
- Sign In Changes: You now need to sign in using the email address associated with your account, combined with your current password. Using your display name and password is no longer supported.
- If you are currently trying to register, are not receiving the validation email, and are using an Outlook, Hotmail or Yahoo domain email address, please change your email address to something other than those (or temporary email providers). These domains are known to have problems delivering emails from the community.
Leaderboard


Popular Content
Showing content with the highest reputation since 08/20/2026 in all areas
-
After 2.5 months its been amazing! The power is right where I want it, with not a crazy difference in fuel milage at partial throttle and its almost better when not in any boost. However, I've had a lot of issues with spark knock and after doing some digging it turns out the cheap Chinese dizzy I got from the part store wasn't sending the proper ECU information about timing.... who would've thought. After replacing the rotor and cap on a spare JY dizzy it seems to have fixed the issue and is hitting proper timing at proper boost. bit of a bummer actually but it seems to be more the cam sensor than the dizzy itself. lesson learned. Would I recommend this swap??? If you can afford the gas and the parts for the swap then absolutely!2 points
-
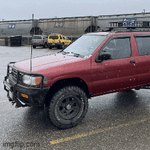
Good day everyone, one morning I was on market place and found a VG33ER forsale for a decent price and for a and was a good few hours drive but I picked it up with no prior intention of swapping my pathfinder. The swap is pretty straightforward along as you have all the parts from an ER to swap. It is also 02 Xterra ECU swapped on the original body and engine harness. The pulley is swapped now as of writing to the 4x4parts 2.4 quick change pulley on the stock SCB cut off. It makes a significantly more amount of power than before and is absolutely worth it if you can afford the premium gas. ALTHOUGH, it seems the MPG has been improved since the swap at least at partial throttle which is pretty cool. It's also running factoy R50 airbox with all original sensors. Here's what was swapped Lower intake Injectors Fuel rails (minor differences) Supercharger Spark plugs Spark plug wires Thermostat 180 to 170 AC tensioner only NOT alternator Belts Crank pulley Water and ps pulley NOT alt ECU and plug Pas side valve cover (only for PCV valve) To swap the ECU most of the pins are in the same locations how ever not all. you WILL have to solder a larger pin on the orange IACV wire and to make the SCB safety work you can reuse and replumb the map/baro switch as the SCB and it works the same. All valves, sensors and anything else are original 97 pathfinder. You will have to run different length belts for all 3 now that the V belt is deleted, the crank and water pump are different size and the super charger belt needs to be a 5 rib and shorter unless you swap the AC comp. Cruise even works too! It drives incredible and I could not be more happy with the result. before the pulley it feels like a more peppy VQ but after the pulley it pulls harder than one for sure. When I dump the clutch I'm always first off the line even to the diesel guys that book it off the light (i'm looking at you Dodge owners) and it seems to run cooler than my friends bone stock X since mine has a hole in the hood and gets good cooling. Thanks. Donor engine in back of my r50 On floor after getting it home repinning the ECU plugs Cleaning Radiator shows up Installing charger and intake *borart voice* VERY NICEEE1 point
-
Not easy. Requires special tools to pull things apart and a press to put things back together.1 point
-
Check out Car-part.com This will search all the yards around you Via distance. also if memory serves, look for an xterra rear differential. they are 33spline as well like the R50s1 point
-
SAS'd on portals! That thing isn't messing around.1 point
-
LOL, Kamchatka is in a galaxy. far, far away. Nice ride for your conditions! I wish mine was a diesel.1 point
-
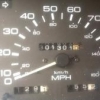
It works, but the backlighting does not work. Occasionally, the lights will illuminate, and I think it's simply a loose ground. The lights are probably original. Last time I looked at them, they're silver in color, and probably ready to give up. OE PN 2754553E00, aren't available in the US and I might be able to import them through Amayama. Has anyone come up with a dimmable replacement LED that could be made to fit? Also... What about the lights on the LCD Clock? Anyone have a replacement for that light?1 point
