- Sign In Changes: You now need to sign in using the email address associated with your account, combined with your current password. Using your display name and password is no longer supported.
- If you are currently trying to register, are not receiving the validation email, and are using an Outlook, Hotmail or Yahoo domain email address, please change your email address to something other than those (or temporary email providers). These domains are known to have problems delivering emails from the community.

02_Pathy
-
Posts
201 -
Joined
-
Last visited
-
Days Won
40


.thumb.JPG.4d076204387ee64eb8e9d177328ba13b.JPG)


Recent Profile Visitors
12,100 profile views


02_Pathy's Achievements
NPORA Fulltime Resident (4/5)
463
Reputation
-

The_Oregonian’s ‘02 Build Thread
02_Pathy replied to The_Oregonian's topic in 96-2004 R50 Pathfinders
If you remove the plastic tray/storage compartment underneath the floor mat in the cargo area, there should be a rubber boot in the floor pan that has the wiring for the trailer hitch wire harness if you have the tow package from the factory. I used that rubber boot to route wires from my backup lights in the rear bumper and into the cab of the vehicle. Then seal it off with some silicone so water doesn't intrude. -
Plus a few more pics because why not Sent from my iPhone using Tapatalk
-
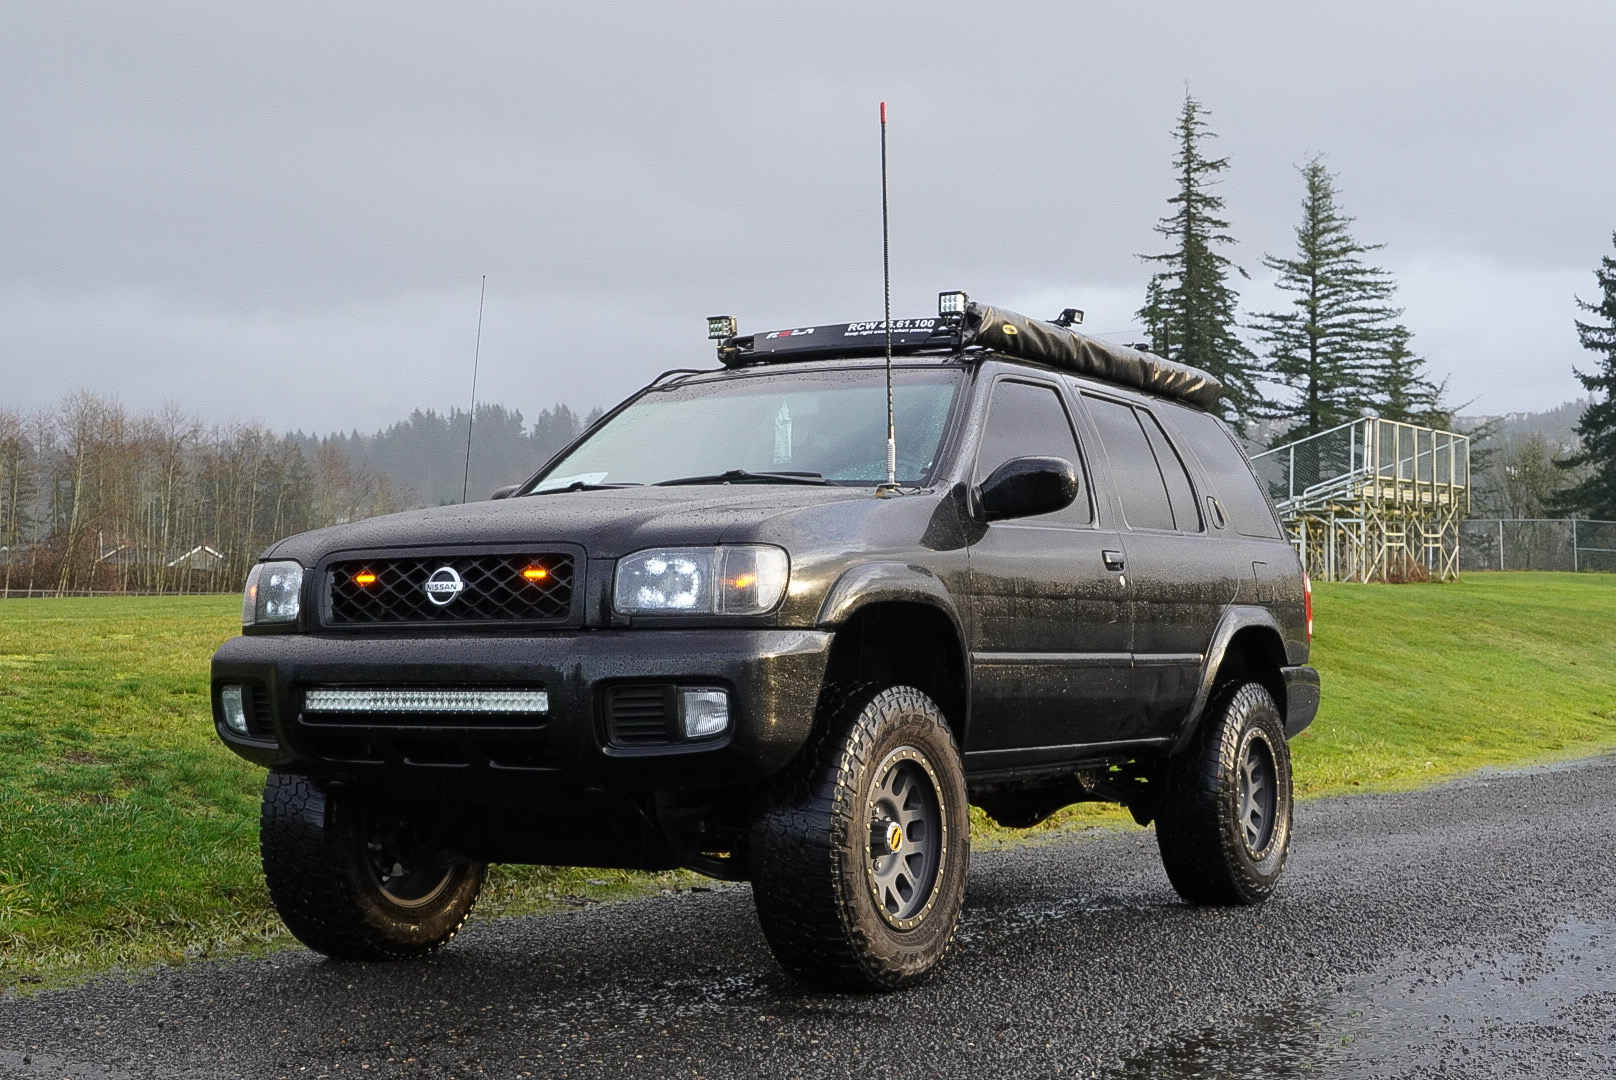
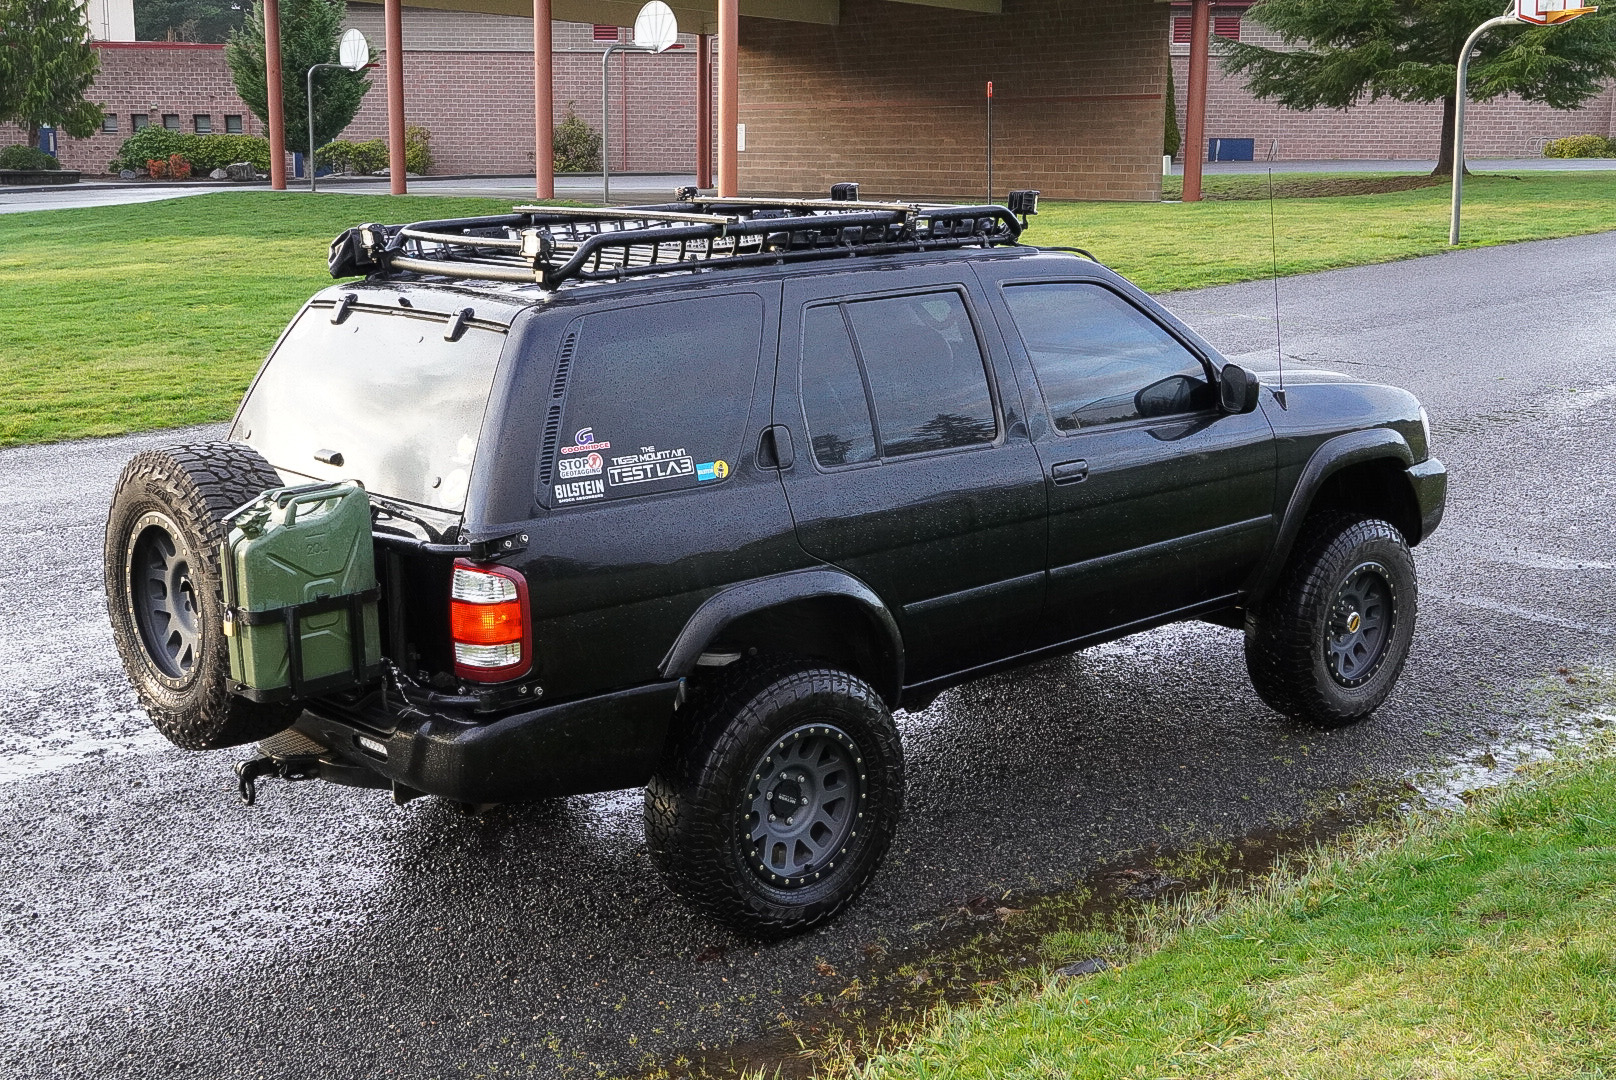
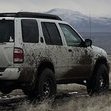
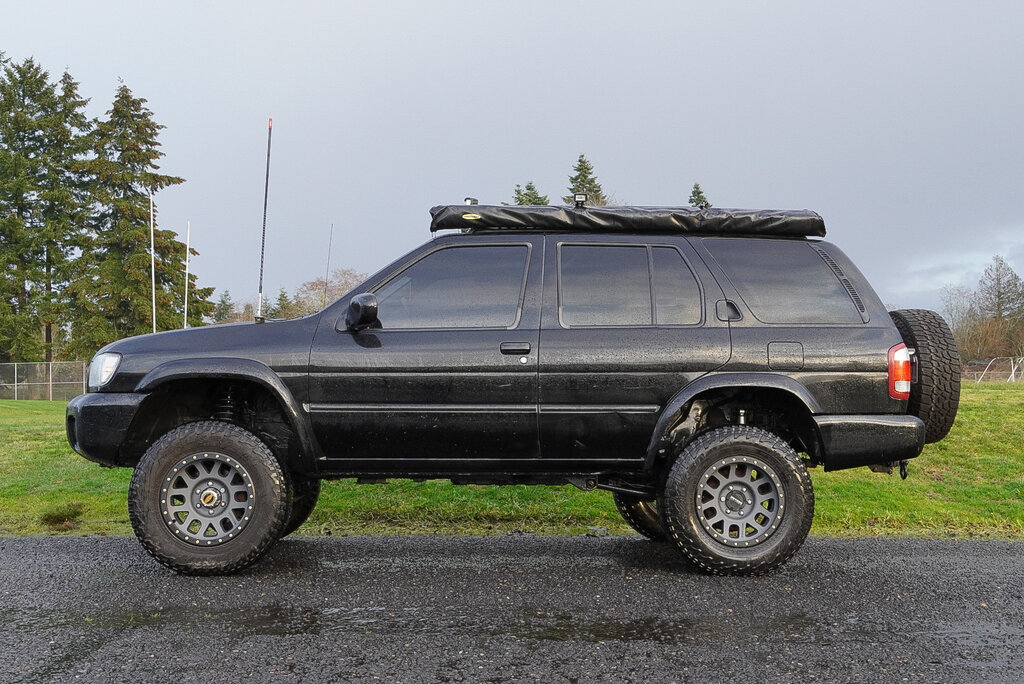
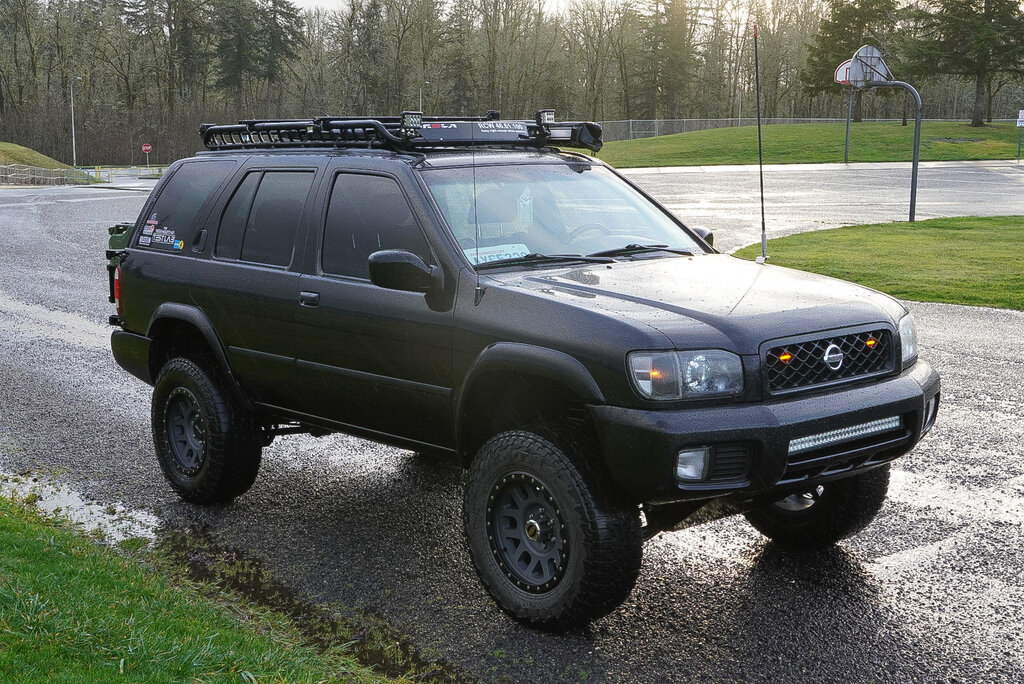
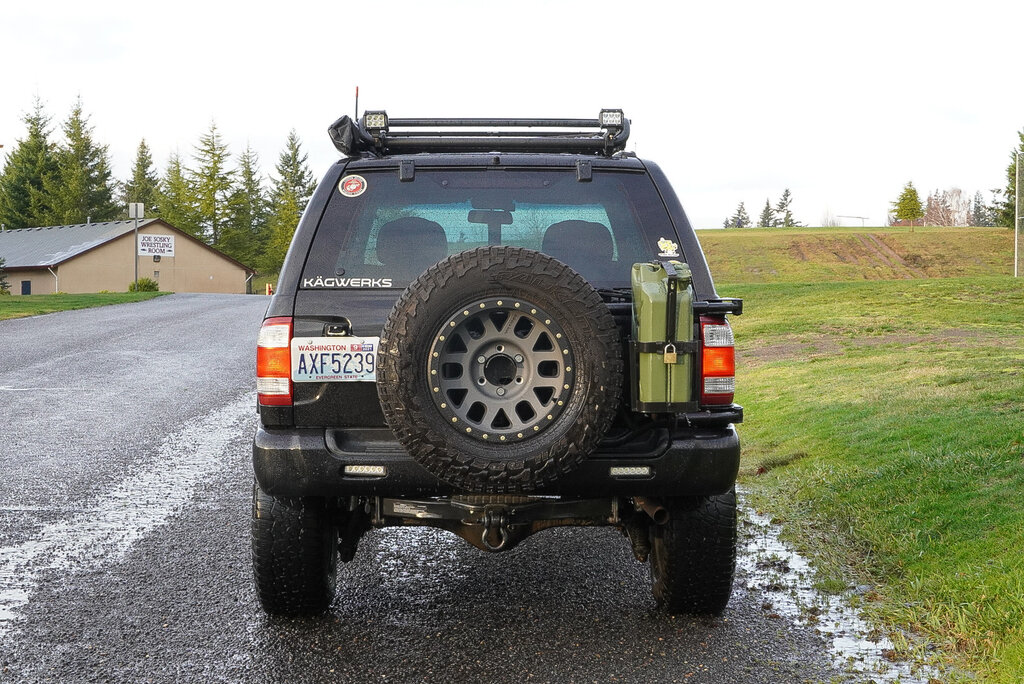
Been quite some time but updated/upgraded the pathfinder since the last time I worked on it. I purchased some Warn Manual hubs for it as well as Method MR309 Grids in titanium gray on sale with 4.75” bs. The hubs went on super easy and I didn’t have to change my stock studs out as they were plenty long, I know people in the past had too but in my case I didn’t. With 265/70r17 tires that are a bit worn down I did still have ample room between the strut and the tire. With the new wheels I took off my wheel spacers so I am currently not running any spacers just solely the wheel. Driving around with the hubs unlocked you can tell a difference that there is less front end drag and that you can coast farther without having to be on the gas all the time. Nice little touches to the pathfinder in my opinion! Sent from my iPhone using Tapatalk
-
New Method wheels and Warn hubs installed Sent from my iPhone using Tapatalk


-
02_Pathy changed their profile photo
-
Sony A6400 Sent from my SM-G960U using Tapatalk
-
The OEM studs in the top hat are pressed in there pretty good, so if you did cut them it would be extremely hard to remove the stud still in the top hat. I would do it right by taking the strut apart, what I did was place the top hat ontop of 3 sockets that were a little larger than the studs and had the stud facing up then just hammered them out. Mine came out pretty easy but experiences might vary due to corrosion and mileage. Also if you had the bolt coming down and the nut on the bottom it would be almost impossible to tighten the nut on the inner side in the fender compared to just having the bolts coming up and tightening the nuts via in the engine bay Sent from my SM-G960U using Tapatalk
-
Star gazing Sent from my SM-G960U using Tapatalk
-
I've used the trakmotive cv joints off rock auto and got about 50k miles before the boots ripped, imo that's pretty good for a remanufactured cv joint and also having the CV's at an angle due to the lift Sent from my SM-G960U using Tapatalk
-
Should probably update this so you guys don't think I'm working on this thing forever lol. After 3 weeks of tedious work I finally got it back together and thankfully no leaks! This is definitely a big job to do nevertheless but totally worth it in my case as I would drip about half a quart of oil after parking... yeah. Also in the meantime while I had the rig apart@TowndawgR50 helped me install the Pines to Spines 4" SFD kit which also made it possible to take my oil pan out and access other parts of the vehicle. More details on that later... Also after this huge project and with addition to the SFD I have replaced and installed: New OEM motor mount Denso Starter 4" stainless steel braided brake lines from Goodridge Extended breathers on front and rear differentials U Joints New O rings in the oil pan as well as the pan gaskets and RMS IVAC gasket Sent from my SM-G960U using Tapatalk
- 97 replies
-
- 10
-

-
This particular photo is with OME HD coils with a 1 inch SF creations spacer on the strut plus the 4 inch strut spacers. After the photo I took the 1 inch spacer out as it did cause my camber to be positive just very slightly even with camber bolts and the camber adjustment on the strut spacer with the Pines to Spines design. After getting it aligned at the shop with the setup OME HD coils and 4 inch strut spacer everything was within spec without the use of camber bolts. I sit currently around 5.5 inches of lift Sent from my SM-G960U using Tapatalk
-
Thanks dude! Sent from my SM-G960U using Tapatalk
-
Pines to Spines Offroad 4" SFD kit is making her turn heads daily now [emoji7] Sent from my SM-G960U using Tapatalk
-
That's a super good idea. I work on Acuras professionally and when we do engines they drop out with the subframe and we use kinda the same trick. We use old subframe bolts, cut the heads off and cut a notch in them so when we are lowering the car onto the subframe we can get it positioned correctly and don't have to mess with trying to lines the holes up. Sent from my SM-G973U using Tapatalk Also for dropping the subframe, if you have spare trailing arm bolts for the pathfinder, they're the same thread pitch for the rear subframe bolts and act as a guide for about 3-3.5 inches down Sent from my SM-G960U using Tapatalk
-
For the most part you really have to take everything out that the manual says to do unfortunately. The only thing that I deviated from the manual was that I just unbolted the alternator and hung it using garden wire to have more room and I didnt even touch the power steering pump. But if you want to drop the whole pan, you have to drop the subframe and hoist the engine so it stays in place just so you have enough room to take it out. I just used the harbor freight 1000lb capacity support bar that sits on the inner fender. Also if you do drop the pan, on reinstallation I bought some thread rod that were the same thread pitch of the pan bolts and threaded them into the block as guide rods to slide the pan back on without smearing the rtv everywhere and making sure the pan goes straight up and seals. Also cut some slots in the threaded rods as well so you can take them out with a flathead if you do go that route Sent from my SM-G960U using Tapatalk
-
I just dropped my transmission and oil pan to replace the oil pan seal and rear main seal. On the rear main seal there is a channel where the rubber upper pan seal goes into where you do goop it with RTV and sandwich it between the oil pan. I removed my whole pan and replaced the front and rear seals as I'm already this far I might as well do it right now then have it leak later down the road. Although you do have to remove quite a bit of things to get the whole pan off. Also if you take the pan off theres 2 o rings inside that you'll need to replace as well. I just ordered the Felpro RMS that comes with a new retainer and the oil pan gasket set that came with the 2 seals for front and rear as well as the o rings. Best of luck with the pathfinder! Sent from my SM-G960U using Tapatalk
- 13 replies
-
- 2
-
-
- rear main seal
- tranny
- (and 4 more)