-
Posts
7,323 -
Joined
-
Last visited
-
Days Won
245
Slartibartfast last won the day on July 16
Slartibartfast had the most liked content!
About Slartibartfast
- Birthday 06/14/1991
Previous Fields
-
Your Pathfinder Info
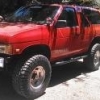
'93, mostly stock. Trying to get it reliable.
-
Mechanical Skill Level
Wrench And Socket Set Mechanic
-
Your Age
30-35
-
What do you consider yourself?
Rarely Go Off-Road
-
Model
SE
-
Year
1993
Profile Information
-
Gender
Male
-
Location
Eastern Washington
-
Country
United States
Recent Profile Visitors
Slartibartfast's Achievements

NPORA Old-Timer (5/5)
1.7k
Reputation
-

R50 Transmission, what else?
Slartibartfast replied to jjmwilkinson's topic in 96-2004 R50 Pathfinders
What in the AI spam hell?- 13 replies
-
- rear main seal
- tranny
-
(and 4 more)
Tagged with:
-
Sounds like you've got plenty to keep you busy! Where are you seeing that P1140 means water in the fuel? I've never heard of a moisture sensor in a gasoline fuel system. Sounds more like both cam sensors (or their wiring) are out. Try shooting some silicone spray in the rear lock, and work it around. Crap gets in there and they get cranky. Wiggle it, flush it, wiggle it some more. Might get lucky. Or take the inside trim off and see if it's actually the lock that's bound up. My door locks worked a whole lot better after I lubed the linkage they're connected to.
-
I would keep your old transfer unless you know there's something wrong with it. The later transfer will work if needed, but you may need to swap the lockout plate and shift linkage to make it work right. There's a difference in chain design between early/late transfers, but I have not seen evidence that one is actually stronger than the other.
-
The ECU does not have a kill function, and the alarm only kills power to the starter, so if it's cranking, it's not that. I have run codes on mine with the engine running and never had an issue, so I doubt it's the position of the pot that's got it upset. IIRC there's just a slot cut in the end of the pot's shaft. So if that's snapped, then there's a chunk of metal knocking around inside the computer, which is not a good thing. If the other side is still there, and you can turn it with pliers, it may be good enough to work with, once you get the loose chunk out of there. If not, you may be able to track down a replacement for the pot itself by dimensions and resistance and solder it in. It may even be marked. Given the symptoms in your other thread, it sounds like you've got no/inadequate fuel pressure. Get that chunk of metal out of the computer before it shorts something, then chase the fuel system. Hopefully the new relay does it. If not, I would unplug the pump and put power to it directly (lawnmower battery or something), and see if that gets it running. If it does, chase the wiring. If it doesn't, chase the pump.
-

TBI Issues, please help!!!
Slartibartfast replied to Josh_Path2346's topic in 86.5-89 WD21 Pathfinders
Good, sounds like you know what you're working with. Too bad the computer has no idea what's up, but yeah, that's pretty typical for old EFI. There are a few designs on Youtube for homemade smoke machines. The cheapest I've seen was a hand-operated transfer pump with a gas station cigar stuck in the intake. The ones I've been looking at have a can or a jar with baby oil, a soldering iron, and a low-pressure air feed, which AFAIK is pretty close to how the proper ones work. Without a smoke machine, you can hold a length of hose to your ear and poke the other end around the running engine, and maybe home on the noise that way. You can also shoot carb cleaner at where you think the leak is and see if the idle picks up from the engine sucking in fuel, but I've never had much luck with that method. -

TBI Issues, please help!!!
Slartibartfast replied to Josh_Path2346's topic in 86.5-89 WD21 Pathfinders
I haven't worked with the TBI, but I've read that they tend to run poorly when the air cleaner is off. I guess it smooths airflow over the MAF or something. Wouldn't explain the RPM dropping at the car wash, but if you're testing it with the air cleaner off, throw it on and see if it clears up any. Idling low at the car wash makes me suspect something got wet. If it was shaky, I'd be looking at ignition components (wires/cap/rotor). Otherwise, could be electrical. IMO your best bet at this point would be hooking it up to a smoke machine. That should find your vacuum leak pretty quick. Could be a rolled O ring, throttle shaft seals (the instructions you linked say not to dunk those in cleaner, not sure why not), something along those lines. I would also check that the brake booster, PCV, and EGR (if that's still around) are in good shape, in case it's not the throttle body that's acting up. I don't have a source for the '88 service manual, but on the off chance you haven't found it already, here's the '89. EF&EC section might help you track it down, or at least understand how the system is supposed to work, which might point you in the right direction. '87 had a different code table and some other weirdness, so if yours is closer to '87 than '89, and the codes you pull don't make sense (44 was "no malfunction" on the '87 ECU, replaced by 55 on later years), let me know and I'll dig out my paper copy of the '87. -
Looks like around '97-'03 for the Fronty, '99-'04 for the X. If it's got the 3.3, that's the one you're after. If it's got the supercharged 3.3, that one's supposed to be built a little tougher, but IIRC the torque converter and flexplate are different from the non-super'd ones, so make sure you get those with it. Again, it may be possible to make the 2WD variant work, but I'd expect it to turn into a bit of a science project.
-
Maybe? I imagine you'd have to open up both transmissions and swap over the output shaft, but I haven't had either unit apart myself. The usual replacement is a first-gen Xterra or Frontier trans. The design was revised a little and is supposed to be better/stronger than the original WD21 trans. No idea how either version compares to the 300ZX trans.
-

97 r50 no start security system
Slartibartfast replied to hunter1919's topic in 96-2004 R50 Pathfinders
If it's like the switch in my WD21, the hood switch is open (wires not joined) when the hood is shut, closed (wires joined) when open. I wired mine to an under-hood light when I deleted the alarm. -

97 r50 no start security system
Slartibartfast replied to hunter1919's topic in 96-2004 R50 Pathfinders
For the door, this thread or this one might help you get it open. Looks like it might just need a little lube in the right spot. Get that sorted out, make sure the locks work, then see if the alarm's still upset. Might just be confused if it thinks the door's half closed or something, though I wouldn't expect that to explain the no-start. Unfortunately I don't think the security system on the R50s is removable. Built into the smart entry whatsit IIRC. -
Well that ain't good. I don't know which computers will work, sorry.
-
Psych ward
-

Time to SAS Hawairish's truck
Slartibartfast replied to hawairish's topic in Solid Axle Swaps, Hardcore Custom Fab
Figures it can't be that easy! Have you looked at universal/hot rod/racecar parts? I see Summit and Speedway (and I assume others) let you search for radiators by dimensions and inlet/outlet placement. I imagine most of their "universal" options are based on stock rads that you've already ruled out, and a lot of what I'm seeing there is stupid expensive, but they might give you a lead if nothing else. The custom shroud may be the way to go. This guy made a pretty decent-looking fiberglass fan shroud from a T-shirt stretched over some plywood, and the e-fan shrouds I've seen look like they'd be pretty simple to fab from sheet metal. -

Time to SAS Hawairish's truck
Slartibartfast replied to hawairish's topic in Solid Axle Swaps, Hardcore Custom Fab
Looks hell for stout! If you don't find a better candidate than the CTSV rad, something like this (rad neck that splices into the upper hose) would let you run it without the expansion tank. -
While you're replacing the MAF, have a good look at the rubber tube connecting it to the throttle body. If that cracks, the engine gets air that the MAF doesn't know about.


.thumb.jpg.3b55d9a307419d052e117782307fc17d.jpg)
