- Sign In Changes: You now need to sign in using the email address associated with your account, combined with your current password. Using your display name and password is no longer supported.
- If you are currently trying to register, are not receiving the validation email, and are using an Outlook, Hotmail or Yahoo domain email address, please change your email address to something other than those (or temporary email providers). These domains are known to have problems delivering emails from the community.
Leaderboard


.thumb.jpg.3351162271e2c1bf86fe7c0c7e657df0.jpg)
Popular Content
Showing content with the highest reputation on 03/26/2019 in Posts
-
My favorite picture from 2018. Sent from my iPhone using Tapatalk6 points
-
new stereo for my r50 ???????3 points
-
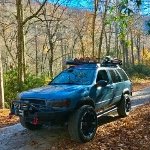
Making it's way thru the SW Sent from my SM-G960U using Tapatalk3 points
-
There is nothing subtle about my noise. It could be exagerated due to the fact that I have no carpet, rear seats or any sound deadening mechanisms at all any more but when it starts it is loud as hell right out of nowhere. But I think I may have found it now. I pulled both axles completly out and low and behold the passenger side inner wheel bearing seal was not sealing any more. The area between the inner and outer bearing seal was filled with metally oil, and there were some small metal chunks trapped in there too. There was no grease left on the wheel bearing, just oil and little blobs of metal powder sludge. I'm guessing the inner seal failed a while ago, allowing oil to reach the old grease and wash it away? Possibly it even failed when I did the locker install originally. The grease left on the drivers side is definitely done, it's black and it smells burnt BUT it is still all there, and there is no metal in it from what I can see right now. Holy @!*% I hope this is finally it. Gonna order new seals and bearings tomorrow.2 points
-
Sweet pics! Sent from my SM-S737TL using Tapatalk2 points
-
Day 4 of our roadtrip, visited Arches National Park Sent from my SM-G960U using Tapatalk2 points
-
After years of chatting about our own Pathfinder projects—and often, grumblings about having to make our own parts or hack together something—it’s become clear that Jacob (@TowndawgR50) and I (Patrick) have a common passion for our trucks. We’re always bouncing ideas around and sanity-checking each other’s work, ultimately realizing we have highly complementary skill sets that extend beyond working on trucks. We’ve also grown tired of a serious lack of aftermarket support for our trucks, especially when there’s an obvious demand to keep them on the road and make them more capable than they already are. To counter that, we’re teaming up to fill that void. That’s right: it’s time to turn a hobby into a business! In the weeks to come, we will be making more announcements regarding the status of the company (still working on the name!) and our product offerings. We’re still in the early stages of the company formation, and have some challenges ahead of us (most notably the 1,400 miles that separate us!), but we’re ready and stoked to get the word out there. If any of our individual projects have piqued your interest, then our collaborative efforts won’t disappoint. Our initial focus will be on subframe drop (SFD) kits, as this is the most important component required to move beyond 2” of front suspension lift. Unlike prior versions of kits that have existed, we intend to offer complete kits and à la carte components in multiple heights—including strut spacers—to support various lift configurations. Our particular focus is to provide high-quality finished products that simplify installation for the average DIYer (hint: strut disassembly not required), and without having to replace aftermarket components you’ve already purchased. While we won’t go into detail about all the products (and services) we’ve been discussing, we will tease that trailing arms and panhard bars (both in static lengths with poly bushings, and adjustable lengths with rebuildable joints), skid plates, missing link, and bumper brackets are on the product roadmap. That said, we’re looking forward to a productive 2019, so stay tuned!1 point
-
Hello, My name is Johann and here is what I've been up to lately (SAS). I've been collecting parts for the swap for close to two years now. Mostly waiting on good deals on parts and tools. Recently I was gifted a motor picker, and that was one of the last tools I needed to start the swap. So about 4 days ago, it began. A few months ago I bought a 97 pathfinder for 300$US. It had shot wheel bearings up front, and as expected, very worn down suspension components up front. The ad had no pictures so I had no idea what i was going to go look at... As soon as I saw that is had a steel bumper, I knew I was buying it. Its a manual, and runs fine, other than suspension issues up front, which made it the perfect candidate for the SAS I've wanted to do for years. So soon after i acquired a hilux snorkel for free and mounted it to the r50 A few days ago I moved the big pathy (my green one) out of the shed, laid down some wood, and backed up the white one to be stripped down. It took about 5 hours, but I got the car way up on jacks (the jacks are welded to the rims and tires are flat) and removed the entire subframe. That subframe is WAY heavier than I thought! So the subframe is what holds the motor up, so to remove the subframe, I put a thick strap around the motor, and a jack under it (to hold it in place). Next I got the motor mounts I made and temporarily installed them to make sure they fit. I then decided that the frame was going to get reinforced anywhere that something was getting added. so I added a piece of steel behind it. These motor mounts were then welded in. I then did the same exact thing on the other side Once they were welded in, the motor was now being held up with no subframe! This was the hardest part so far because there was barely any space under the car with the jack in the way. Now with the jack out from under the car and with more space, I started cutting and removing all the old steering stuff. everything from the firewall up was removed. there are two little brackets holding the original steering bend box (90*, not sure the specific name for it). I cut those out with a reciprocating saw. once all the old was out of the way, I ground the "frame" down to raw metal (where the new jeep steering box would go) when I went to mom up the steering box, it wouldn't fit because the wheel well was blocking the back end from sitting on the rail, so I eyeballed it and cut a slot into the well to allow the box to sit. Once up, I mocked up some steel reinforcement plates to the frame, drilled them & the frame, and temporarily bolted up the box to make sure everything fit. Tomorrow the box will come back out so I can trim the reinforcement plates up to size better. Once they are trimmed up, the box will be mounted, plates tacked in, box removed and the rest of the plate will be welded in. I started tinkering with the shaft connecting the wheel to the steering box and am debating on how I am going to splice them together. Probably will cut to length, weld, sleeve, then weld the sleeve to both ends. Any better ideas? the left one is the jeep one, the right is the stock one. I need to connect the top piece from the left one (goes onto the steering box) with the bottom of the right one (goes into end of steering on r50)1 point
-
Hey all, been a while... hope you have been good. I'm that jerk that nags my wife to check oil/water/tire pressure/spare before a trip (just a weekend can be 600+ miles). She hates that I don't just do it for her, but she has to know how and why as well, so tough schitt. Well, she managed to avoid it a few times, but just before ThanksGiving last year, I made her do the rounds, and guess what? Yep, that is what the 14 year old tire looked like. Granted it is a micro-emergency tire, but it has never been used in the 10+ years we have had the vehicle... it just sat in it's space saving well and rotted. Imagine being stuck somewhere only to find that this is what your spare looks like! Needless to say she went from "Why do I have to do this?" to "OMG what if I needed it?" real quick. The real point is that you won't find these tires at any tire shop, it is only at the stealership, and they probably don't have it in stock... I know, I called 1/2 a dozen. In this case, the oddball size was made by Continental (in Germany) and they would mount/balance/tax me for about $165. o_O So the wife now has a new full sized steel wheel ($60), a used tire from a local shop ($50) held down with some HF tie downs ($5)... $115 for the math challenged. This way she could just keep driving, across the state if need be, and not be limited to 50 miles/50mph with the factory sized crap. I yoinked the plastic holder thingie from the well, and that area is now hidden storage for everything from jack to water to change of clothes/shoes to emergency gear. The fulll sized spare takes up a little room, but it is worth it. (when will manufacturers stop this stupid schitt? Put a full sized spare tire in/on/under the car, anything else is a travesty.) Anywho... check your spares... well. B1 point
-
Yeah that reminds me that I need to keep an eye out for a good full sized factory wheel with a good tire for the car. It's. Gen2 which which got narrow temps for a spare, unlike the Gen1's which came with a matching full sized wheel & tire. The good thing is that they left the well the same size throughout both generations.1 point
-
I got the coil springs in hours ago, but ran into trouble with the upper fitting of the brake line. Gave it some time to soak in WD40, but long story short, I snapped the tiny rubber/plastic hose. So, I have the aftermarket brake lines screwed in at the axle and the frame mount, but the hose is broken right after the frame mount. I guess I’ll figure out how to fix that tomorrow, as well as bleed the brakes. I was tempted to put several layers of heat shrink over the hose at the break, but I’m not sure that’s a great idea. Too bad too, cause that’s a tight spot to access. At least the brake line is noticeably longer1 point
-
Replace my carpet with actual OEM carpet matching my color from OEM surplus. Was $168 for first and second row carpet set including shipping. Fit perfectly! http://www.oem-surplus.com/nwp/pathfinder-5.htm1 point
-
The OEM ones are just as weak as the aftermarket ones.1 point
-
Hoping it'll be ok. The lower perch metal is thicker than the upper perch metal, and the bumpstop has that steel plate to distribute load across the upper perch, too. With rust up top on the perch, and reduced contact area, could become a problem eventually.1 point
-
No not yet but there was 1 time where we were close to using them Sent from my SM-G960U using Tapatalk1 point
-
Those aftermarket ones just aren’t as beefy as the oem ones. Poly bushings are definitely the way to go! And if you’re worried about squeak you can always drill and put in your own zerks1 point
-
Oh baby, that’s muddy. I’ve almost always been there in the dry & have even turned tail & ran to AZ, NV or CA if it’s wet, so it’s interesting to see all that mud. Have you needed the recovery boards yet?1 point
-
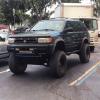
I found some used tires that were so cheap I couldn't say no, even though they weren't the size I was looking for. 40x15.5x20 Nitto trail grabbers. Something is probably going to break, but that's ok. Gives me a reason to fix it and make it better the next time around. Now I'm on the lookout for some rims.1 point
-
heres my extended bump stop, anchored to the lower perch using a 4.5” bolt and a nut on the underside. 4” would’ve been better but oh well. Bumpstops are now about 2” longer1 point
-
By all means go for it. It would be good to know that it is an option!1 point
-
My 93 is my Jezebel, so that is her name. Jezzi for short.
.JPG.29bc49fb6baed1423f6e4ef07a60865f.JPG) 1 point
1 point -
Man, you take a lot of pride in you R50's bro. This one and the Q are super clean! I'm guessing this one obviously has been repainted. Looks great! Sent from my SM-J327P using Tapatalk1 point
-
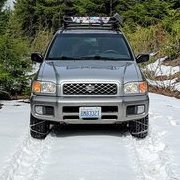
Trip Report - Quilcene Went on a quick little spring exploration mission. Didn't have high hopes of any elevation since we had a pretty heavy snowfall recently so I planned some lowland stuff. Ended up being much drier than I anticipated so I made a run for an old firewatch location out near Quilcene. Towards the top I had to cable-up to get through some deeper snow in the shadows, but honestly it wasn't anything too nasty. Minimal to no snow (other than ~6-12" in shadows) all the way to the top at about 3200' of elevation. Overall I found a couple decent campsites, cruised some easy backroads, and checked some gates/dead-ends off my list so I know not to waste my time in the future! I use GaiaGPS to plan and track all my trips. I'm definitely getting my rhythm down. Work gloves with latex gloves inside help keep my hands happy while chaining. A pad to kneel on helps a lot as well.1 point
-
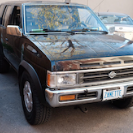
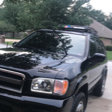
My 96 SE. From rags to riches. Sent from my SM-S737TL using Tapatalk1 point
-
A little deep woods off bug spray will clean headlights right up. Just make sure it has deet in it1 point
-
i also have a leak. on my 01. just didnt have the time and place to fix it. but i do believe its not the rear main seal is leaking. it could be the rear oil pan seal which is a rubber. it dries out over time and cracks. how i figured it is if its parks while the front is towards the downhill it doesnt leak. regardless of angle it should leak if its a rear main seal. just a thought1 point
-
The kits are still being tested and refined but as of right now they include all stainless fasteners, rivnuts and the stiffener plate for the body mounted latch components to retrofit a Pathfinder that did not come with a swing gate with a used JY unit. There is the optional license plate relocation bracket for those that want it as well. This setup has not been tested on pre-face lifted Pathfinders or any QX4. You'll need to source a used swing gate and latch components from a JY or part out vehicle. Also, you'll need to rent or purchase a rivnut gun to install the threaded inserts. Given the total cost, when compared to a swing gate for a 4runner or universal unit from Smittybilt, JY swing gates are a great alternative.1 point
-
Hasn't been touched since unfortunately. Between doing my thesis, BioChemistry, Physics and my Biology classes, I have no time to spare. Hopefully after graduation this May i'll have a decent break to finish the rear. On the bright side, I just bought a new welder to help with this project, so that ought to make it go by a little faster than the front end.1 point
-
Bells Knob October 20181 point
-
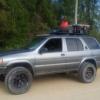
I just painted black my rims and did the conversion to leds of my instrumental cluster1 point
-
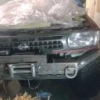
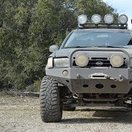
Finally finished welding up my low profile winch bumper last week! Sent from my SM-A520W using Tapatalk1 point
-
What size tires?1 point
-
1 point
-
1 point
-
1 point
-
That's crazy. How much pressure was in that thing? I can't tell if the outside shrunk or the inside bulged. Either way, good thing she found it when she didn't need it. I guess that's another point in favor of external tire carriers! Tough to miss a problem with your spare when it's right out in the open. (I say that... I remember taking the cover off the original spare on my '95 and finding the original spare inside, never used but with deep cracks in it.) I had a look at the spare in my dad's Audi a while ago, just to check it, and found that it was dead flat. Imagine my surprise when I aired it up and the damn thing unfolded. Some rocket surgeon designed a collapsible full-size tire to fit in a space-saver tire well instead of just making the tire well a little bigger. At least they included a spare at all, apparently a lot of cars don't.0 points