- Sign In Changes: You now need to sign in using the email address associated with your account, combined with your current password. Using your display name and password is no longer supported.
- If you are currently trying to register, are not receiving the validation email, and are using an Outlook, Hotmail or Yahoo domain email address, please change your email address to something other than those (or temporary email providers). These domains are known to have problems delivering emails from the community.
Leaderboard



Popular Content
Showing content with the highest reputation on 03/20/2019 in all areas
-
I was lucky enough to get in on the swinggate fest nw edition at@Towndawgr50 ’s compound a few weeks ago. Here has been my review on it thus far. While these are not common in any 2003 pathfinders I found that the installation was very straight forward. Like any swing gate they will make some sort of sound going over large bumps but I can assure you this thing is solidly mounted. You will want some heavy duty springs due to the fact that the factory tire carrier is pretty beefy. This is definitely not a one person job. I did have a jerry mount welded onto the carrier as well as a custom plate mount. This is a pretty cheap mod considering what the Toyota guys pay for a swing gate. With the kit that Pines to Spines will be producing I am sure it will make this a very common addition to the post face lift r50’s. Sent from my iPhone using Tapatalk6 points
-
I’ve been present for the installs so far and have witnessed the little tweaks made as@TowndawgR50 goes along. He then applied those finesse adjustments to the first rendition. I’m next up and excited but not anxious at all having watched how nice it all comes together.@TowndawgR50 &@hawairish really are committed to quality work.4 points
-
Torque alone (even with thread locker) is insufficient for that application, especially with the incorrect fastener arrangement you've got. You've put a standard nut over a hole without a lock and flat washer; you have no locking method and have significantly reduced contact area on a fastener that demands it. Expect subframe shift, the edges of the nuts wallowing out the spacer holes, and a loose contact area over time. Proper—and properly installed—hardware is cheap insurance for safety. I'd be worried about it.3 points
-
I painted the tow hooks on the front blue. I removed all of the rust (which took 2 days) and then I primed and painted them royal blue. Sent from my iPhone using Tapatalk3 points
-
Kudos for giving it a go. However, it looks like you're using standard hex nuts without lock washers and flat washers, except on the head-side of the bolt. The nut will likely loosen in that scenario, causing potential for the bolt to fall out because of its upward orientation. Looks like you're also missing a washer on the front spacer. You won't be able to fix the bolt orientation without completely loosening the spacers from the chassis, but you can address the other hardware issue without much effort. Bad: bolt - lock washer - flat washer - <steel> - nut Better: bolt - flat washer - <steel> - flat washer - lock washer - thread locker - nut Even the "better" is bare minimum for this application. I don't even recommend standard nuts here. This is a high-torque (>110 ft lbs) application; your entire suspension, steering, and front axle are tied to this and will be twisting this every time you drive. Play it safe.3 points
-
This is my 2.5” SFD, I think it was a success!3 points
-
Going deep Sent from my iPhone using Tapatalk2 points
-
Just keep in mind the extra height of the spacers subjects everything to side load stresses that the stock configuration is not subjected to, so the hardware for the sub frame spacers needs to be stronger than stock in my opinion. These are minor and easily fixed details though, it looks great! I like your steering shaft solution, simple yet effective!2 points
-
I want all these things! You guys are gonna bankrupt me2 points
-
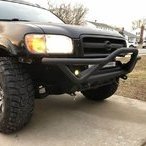
Making a winch bumper. Sent from my SAMSUNG-SM-N920A using Tapatalk2 points
-
2 points
-
If U do the lift right way. U should have any issues. Only challenge you gonna run into is the normal wear and tear which is ok depends on how you used your rig. Ive been lifted almost 3 yrs and months after i got my rig. Ive run into repairs and such because the truck has been use as built and intended to. But i was ok with it. Ive done most of my repairs and work. Check my build thread timeline. You will see how much time spent my truck being used off road.2 points
-
Thank you for your patience everyone! We're excited to make a few important announcements... First, our company name: Pines to Spines Off Road. Affectionately "PSO" in our regular discussions, the name refers to the regions we call home and the challenges in between that inspire us to design and build our rigs to tackle all terrains. Our primary goal is to provide a comprehensive line of products that focuses on design, function, and quality. Since our product line will come from two locations depending on our fabrication processes, we also couldn't proceed without proper facility names: the "Tiger Mountain Test Lab" in WA, and the "Spines Fab Lab" in AZ. By both combining and splitting the production, we're able to make solid use of our respective areas of expertise and assets. Second, our SFD components. Let's step backwards for a moment, though: we know there are "kits" (pieces?) out there. Everything we've seen is based on antiquated prints that have been floating around the internet for years, with very basic designs, zero improvement, limited tooling access, and little assurance that the alignment issues are addressed. The design got folks down the road, but many have experienced problems with fabrication quality or alignment issues. The original kits were also intended for a specific outcome (either 4" to 6" of lift), and potentially required removal of prior upgrades; even that company got out of the game for some reason. Fast-forward to now, and we're addressing all those points. Our SFD solution is modular and bolt-on, backed by CAD and CNC equipment to produce consistent and efficient results. Our SFD "kit" is actually multiple kits, including a non-SFD lift option! We'll be offering 1.75", 3", and 4" strut spacers, all of which feature camber adjustment, and pairing those with 3" and 4" SFD kits. This allows us to cater to practically any desired setup! The 1.75" base spacer can be used without a subframe drop, or combined with OME or AC springs and 3" SFD to produce something more moderate. The base spacer is also the heart of our 3" and 4" strut spacers, so upgrading later is easy. None of the spacers require strut disassembly, and because they are two-piece spacers, installation is as simple as attaching one part to the strut, the other part to the chassis, and then bringing the two together. All materials meet or exceed OE specs with grade 10.9 metric hardware, 1/4" plate for the strut components and subframe risers with 3/16" plate for the motor mounts. Shown above are the unfinished prototype 3" and 4" motor mount spacers, the 4" strut spacer demonstrating full camber offset, and the upper mounting plate for use as a 1.75" spacers. These are fresh from the plasma table and press break processes this past weekend with a quick mock-up to validate core assembly so they have not been welded yet. We are still prototyping, using our personal rigs and a 3rd vehicle--an 03 Pathfinder LE (a.k.a., The Gambler) that @ferrariowner123 graciously sent our way! This rig will be fitted with all of our gear and serve as demo vehicle and eventually participate in the Washington State Gambler 500! Soon after, we'll be working with several local NPORA members (our "Piners & Spiners" Team) to personally install the first batch, among other things we've already been field testing. We are very grateful to these folks for the support and a chance to provide real-world feedback to further improve our products. We have also been eagerly developing other products we hope to offer in the near future: · static and adjustable rear control arms and panhard bars · polyurethane motor mounts · swing-gate installation kits · roof-rail mounting system for roof baskets, lighting, storage, etc. We are excited for the coming months as things roll out and our products get put to the test. Going forward we ask that all posts to this thread stay on topic with questions and comments pertaining only to our offered products and services. Stay tuned for up to date progress and product release dates!2 points
-
Thanx all. MTG1 point
-
I stressed about the steering link for a long time, but it ended up being one of the easiest parts of the whole process. I just didn’t have money for the Woodward steering link, but I didn’t think mine turned out too bad at all.1 point
-
Looks great! I was jealous of all of you who got together. Mine is sitting in the garage until I have the time (and courage) to try to get it installed this summer. Spare in the cargo is no good... Sent from my iPhone using Tapatalk1 point
-
That modular strut spacer system made my jaw drop. Really impressive looking. Very looking forward to things to come.1 point
-
Damn that is really nice!!!1 point
-
Hey you describe the previous owner perfectly, do you know him?1 point
-
My link is from the guy selling them on here. I'm sure I could jack my truck up with it. It is a fairly thick gauge box steel member. Maybe using the squashed sheet metal pole for a missing link would be a little safer, but I wouldn't count my life on it if it really concerns you. All in all, R50 Pathfinders had pretty poor frontal collision crash ratings anyway. They crumpled at the door pillar and the front passenger compartment partially collapsed while transmitting significant loads to the occupants. Sent from my SM-N950U using Tapatalk1 point
-
I don't think there is any way to be convinced that would happen without an engineering review if it concerns you. Just looking at it, by the time the engine block contacted the link hard enough to shear it I think the block would be greatly intruding into the footwell and firewall. Basically the engine depends on the strength of the firewall and floor panel to push it down and underneath. Now you've got a bar with connectors much stronger than sheet metal pinning it back up, and I think it will wedge between the two right into the passenger compartment. Sent from my SM-N950U using Tapatalk1 point
-
I'm thinking electric! I'm spending $80 to $90 a week on fuel! That would pay a note on a small electric car, leaf maybe! James1 point
-
And driver side... Went much smoother and almost in 1 continuous cut so I think it came out a smidge better I'm going to use some 3m body tape to keep the liner taut, as I get a tiny sub still right at the edge That's some decent approach! Ended up a little anticlimactic in the looks dept. Looks clean and I doubt will catch anyone's eye. Not sure if pathfinders have the same issue, but there will always be the little rub on the rear bottom of the fender corner. Is to me the real restriction of 32s on a pre-refresh QX4 with only 2 inches of lift.1 point
-
Its going down! I took the tape to it and gave myself some options of least to most drastic, and slept it. I went least aggressive and I'll see how I think about crazier angles later. Here's the photo dump of the first side completed I'll post more when the other side is complete1 point
-
I mentioned this in another thread but figured I’d share a teaser of what I’m working on next. It’s either going to be awesome, or an epic fail...lol! With the addition of the tube bumper, and plans for a winch in the near future, I need to finally upgrade from the stock springs up front. I considered ordering the OME HD’s, but I like to be different and decided to experiment a bit. I’ve been doing a lot of research on sites that supply parts for race car builders and have a lot of components for building custom suspension set ups. I settled on these springs And the plan is to pare them with this adjustable spacer on the bottom strut perch. Since the stock springs are wider at the bottom than the top, and the aftermarket springs aren’t, I went with springs that should fit the top strut mount and the adapter should take care of the problem of being a bit too small for the bottom mount. I’m going to keep the 2 inch strut spacers I already have, so my plan is to use this combo more for increased load capacity and not necessarily set it up for much more lift. But, if my calculations are correct, than this spring and adjustable spacer combo should able to provide up to 2.5-3 inches of lift without spacers. I’ll update this when I get time to actually dig into it. Sent from my iPhone using Tapatalk1 point
-
January 2017 Prairie SVRA1 point
-
January 2017 Prairie SVRA1 point
-
How are you finding the ride quality of the 9449 when unloaded in comparison to the OME?1 point
-
Suspension update: After having the LR 9449's on with my old shocks I found out that they were too short now. So I went ahead and bought some Bilstein 33-185569 5125's and man what a difference. I got so much more travel now and can actually flex and tuck a wheel now. Before the shock would pick up my wheel but now the wheel stays in contact with the ground. Sent from my SM-G960U using Tapatalk1 point
-
Poor boys rear tire carrier. Just mocked up t this point. Going to need to do a little work to get it better stabilized. Gonna figure out a way to mount my jerry can holder on it too. A project for another day! Sent from my SAMSUNG-SM-G930A using Tapatalk1 point