Terranovation
-
Posts
903 -
Joined
-
Last visited
-
Days Won
10
Content Type
Profiles
Forums
Calendar
Everything posted by Terranovation
-

UNP Spotting, South of Denver, Colorado. HELP IDENTIFY
Terranovation replied to CO_pathfinder's topic in General Forums
I just read it like the liquid metal man. "Unidentified. Nissan. Pathfinder. Have you seen this boy?" -
Yeah I had the inclinometer but I removed the display and everything because I wanted to fit a gps into the plastic surround. Those wires for the lights I tucked down through one of the mounting holes. I'm thinking that the connector might be for footwell lights, as I don't have any.
-
UNP Spotting, South of Denver, Colorado. HELP IDENTIFY
Terranovation replied to CO_pathfinder's topic in General Forums
You sound like the liquid metal Terminator from Terminator 2 -
I'm in Australia, we say things differently here mate
-
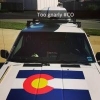
I just had a brain wave, get an old plastic drink bottle and paint it so it matches the rear tyre carrier, zip tie it onto the tyre carrier down at the base. Now you have the flag pole holder so the flag won't slide down and fall off. Put another couple of zip ties around the actual flag pole. Be aware that flags get destroyed pretty quickly by driving. My buddy had one one his and it was all in tatters after freeway driving and I don't think the cops like it either.
-
There is already a globe connected to the glove box housing, I put an led globe in there just for the hell of it and it's like day time in there. As for the other connector I found taped up I don't really remember what color the wires were. I think they were brown but I'll have to have another look when I get time.
-
Much to learn young padawan
-
So I had the glove box off and removed the metal panel behind the glove box. Just up above the air box relay there's a brown connector taped up out of the way. Is this for a floor light or something similar? I haven't tried plugging any globes into it for fear of shorting out fuses.
-
Position it on the rear tyre carrier. Couple of zap straps around the flag pole and rear bar should hold it.
-
Thanks yeah I already watched that video, the only problem is he kept skipping the parts where he unbolts things. In the video its like they just magically come out and then magically go back in.
-
Drip, drip, drip. Oh where's that green stuff coming from? This had me baffled for the last two months, I simply couldn't find the leak so I've been just topping up with distilled water and been monitoring it. Today after a short drive I noticed it leaking so immediately opened the bonnet and craned my neck down looking between the drive belts, yep under the water pump it's leaking. So this is on the agenda. I know I have to remove radiator, take out fan, unbolt the old water pump. Anything else I should do? I'm attempting this myself so is it fairly basic? Gasket or no gasket or just silicone it? Belts are fairly new with no visible cracks in them. The reason I'm asking all this is because in my guide it just says "Remove water pump" but how? Does it just unbolt and pull out?
-
Yes, don't let babes in bikinis distract you from cleaning the bra strap and knickers
-
I've had mine for ten years now
-
I sprayed cologne in my air box housing now can't get rid of the smell of Joop
-
Lol I don't like burnt bacon but, err, yeah that'll do me lol
-
I'd say he would have figured it out by now. Three months since he asked that question so I doubt he would have his Pathy sitting for 3 months doing nothing.
-
I cleaned mine out again and this time found only one leaf, what looked like some seed pods and a dead bee. Handy tip - spray some of your favorite cologne or deodorant in there and enjoy the nice smell that comes through the vents.
-
What did you do to your Pathfinder today?
Terranovation replied to RedRider3141's topic in The Garage
Tightened up the screws holding my rear speakers, all good there and fitting new protective covers to the outside of the speaker surrounds. Had material left over so covered my centre armrest in the stuff. Floor mats went in the wash and did the air box fire prevention, opened up the hole and found a leaf, dead bee and what looked to be seed pods. Cleaned that out and sprayed deodorant in there. Now my truck smells nice when I hit the fan. -
Dashboard bulb size... 194 and what else?
Terranovation replied to Slartibartfast's topic in The Garage
Aaaand here's my other vid I made about replacing the centre console bulb with an led. Really simple job this one. -
Dashboard bulb size... 194 and what else?
Terranovation replied to Slartibartfast's topic in The Garage
Here's my video, yep that's me doing the job. Also there's a link in the description for what leds work best plus I included some other instructions in more detail. Basically all you need is a screwdriver and maybe even a plastic scraper for prying up panels, although I just used my fingers. -
Dashboard bulb size... 194 and what else?
Terranovation replied to Slartibartfast's topic in The Garage
Well on the square dash ones, it's lower the steering column, Remove the screws holding the steering column cover on Remove the five screws of the speedo display trim, pry top trim down, grab both sides and pop the trim out. Remove the four screws holding the actual speedo display Carefully pull speedo display forwards then flip it over to access the bulbs at the back. There's a video on youtube I made a few years back, it wasn't a successful illumination job but at least it shows what is involved. I put different leds in at a later time and had to remove these blue bulb filters that were inside the speedo. I didn't exactly know how to get to them but I just pushed them in with a screwdriver through where the leds go in, then had to carefully angle the speedo and shake the little blue filter bulbs out. -
Is it making a clicking or clacking noise when you turn right? If so then yeah it's cv joint. Also check the rubber boots, both inner (near the engine sides) and outer boots for tears, cracks. If you see any grease flung around down there near the boots then it's definitely time to either get a new boot kit and regrease the cv, have the cv joint dissembled, checked for wear and if it's ok then regrease and reinstall. If it's totally stuffed then it's new cv joints. Get it checked first before just buying new cvs because you might be able to save money by just getting it checked for wear.
-
I will share a story that happened way back in 1997 when I was an apprentice exhaust fitter, we were a team of just 3 guys and one guy was installing a new clutch plate to the trans of his own car (because at the time we didn't have any customers and it was quiet) he had the vehicle up on the hoist. Me and the other guy said ok we are going to have lunch and the guy underneath his car said ok Il be there in ten. So we went and had lunch in the crib room. Well ten minutes had passed and the guy working on his car didn't come to have lunch so we decided to go check on him. There he is, fingers of both hands jammed in between the trans housing and the engine rear main. He was trying to support the weight of the trans with his forearms and looked in shock and was silent. So we quickly jumped under and lifted the trans up so he could get his fingers out and they were purple but all fingers intact luckily, grabbed an ice bucket immediately and bandaged his hands. Lesson learned, he should have used the support stand under the trans just in case it dropped. He said afterwards that he couldn't yell out for us because he was using all his strength to hold up the trans and if he yelled he would have dropped it and lost his fingers. It would have been disastrous if we had decided to go down the road to get lunch, it would have been too late.
-
Dashboard bulb size... 194 and what else?
Terranovation replied to Slartibartfast's topic in The Garage
I have the square dash too. In Australia the bigger globes for the dash are called T10, you'll need about 6 (four for the dials, two for the indicators) and the tiny little skinny bulbs are T5. They are the ones for your warning lights (high beam, clock, A/T temp warning etc) The globe behind the aircon display is a single T10, unless you've got the aircon with all the buttons and can be set on auto, in which case you'll need a whole bunch of globes for each individual button. I went all leds for my dash and it's heaps brighter.