- Sign In Changes: You now need to sign in using the email address associated with your account, combined with your current password. Using your display name and password is no longer supported.
- If you are currently trying to register, are not receiving the validation email, and are using an Outlook, Hotmail or Yahoo domain email address, please change your email address to something other than those (or temporary email providers). These domains are known to have problems delivering emails from the community.
Leaderboard

Popular Content
Showing content with the highest reputation on 07/03/2020 in all areas
-
Alright folks, let's try this again with some updates. I figured Amazon pictures would work as a host for my pics, but I guess not - oh well, continuing this thread with Photobucket!: This is what I started with: the vehicle was just a pretty stock manual XE model. It had some pretty bad rust spots on the rockers that needed to be re-worked. Thought about buying just some slip-on rockers, but decided that it would be good to have a little experience with patch panels. As you can tell, the rust wasn't HORRIBLE, but it definitely needed to be repaired. Once everything was welded up, I used some paintable caulk to seal the gaps between the rocker and the fender. And same thing on the driver's side (featuring some fiberglass filler): I had to sand the hood down to metal (practically everywhere), as the rock chips had started light rusting: I bought some new rims for it. Just some standard Chevy six-lug rims, wrapped with 33's. These were the tires that came with the rims. Super worn out, so I decided to get some new rubbers. I went with a 32x11.5 tire, in hopes that it would fit under the fenders a bit better. I love how tiny the stock wheels look compared to the 33's. Ha! And the new tires (featuring my ominous shadow): Next up was the painting process. Yes, I painted this in my driveway. Definitely a 'redneck' way of painting, but I think it turned out pretty well! Used a House of Kolor primer/sealer, and painted the inner door jams and inner doors first: Once the "interior paint" was done, I put the doors back on, and put everything relatively back together so that I could focus on exterior paint. Again, primed/sealed the body with the HoK and used TCP Global Ginger Metallic for the single-stage enamel. I highly recommend that paint. This is the second time I've used their paint, and have had absolutely no complaints about them (though I often am found complaining about the guns or some dust - or in this case, a wasp - that found it's way into the paint): Once the paint was on, it was time to focus on sound. Replaced the stock 5x7 speakers with CT sounds speakers. The head unit was replaced with a Pioneer MVH-S310BT Bluetooth stereo (so that I could jam out to some AC/DC and Dynazty on Spotify, of course). I did a professional wire kit (none of this through-the-fender-and-doorjam bs) and slapped my old Sony sub paired with a Volfenhag amp. It's an old setup, and isn't the loudest or proudest, but I still love that combo. I don't have many pictures of the sound system, sorry. After that, it was time to move on to coating the frame with POR15 paint. I should have taken pictures of myself on this one, because it was a sight to behold. Let me tell you something: that POR15 will take a layer of skin off if you try to peel it off too soon. Which is very problematic when you get it on your whole body (including face). Highly recommend that stuff, but highly recommend not getting any on you or anything you don't wish to be permanently black. Once all that was done, I moved on to getting the wheels/tires. sandblasted and powdercoated (charcoal grey) the rims. That was a miserable experience. I highly recommend taking items in to be sandblasted. I had sand in crevices on my body that I didn't even know I had. And once those were on, the fun began of mounting the bumpers. The rear bumper was no problem. The front bumper, though, was a challenge. The 3" bumper relocation brackets that were sold in the kit had to be fairly heavily modified in order to fit. Oh well - that's part of the fun, right? I also fabricated a new rear license plate holder, as the old one wouldn't fit with the bumper and lift kit. And one of the final steps I had was the shift boot. As you all are probably well-aware, the stock boots don't work well with a lift kit. So to remedy this, I bent the 4x4 shifter, but left the manual shifter as is. I originally thought I could use a larger sewn boot (3rd picture) and tuck under the carpet. However, that looked a bit ridiculous, so I went a different route: cut a diamond plate sheet and bent it to match the curvature of the well. I then sewed the shift boot from faux gator skin, used a screw-in grommet on the top (as a finisher), and bought some new knobs. Behold, the shift boot shenanigans: And last but not least: the graphics. I owe a huge debt to my dad who helped me with some of the cutting/designing of the graphics. The back part (where it is flat at the top) needs to be re-designed and re-cut, but overall it turned out pretty nice. We are also going to be doing a hood graphic here in the next few weeks: Some other mentions that may not be pictured: I highly recommend fluid film as a rust-preventative in the rockers and fender areas. It doesn't take but 5 minutes to pop off the scuff guards and spray some FF down into the rockers. Pretty easy. I also ordered stainless M6-1.0 16mm flanged bolts on Amazon for pretty cheap. I found it very beneficial to spray just a tiny bit of Fluid Film on the stainless bolts to ensure nothing is getting rusted/stuck. I broke about 50,000 of the old bolts off, simply due to rust, age, and over torque from previous work. Next on the to-do list for this vehicle: headers/exhaust, roof basket rack, and steering components (I have new inner/outer tie rods, centerlink, and some other goodies coming in the mail in the next few days). And that's about it, folks. I have about 300 hours of cutting, welding, sewing, cursing, pleading, and some good ol' quality dad/son time into this since March. I hope you all enjoyed! Let me know if there are any questions or if I can help with anything.3 points
-
New addition to the family Four months later - overhauled, lifted and dressed up3 points
-
I can confirm that this works. You don't even have to take the module entirely out. The illumination lights for the panel are on the top left and right centre and are easy to access through the double DIN for the head unit. Just did it.2 points
-
Over the past little while i have been attempting a full LED conversion. I have completed the dash but i want to also do the climate control back lighting, but i cant for the life of me figure out how to get it out. On top of not being able to find many videos or threads on this topic, i dont have a spare unit to play with if this one breaks. So with that said, has any one does the back light LED install on the unit before? If so how in the world did you get that done lmao1 point
-
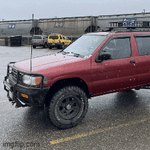
Updated pics as of this morning. I love my r50 Sent from my LM-G710VM using Tapatalk1 point
-
Was the problem with the running board mounts rust? Was it the whole mounting area or just the bolts? Personally, I’m an advocate as I think the truck looks unfinished without running boards or sliders. The low profile LE sliders offer some protection, are useful for accessing a rack up front, are a necessity for women & kids & just add a nice complementary line across the bottom. I would think spare bolts or even running boards should be a dime a dozen. So the fenders are going back on? Honestly, CB is really dated. Some people run them but GMRS & Ham have largely replaced it. I bought a fancy new CB but it’s still in it’s box because myself & those I travel with have all come to prefer GMRS. I regret buying my CB & will likely never mount it. On the other hand, I’m buying additional GMRS units for my kids & wife & anyone who joins us without one. The hand units have impressive reach & allow easy communication with spotters on foot. They can also talk with both Ham & FRS which increases their versatility (non-licensed can be on FRS channels). Ham has many of the same benefits but requires a test for licensure & that license doesn’t cover family members (GMRS is simply pay & your whole family is included).1 point
-
Looks great. Love the period correct graphics!1 point
-
That's a FANTASTIC looking truck, great work on it so far! I'm a huge fan of the red, but the color you went with looks equally sharp.1 point
-
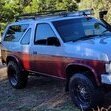
Last Tahoe trip1 point
-
I played around with mine last weekend. Got it loose but couldn't wiggle it out of the slot for the HVAC controls but figured it would come out if I took the head unit out so I could push it back, down, and out through the double DIN hole. This seems to confirm that approach (I didn't have time to try it):1 point
-
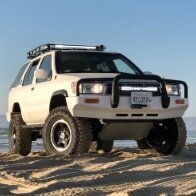
Scored some 31x10.5 mts on wheels for 70 bucks and stuck some 7in leds on the bush guard1 point
-
Hawairish, your observations confirm something I learned a few years ago when I replaced a CV axle with a replacement I bought either at O'Reilly or Autozone... or possibly RockAuto. I cannot recall whether the axle was a Duralast-branded part or whatever brand O'Reilly sells. I have typically bought CV axles locally rather than waiting for parts to ship from Rockauto due to the urgency of the repair. Anyway, during the replacement, I noticed that the inner cup on the previous CV was different than on the replacement axle. The wall thickness of each of the cups was different, and the bearing sizes were also different. I believe that the thinner-walled cup with larger bearings allowed more operating angle before binding, whereas the other axle whose inner CV cup had thicker walls and smaller bearings had binding at a lower operating angle. I was able to check the wall thickness and bearing sizes by popping the grease cap off the back of the inner cup. Unfortunately, it's hard to tell just from brand/part number/new/reman whether you'll get a thin-walled inner CV or a thick-walled inner CV. Anyway, if I recall, I think I may have returned the thick-walled CV axle back to the store I bought it from (eg. Autozone) and got one from the other store (eg. O'Reilly Auto), which had thinner walls.1 point
-
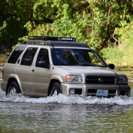
15” procomp wheels with 32x11.5 mt tires. We’re currently in a roof rack swap from SE to LE, but I’m kind of enjoying this sleek look. Sent from my iPhone using Tapatalk1 point
-
When I tried out these wheels and tires on stock suspension, the tires would rub in the back if the suspension was compressed. At stock height, it looked as if just flexing would cause it to rub but it looks like with the lift, this must change the geometry to where I can tuck the rear tire at flex now.1 point
-
The inner joints on mine have a step. In fact, if I had to make any direct comparison, mine look like the picture of the Cardone remanufactured unit, p/n 606185, on Rock Auto: The shaft shape seems to be what we, so far, leaning towards being OEM. This reman'd unit could potentially be that.1 point
-
My 2001 LE CV Brand/PN: OReilly's Import Direct/NI8185 Markings: "KAI 025" on the outer cup band. Has a smooth round outer cup Strut Brand/PN: KYB-335032 & KYB-335033 Spacers: SFD w 4.75" strut spacers + OME HD coils Binding: 0 currently, had 2" spacers on top of the OME HD when I first lifted the truck before installing my SFD and broke 2 CV axles but never observed issues at full droop though there was likely some Pines to Spines 2003 LE "Gambler" CV Brand/PN: uknown Markings: none Strut Brand/PN: unkown Spacers: Pines to Spines 4" SFD Binding: 0 I currently have 3 sets of CV's to look at- My 2001 which has new units from ORielly's, a used set of what @02_Pathy thought were OEM and the set on the Gambler, which look identical to the assumed OEM set. The biggest difference I can tell right away is the entirely smooth and round outer cup on the OReilly part whereas the "OEM" units have a step in the casting. Assuming the 190K 2003 Gambler has never had a CV replaced and @02_Pathy really did replace OEM units I think this may be an identifying trait? Also worth noting- @02_Pathy installed a brand of CV I've never heard of and has had no issues since, although they have the same part number as the new OReilly units in my 2001 and could just be a re-branded part. He gave me the "OEM" units in their boxes1 point
-
The chrome could use some spit shine but I haven't gotten that far yet. I've been soaking them in degreaser since my earliest post on this build so the grit is kinda settling on the metal. As for the hi-lift jack, sadly I didn't get any pictures of it on the trail as I was in business mode trying to prevent further damage. I used it to winch me up muddy hill with the rocks my tires were caught on and one more time winched from my 10:00 to pivot the front of the rig to the left on mud. The trail went downhill on mud and hooked left but gravity and mud wanted me to go straight down toward trees so the hi-lift fixed corrected my course of action. I had 2x5' sections of tow chain, 1x10' section of tow chain, 1 tow strap with hooks and 2 recovery straps to get creative. The kicker is that this was a harbor freight jack and we had no idea that would hold up.1 point
-
This is the MOST DETAILED write up I’ve ever seen. Well done sir.1 point
-
So to date this is what ive got goin: Relocated knock sensor to front center of engine. Started with 2" spacers and ended with nrc9448 springs some Bilstein 33185569 5125 shocks for the rear. (Still havent drilled a new panhard bar hole so my axle sits half an inch to the left). The front also had spacers first but once the stock struts finally went i went down the speedwaymotor rabbit hole and purchased trucoil purple racing springs with 250 pound per inch compression and a spacer for it to sit onin the new strut, allowing us to cut off the extra large seating for the stock spring and have more room for tire there and not just a sketchy quarter inch. All of which i learned from[mention=40517]Bax03SE[/mention] as he did it first. Only thing i did different was avoid sfd by taking off my old spacers. I might put one inch back on bc i can so why not at some point. I wouldve left my running boards on had half the bolts not looked like they were going to fall off any minute. Theyre strong and when in good shape make for some good extra protection. Id like to fit some actual steel rock sliders at some point somehow. Ive taken off all of the bumper covers and fender flares for rust repair and everything off the rear stayed off its still off i have no rear bumper. Oh well . ill put one on when I find a way im pleased with. I left the metal bumper inside on the front and held harbor frieght lights on it for a long time while i worked on the brackets to fit a TJ wrangler to the front which just went on two weeks ago now i wanna say. Ive put manual hubs on the front and changed both cvs as the originals were torn and not clicking. So i purchased a kit to rebuild them. I also found that ultra black gasket maker will fix a small one inch tear near the clamp. Btw if the cvs have never been done SCREW THOSE BOLTS ON THE DIFF SIDE holy cr@p i cracked two 12 mm sockets on that 16 year old locktite(?). Up next: Next week im doing a drain and fill with some good ole nissan matic d for the tranny and hopefully by then ill have figured out which is the actual correct fluid for my tc. I have the stick shift tc and manuals ive seen online have said either the matic d or 75w90 will work. But that its ok for both. That doesnt make sense? If it does pls enlighten me. Diff fluids get changed next month too any recomemdations there would also be good. New lights up front with the dang clamps. ..if i have to.. id prefer to use the two tabs i have at the very top or maybe utilize the single ones i have that almost line up with where the original stock fog lights were. Which i also still have but the tabs broke on one of them i believe. That whole rear bumper not being there situation will be dealt with at some point. Ive also been thinking of a cb because thats probably important but im just not quite sold on it. Sent from my LM-G710VM using Tapatalk1 point
-
I don’t have any pics but I can tell you, there are two on the muffler, one goes to the bracket on the upper control arm crossmember, the other is bolted right to the frame. Last I checked the hardware is still available aftermarket. The tailpipe one is the same as the rear muffler. They’re on rock auto right now. There is also one on the midpipe at the transfer case but I don’t think it’s available anymore. But it wouldn’t be hard to make something. My solution to rust was just not drive my pathy in the winter here. Lol.1 point