
- Sign In Changes: You now need to sign in using the email address associated with your account, combined with your current password. Using your display name and password is no longer supported.
- If you are currently trying to register, are not receiving the validation email, and are using an Outlook, Hotmail or Yahoo domain email address, please change your email address to something other than those (or temporary email providers). These domains are known to have problems delivering emails from the community.
Leaderboard



Popular Content
Showing content with the highest reputation on 07/30/2019 in all areas
-
5 points
-
2 points
-
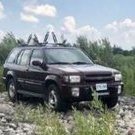
Swapped in used JY CV axles, so no more torn boots and now I have trail spares. Added a 3 gallon rotopax on the roof rack for an upcoming road trip, I don’t really like the look so it may only show up on an as needed basis And I bought I viair air compressor to substitute the harbor freight one. Came in handy inflating tubes and floaties at the lake yesterday2 points
-
Before i installed my DIY ditch light project today, found a small trail - thing that was fun2 points
-
Back before the light upgrades. Sent from my SM-S737TL using Tapatalk2 points
-
You CAN install a factory carrier onto a non-equipped Path without cutting any sheet metal! This is on my 88 XE, though im sure others should be similar. Total work time was at least 8 hours, definitely not a quick easy job. Total investment $120, $30 for the carrier and $90 for the shipped brackets. And what a job it was… I would never do it again, but I sure am glad it’s done. I bought a used carrier from a pick a part about 2 years ago, and bought the kit from 4x4parts.com around the same time. When the brackets came in I saw the size of them, looked at the car, and I got discouraged and the parts sat ever since. Well this weekend I finally got tired of hauling that 32” tire onto the top of the truck every time I went out camping. The Kit NISSAN supplies is for body shops that have the quarter panel off, It is not an add on kit. This job is impossible without an angle grinder or some kind of metal cutting tool. For the rear latch and support bracket, Nissan was nice enough to hide captive nuts behind the body. All you have to do is drill the holes, they even dented the metal where you need to drill. Though mine were not centered and it took quite a bit of filing to make them fit, still much easier than the rest of the install. I don’t understand why Nissan didn’t do the same thing for the rest of the brackets. How much more money per vehicle would it have cost them to install all the brackets so all you had to do was drill holes. One carrier bracket bolts in just as is, the other two need to be modified, One slight, one heavily! I was able to bolt the two top brackets into the factory supplied locations with little modification. They place all their weight on the factory supports inside the body like they should. The lower bracket, underneath the tail lamp is another story… I had seen another post on NPORA back in the day about someone who did this job by cutting the floor of the hatch. http://www.nissanpathfinders.net/forum/index.php?showtopic=6680&st=20 I was willing to do that if I had to, but it was my last resort. I did manage to cut the S#!t out of the bracket and get it to fit. It was a trial and error thing but when I was done there wasn’t much left of it. The lower bracket no longer attaches to the inside of the body the way Nissan intended but at least it is a thick piece of metal that braces against the outer body so it doesn’t tear a hole in the body work. Besides, the latch and the rear mount seem to hold most of the vertical weight while the carrier is locked, which is 99% of my time. Below are some pictures of the before/after and the aforementioned bracket. I had to cut off even more than you see in the picture, I drew the red line to illustrate. Even with as much as I cut off I still had to pry it into place using a hammer and a small pry bar. Any questions just ask I’ll be happy to share my experience. I posted this over at 4x4parts as well to spread the info.1 point
-
31 inch tires should be causing hardly any rubbing, if any, especially ones that narrow. Do you have wheels with lots of offset or wheel spacers? KYB front struts with OME or AC coils, and Bilstein rear shocks with Land Rover coils are a popular combination, but not necessarily cheap.1 point
-
I just moved my whole body from the right side to left side, on top of the engine, used all kinds of attachments, but don't exactly recall how i got that out. All I remember was that it was a pain in my behind and I wanted to forget it. hopefully I never do it again lol. I also recall the feeling of reaching the waterfall at the end of the hike after i got it out.1 point
-
Hmm, yours puzzles me. I figured if@TowndawgR50 did it, so would yours. My LEDs: Stop/Tail #7443 DDM Tuning Red 6xCree LEDs Rear Turn Signal #1156NA DDM Tuning Amber 6xCree LEDs https://www.ddmtuning.com/Products/7443-6xCree LED Relay Novita EP34 LED Relay https://www.amazon.com/Tridon-EP34-Flasher/dp/B00064LQKS1 point
-
Sunset run in the mountains Sent from my SM-G960U using Tapatalk1 point
-
just barely used the sliders today, and found this difficult obstacle, which highlighted my need for a locker. With how the trail approaches this 2-3 foot step at a 90* angle, I couldn’t keep all of either my rear or front end perfectly in traction. I feel like a front locker would’ve pulled me right over. I’ll have the money here to swing one soon, but I’m worried about install-I don’t think I can do it myself1 point
-
So I finished replacing my alternator. I am going to get my original Hitachi alternator rebuilt and have it on-hand, since consensus seems anything but a new or rebuilt Hitachi alternator is unlikely to last long. But because I didn't want to be down for that time (little did I know the lower alternator bolt would break and leave me down for a week anyway), I got a junkyard alternator. Unfortunately I wasn't able to get a Hitachi one from the junkard. It was a 13900 built in Malaysia. It was a greasy mess, so cleaned it with a can of CRC Lectromotive electric parts cleaner, which worked great, and got it tested at Autozone. It turned out I couldn't see well from the top, so I was wrong about not being able to get my arm between the battery tray and the power steering pump. I'm 5'6" and medium build with fairly large forearms, and I could do it with a fair amount of struggle. If you were significantly bigger, especially in the forearms, you might not be able to do this. Any specs quoted below are from memory, so I recommend verifying in the FSM before doing this. Here are my steps - Remove the plastic windscreen on the underbody From right behind the steering rack, reach up and remove the alternator ground screw Use a flat blade screwdriver to push the plastic latch on the wiring harness off the metal bracket attached to the alternator Put a magnetic finder on the alternator mounting nut (to prevent it from getting lost, you don't want to lose this in the power steering rack) Loosen the nut on the front of the idle pulley FIRST! Release the belt tension by unscrewing the bolt on the bottom SECOND! - Otherwise you'll screw up the tensioner mechanism Work the belt off Remove the battery and plastic tray Optionally you can loosen the alternator top bolt, and remove the bottom bolt to possibly gain a half inch for doing the 2 steps below. I was able to barely do it without loosening the alternator. From the top, remove the voltage regulator plug (release button faces the firewall) From the top, remove the positive lead by pushing the rubber boot out of the way and removing the nut Here is where my truck will deviate a little bit (I have an electric radiator fan) - remove the radiator fan and shroud Break both alternator mounting bolts loose Unscrew and remove the top bolt from above Find its nut with the ear below your engine Remove the bottom bolt from below There is no good way to describe how to jigsaw the alternator out of position, but you basically have to move it a little to the passenger side, and bring it forward in front of the radiator. It will take some wiggling and muscle to release the alternator top mount from the engine bosses. Be a little careful, in the manual transmission, the oil level sensor's plastic socket is right below the alternator. Carefully bring the alternator across the radiator to the driver's side, and then Tetris it out between the radiator and anti-sway bar. There is an inch more room here that makes the difference After the 2nd replacement, I decided not to reattach the metal wire harness bracket to the new alternator. The wiring harness seems much stiff enough to support itself. Work the new alternator back into position the same way the old one was removed DO NOT USE lubricant on any bolt threads or nuts. Wash them off with parts cleaner if necessary. You may want to replace the lower alternator bolt if it looks corroded. The head of mine broke off when tightening it. I believe it is a M8 1.25 20mm flanged head bolt. I used a class 10.8 I found at Autozone. Put the top bolt in first Optionally put in the lower bolt, but you could wait until after you wire the positive lead and you might gain half an inch of clearance for the positive lead and voltage regulator plug Get someone to spin the top bolt for you while you get underneath the car and start the top nut onto the threads, and get the ear seated against the alternator mounting arm From the top, reattach the positive lead FIRST! If you try to do the ground first, you'll be unable to correctly seat the positive terminal between the two nuts on the positive stud of the alternator without cracking the plastic insulator. Someone did this to the junkyard alternator I had. So I swapped the insulators with my old one. From the top, reattach the voltage regulator plug Reattach the negative lead from the bottom Tighten the alternator top bolt (60 NM) Tighten the alternator lower bolt (30 NM) Put the belt back on Finger tighten the idler pulley nut and back it off a quarter turn Tighten the tensioner belt (I have another thread with guidelines for this. The short version is hand tighten with an extension and no wrench, then use a wrench 2 full turns for a new belt, and 1.5 turns for an old but good belt) Tighten the idler pulley nut (25 NM) Reinstall the radiator fan and shroud Reinstall the battery plastic tray and battery Reinstall underbody windscreen1 point
-
Took my Q to Infiniti and got shut down. Didn't go so well for Mrelcocko Sent from my SM-S737TL using Tapatalk0 points
.thumb.jpg.5f3374d0ea9f01d58f63dc0cc281e8ca.jpg)



