- Sign In Changes: You now need to sign in using the email address associated with your account, combined with your current password. Using your display name and password is no longer supported.
- If you are currently trying to register, are not receiving the validation email, and are using an Outlook, Hotmail or Yahoo domain email address, please change your email address to something other than those (or temporary email providers). These domains are known to have problems delivering emails from the community.

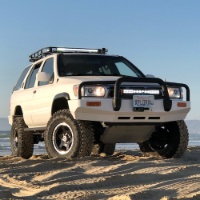
XPLORx4
-
Posts
2,583 -
Joined
-
Last visited
-
Days Won
47
Content Type
Profiles
Forums
Calendar
Everything posted by XPLORx4
-
While the security circuit for the dome light may support additional electrical current for your lighting needs, it's safer to isolate your new lighting circuit with an automotive relay that is triggered by the dome light circuit. I have considered making a similar mod, but it requires tapping into the security/dome light output on the body ECU, and making the mod hasn't ever been near the top of my priority list.
- 94 replies
-
- 1
-

-
- rock lights
- led
- (and 1 more)
-
If you want a lift, the easiest thing to do is to purchase new coil springs and shocks, then take them to the shop and tell them "hey, my old coil springs are sagging, and my shocks are worn out" and ask them to install these new coil springs and shocks that you got. If the front struts are still OK, you can re-use them, but if they're tired and worn, you should replace them with the springs, since the labor to replace the spring is the same as to replace the strut, too. You don't have to tell them that your new parts provide any significant lift. The shop you used simply isn't familiar with suspension lifts for MacPherson strut-based IFS. The only thing I have run into is that some shops refuse to install customer-supplied parts due to liability/warranty-claim issues. After the springs are installed, of course, you should get an alignment. Camber bolts (which usually correct for positive camber after lifting) may or may not be required, but the toe angle will be off. Also, with any lift, the front CV axles will be at a higher angle and could accelerate wear on the CV boots, and may potentially introduce mild vibration of the CV joints. If you want to mitigate these issues post-lift-install, you may consider installing manually hubs on the front wheels to disengage the front drivetrain while you're not using 4WD.
-
As others have posted, cut out the rubber bushing. You can use a drill and then wire saw to cut out the bushing, then a sawmill to cut a slit all the way through the outer sleeve, but not through the whole outer metal tube. If you have an air compressor and an air chisel, it's faster than using a hammer and punch.
-
2002 Pathfinder...the long road to recovery (build)
XPLORx4 replied to system_f's topic in 96-2004 R50 Pathfinders
Nothing. Spacers thicker than about 1" which are placed between the body and the top of the strut allow the suspension to travel beyond the max operating angle of the CV and causes them to break. It seems some brands of CV axles are less tolerant of high angles than others. If you want a lift greater than 1" and want reliability, replace the coil springs. I have wheeled my '97 for almost 20 years with a 2" coil spring lift and I have NEVER broken a CV joint. -
Just because the lights turn on doesn't mean that the battery is good. Batteries can be OK for running low-current accessories like the headlights, but may not have the cranking power to engage the starter. Check the positive battery cable connected to the starter. If the terminal at the starter is corroded, you'll have the same symptoms. It could be the starter motor, also. Hopefully it's not the tranny.
-
If it just clicks when you try to start the engine, it could be: corroded terminals on battery (how did you verify connections are good? Remove terminals, clean the terminals and the posts, then replace them on the battery posts) brittle/corroded positive battery cable going to starter (replace positive battery cable between starter and battery) bad battery (how did you verify battery is good?) bad starter
-
The Bilstein 33-185552 is a good fit for a 2" lifted Pathfinder. Shocks should be about 16" compressed, 26" extended. The Bilstein 33-185552 has 255/70 valving, which works well for the Pathfinder. The other benefit of the Bilstein is that the body is on top, so the right shock won't interfere with the panhard rod mount when the suspension droops.
-
Anyone still selling a subframe drop kit?
XPLORx4 replied to NovaPath's topic in 96-2004 R50 Pathfinders
1) Raise chassis off ground and support with jack stands 2) Remove wheels 3) Remove struts 4) Remove front differential assembly 5) Lock steering wheel; remove steering U-joint from rack 6) Remove bracket securing P/S hose to subframe 7) Support subframe with a floor jack 8) Support engine with a floor jack (with a 2x4 or 4x4 placed between oil pan and jack) 9) Remove bolts securing subframe 10) Remove nuts on motor mounts 11) Lower the subframe about 5" 12) Insert spacer blocks between motor mounts and subframe 13) Insert spacer blocks between chassis and subframe 14) Install and tighten all of the hardware to secure the spacers to the chassis and to the subframe 15) Install "missing link" brace between left and right lower control arms 16) Attach strut spacers onto struts 17) Reinstall struts 18) Install new steering shaft/u-joints 19) Remove floor jacks 20) Reinstall front differential 21) Reinstall wheels 22) Now go lift the rear suspension. -
Did you ever source poly bushings for the diff mounting brackets? They are an oddball size, it seems. I had to replace the mounts on my rig when I installed the SFD, but I bought a set that was pulled from a wrecked R50. I still have the original brackets (sans bushings) for the eventuality that I install poly bushings.
-
I installed a dual-battery system in my Pathfinder. X2Power SLI34AGMDPM. Photo here: https://xplorx4.shutterfly.com/437 My on-board air (photo: https://xplorx4.shutterfly.com/185) occupiesthe space formerly taken by the stock air intake box. If I had opted to keep the stock air box, I probably would have mounted the compressor outside of the engine bay, perhaps above the rear differential or on the back of the panhard rod brace. I find that the compressor gets quite hot for airing up duty when it's mounted in the engine bay - especially in the summer. I'm sure that its location there doesn't do any favors for the duty cycle.
-
I hear your pain. It is pretty inconvenient to have to disassemble the strut to install longer bolts. But imagine if Nissan had designed it so that the strut mount bolts were welded on the chassis pointing down with just holes in the strut mount. That would be terrible, because then you'd be stuck with STOCK LENGTH studs instead of being able to replace them with longer bolts! Plus, consider how hard it would be to tighten the nut closest to the engine if the bolts pointed downwards. That'd be a huge pain. Currently, it's hard enough to just fit a small box wrench in there to keep the bolt from spinning while you tighten the top nut.
-
I just picked up a 2WD driveshaft from a 96 Pathy at the local junkyard hoping that it can be modified and adapted to fit on my 4wd. I didnt realize that the 2WD shaft is a two-piece shaf with the section attached to the rear end being a dual double cardan CV shaft that is actually shorter than the single cardan 4wd shaft. Is your driveshaft also similar? If youre having vibrations on your 2WD at only a 3 lift, its making me wonder if itll work for me.
-
Well, except for the ring and pinion, the rear end is new and has been pulled 3 times to double-check the pattern. New ARB. New pinion bearing. New carrier bearings. Though the gears are old, they show no signs of abnormal wear and the pattern is perfect. The shop has been doing rear ends for 40 years and swears that everything is set up perfect. At least it's good to hear that I'm not the only one who has experienced some driveline issues after moving up to a 6" lift.
-
So you did hear the growling problem after installing the SFD?
-
Hi guys, A couple of months ago I installed the SFD in combination with my AC 2" lift, so now I'm running about 6" total lift. After installing the lift, I noticed a growling vibration at the rear end when lightly decelerating (very light pressure on the accelerator while still slowing) when driving at any speed above about 40 mph. It is most noticeable at higher speeds. There is no sound under acceleration or under deceleration (engine braking). There were no such issues before installing the additional 4" of lift. After talking with a couple of different shops, the consensus seems to be that the rear driveshaft angle is too steep and the vibration is caused by this angle. We measured the pinion-to-driveshaft and slip yoke-to-driveshaft angles, and they are about 18°. It is believed that in order to fix this, I'll need a double-cardan (CV) driveshaft. Tom Wood's Custom Driveshafts makes these for the Xterra, which uses the same driveline as the R50. (http://www.4xshaft.com/Xterra2.asp). In addition, it is believed that I also need to reduce the pinion angle, so I also need custom adjustable upper links. It seems that there is not very much more axle droop possible with the 6" lift installed using stock upper and lower suspension links. This morning, I visited a wrecking yard that has a 2WD '96 R50. I discovered that the 2WD driveshaft is split into 2 sections after the transmission, and the rear section of the shaft which moves with the suspension is much shorter than the 4WD driveshaft. Moreover, it also has 2 double-cardan joints. I wonder if it would be possible to take the 2WD shaft, attach the slip yoke to the front joint and have a custom-length center section made for cheaper than it would cost to have Tom Woods build one ($569). Thoughts? Finally, my questions for you who have installed lifts over 4" are these: Who has lifted their R50 more than 6", and what did you do to the rear suspension to achieve this? Have you noticed any new driveline noises after installing the lift? Have you had to make changes to the rear suspension links in order to improve the pinion angle? What is the angle of the driveshaft if you haven't made any changes? Thanks?
-
Who wants a set of aftermarket suspension links?
XPLORx4 replied to tmorgan4's topic in 96-2004 R50 Pathfinders
Shucks. Now I need to figure out how to build my own or work with a shop to do so. Re: the panhard rod, I'm ok to pay your mom to ship it to me from KC. Thanks for the kudos on the shutterfly page. Here's info about my on-board air system, which includes photos of how I was able to plumb my rock sliders for air. It turns out I rarely need air storage for my off-roading needs, so they primarily serve simply as large metal pipes. https://xplorx4.shutterfly.com/289 https://xplorx4.shutterfly.com/206 -
Who wants a set of aftermarket suspension links?
XPLORx4 replied to tmorgan4's topic in 96-2004 R50 Pathfinders
RainGoat- do you still have those links? Installed them yet? I'm actually in desperate need of adjustable links now, as I've just installed a 6" lift, and the driveshaft angle is way too steep, causing bad driveline vibration. I'm probably going to have to install a double-cardan (CV) driveshaft, but the pinion angle is still way off. If you haven't installed them and are willing to sell them, let me know. -
For sale: Bilstein 5150 rear shocks for 2" lift
XPLORx4 replied to XPLORx4's topic in 96-2004 R50 Pathfinders
Yeah, it's difficult to tell if what I'm experiencing is unique to my truck or if the issue might exist in others' builds, but they figure it's a "normal" side-effect of lifting that high or they don't care. -
For sale: Bilstein 5150 rear shocks for 2" lift
XPLORx4 replied to XPLORx4's topic in 96-2004 R50 Pathfinders
Yeah, it's probably 100% correctable by redrilling the holes. I haven't had a chance to mess with it for a few weeks, since after I lifted the rear 6", I was getting really bad vibrations from the driveline when lightly coasting, and it's been at a shop where we've been trying to isolate where it's coming from. At first we thought it was the rear differential, but now it's looking like I might need a slip-yoke eliminator and double cardan driveshaft to get rid of the vibration. -
How much do you want to spend? A solid axle swap will be more expensive.
-
If youre getting spark and fuel, the missing piece is air. Either too much or not enough. Do you have any OBDII codes? It could be the MAF or crank sensor.
-
The leaking oil cooler (at the oil filter) is unrelated to any dashboard warning lights.
-
If the alternator is new, also check the white wire pair between the battery positive terminal and the fuse/relay box. Those wires can sometimes harden and corrode and create electrical problems.
-
As far as I can recall, there is no dummy light for a leaking ATF cooler. The primary ATF cooler is incorporated into the bottom tank of the radiator, and certain models had an external cooler mounted in front of the AC condenser. There is an AT TEMP light, which also glows with the batt and brake lights when the alternator output is too low. What is the voltage at the battery terminals when the engine is running? I suspect the alternator, its internal voltage regulator, or the connections to the alternator.
-
For sale: Bilstein 5150 rear shocks for 2" lift
XPLORx4 replied to XPLORx4's topic in 96-2004 R50 Pathfinders
Bingo. Last issue is that I accidentally drilled the additional hole for the panhard drop bracket too low, making the drop bracket angled to the left, and now the panhard rod is shifted 1/2" to the left, so now I need a longer/adjustable panhard rod, because my rear shocks look like this: /_____/