- Sign In Changes: You now need to sign in using the email address associated with your account, combined with your current password. Using your display name and password is no longer supported.
- If you are currently trying to register, are not receiving the validation email, and are using an Outlook, Hotmail or Yahoo domain email address, please change your email address to something other than those (or temporary email providers). These domains are known to have problems delivering emails from the community.
Leaderboard



(1)_opt.thumb.jpg.035a5eb628baefe0934fbb6e70f9b39e.jpg)
Popular Content
Showing content with the highest reputation on 05/25/2020 in all areas
-
It was me. However it was a big hard snatch, from halfway around a corner in deep ruts uphill with the car sitting on the diffs...2 points
-
Testing Testing the LSD requires the means to apply torque to one side gear while holding the other stationary. I made these tools from some spare axle shafts (31- and 33- spline) and towing accessories. A digital torque adapter is used to measure breakaway torque. Splined ends cut off and welded to ball mounts and ¾” drive sockets: Undermount hitch receiver and backing plate: Digital torque adapter displaying a test result: With this setup, I realized my workbench has a 175 ft-lb breakaway torque before it wants to topple over. The advantage here, of course, is that I can mount this to my truck hitch (and I needed to once I started hitting higher numbers). Without such a tool (I doubt many people hoard spare axles and differentials like do), if you have the means to rig up a flange that mounts to the wheel hub and has a socket provision for a torque wrench in the center, you can actually test it that way, too...it's the same principle as the bench tool above. Otherwise the only other "test" is to do LSD-check test #1 in the Q&A section (first post) and feel out how much effort it takes to turn the tire. This will be entirely subjective. Barring any definition of the average mechanic, knowing that I could rip the truck if half if I wanted to: If it's relatively easy to rotate the tire, it's probably under 50 ft-lbs. If it takes a fairly significant amount of effort for you to rotate the tire, it's probably around 100 ft-lbs. If it requires just about everything you've got to turn it, it's probably over 150 ft-lbs, or you haven't put your purse down or eaten your Wheaties today. I also made a 3rd member mount because I need to set up a few carriers in the coming weeks: The joys of having a plasma table. Anyway, let’s talk about some real numbers. My torque adapter ranges up to 750 ft-lbs, and has a Peak-to-Peak setting that autosaves each peak readout. I’ve recently repacked 3 LSDs units using a bunch of new and unused FPs, some new FDs, some 1.6mm pieces, and the 3SS setup, all while testing incremental changes in between. For each test, I did 6 “pulls”, 3 in each direction. These were the general improvements observed: Using new/unused pieces: 10-15 ft-lbs per pair Series vs. parallel springs: 15-20 ft-lbs Using thicker (+0.1mm) piece: 20 ft-lbs per pair Triple parallel spring: 15-20 ft-lbs These are the following end results for those 3 LSDs and their recipients: @TowndawgR50: 4FD, 6FP (1x 1.6mm, 4x new), 3SS (1x SD, 1x SP, 1x SS) - Avg 236.5, Min 232.3, Max 240.1 @R50JR: 4FD (1x new), 6FP (4x new), 3SS (3x SS) - Avg 197.5, Min 184.4, Max 211.4 @RainGoat: 5FD (1x new), 6FP (1x 1.6mm, 4x new), 2SS - Avg 193.8, Min 178.9, Max 207.5 Notably, there were several other tests in between, but here’s how RainGoat’s LSD transitioned: Initial: 5FD, 6FP (4x new), 2SS: 151.1 ft-lbs With 1x 1.6mm FP: +19.4 With 1x new FD: +14.8 With both: +42.7 The aforementioned 95 WD21 unit I rebuilt using only the original pieces it came with averaged 142.8 ft-lbs. Not shabby given age and mileage.2 points
-
Assembly By now, you should have everything cleaned and pieces you intend to use all sorted. Organize the pieces in order so you just grab a piece, lube it up, and build the stack up. I do one stack first, get it in the carrier half, then do the other stack and carrier half. You should also have a container or squeeze bottle for lubricating each part in gear oil. Everything gets oil. Get some gloves because this gets messy. Start with the springs, put some oil on them, put them in parallel, and set them in the carrier concave-up (if using SP and SD, the SP goes into the carrier half first). Then, grab the first FP and oil it up; this will go against the side gear. Grab a FD, then another FP, and repeat. Once the stack is complete, rotate all the FPs so that the tabs are aligned (don’t worry about the FD alignments). At this point, you can either put the guides on the stack (note my fingers are holding them in place) and try to get it in the carrier in one shot, or place the entire stack into the carrier without guides first, and then lift each side near the tabs, and slip the guide in. The latter is probably easier. Both of these approaches are better than the FSM method, in my opinion. You’ll figure it out. You can see how the FPs tabs fit into the carrier, and the guides in place. All the tabs must be constrained by the guides. Put the side gear in place. A few slight twists will align the FDs and eventually let the side gear fully seat: Check the backside of the carrier half to ensure the guides include the last FP (hot tip: before flipping this over, hold the side gear in place, otherwise you’ll be starting over when everything falls out): Repeat stack assembly on the other carrier half. Apply gear oil on the cross shaft and gear surfaces, including between the spider gears and their thrust washers. Put the cross shaft and pieces on the Case B side. You’re going to do two flips: first, starting with Case A, put a finger on the side gear to keep the stack from falling out, then find your match marks on both cases. Watch for finger pinch points. While holding the entire assembly together with both hands, flip everything over. Apply gear oil to the threads of the carrier bolts (yes, the FSM calls for gear oil, not threadlocker) then hand-tighten all bolts (they should thread in smoothly). Use a ratchet to initially compress the two cases together, then go through a torque cycle. If you skip every 2 bolts when tightening, it’ll draw things together evenly (see pattern below). Torque to 50 ft-lbs (FSM range is 47-54 ft-lbs). Note that in this pic, I’m using washers. Older LSDs like this one had retainers to prevent the bolt from backing out. The retainers are not reusable (they get damaged during the removal process), and they were also discontinued by Nissan; use M10 washers instead if you prefer (Bellevilles would be best). Newer LSDs used flange bolts.2 points
-
Repacking The heart of the discussion—the actual “how to repack” tips. This is what you want to do to get the most out of your LSD: Rearrange the pieces to maximize the number of friction surfaces Maximize the stack height by replacing thin pieces with thicker pieces Use new pieces Use “unused” pieces and pieces with less wear Put springs in parallel "Triple Spring" Shim it Clean everything Rearrange the pieces to maximize the number of friction surfaces We want friction on both sides of all pieces. The optimal stock stack is 5FD, 6FP, 1SD, and 1SP: G1234567890123 GPDPDPDPDPDPSS #|O|O|O|O|O|)) This yields 13 friction surfaces. The SP doesn’t see friction on the side facing the carrier. Use the SPs and SDs if you have them; the SP needs to be the last piece on the stack and the longer guides are used. The next best optimal setup is with 2SS, with 11 friction surfaces, since the last FP and both SSs rotate in unison with the carrier. The 2FD setups only have 5 friction surfaces; you want a donor 5+ FDs to replace spacer or excess FPs. Maximize the stack height by replacing thin pieces with thicker pieces Use a micrometer or caliper to measure each friction piece. You want to replace all 1.4mm (thin) pieces with 1.5mm (nominal) or 1.6mm (thick) pieces. The weaker LSDs I’ve opened have had 1-2 thin pieces per stack. A 95 WD21 LSD I cracked open last week had only 1.5mm pieces. There’s no real guarantee what you’ll get, but with pieces from two donors, it should be fairly easy to at least replace all thin pieces. Use new pieces Unfortunately, new pieces are difficult to find since the pieces are discontinued. But, they are out there, and here are the p/n’s: Friction Disc, 1.4mm: 38433-C6004 Friction Disc, 1.5mm: 38433-C6002 Friction Disc, 1.6mm: 38433-C6003 Friction Plate, 1.4mm: 38432-C6002 Friction Plate, 1.5mm: 38432-C6001 Friction Plate, 1.6mm: 38432-C6003 New vs. used piece: Use “unused” pieces and pieces with less wear The only advantage to the weaker LSDs with 2 FDs is they have FPs stacked consecutively, meaning that they’ve never had friction applied to their surfaces, only compression. These are effectively unused. For example: 01-02 R50 (2FD, 9FP, 2SS), pieces 6-11 are unused: G1234567890123 GPDPDPPPPPPPSS #|O|O|||||||)) 03-04 R50/D22/WD22 (2FD, 5FP, 1XXXX, 2SS), pieces 10-11 are unused: G1234567890123 GPDPDPXXXXPPSS #|O|O|XXXX||)) These can be shuffled into other positions. Keep in mind, too, that the FP in position 5 will have only seen friction on one side, so it can be flipped. The 01-02 R50 makes for a great donor in this sense because it has 12 unused FPs total (though some might be thin). Unused pieces should replace “inner” FPs that show wear. The FSM specs warp and wear limits, but it’s unlikely any piece will hit the wear limit (-0.1mm). In general, use pieces with less shiny surfaces, as the surfaces on these pieces have basically self-polished over time. Here’s a set of unused, slightly worn, and worn pieces (I’ve adjusted the image shadows to emphasize condition): The unused piece lacks broad shiny spots on the surface (ignore reflection from the grooves), but may show a slight circular depression from long-term compression: A slightly worn piece with a few shiny spots: A worn piece showing uniform wear: Notably, the worn piece is still well within spec. Depending on your supply or donors, you might not need all of the pieces, so you should sort the pieces out to use the thicker and better ones first. You should also inspect all pieces for excessive damage or cracks. Pieces that show metal ridges or lips on the FP’s tabs or the FD’s teeth, or even gouges to the guide pieces, indicate that the LSD saw its share of abuse. If you suspect a piece is cracked (in particular the springs), hold it lightly and tap it with a wrench, screwdriver, or another piece. If it resonates like a bell or chime then it’s good. If it resonates poorly or sounds muted, it’s cracked...toss it. If you look very closely in that earlier pic showing the types of pieces, the SD has two little cracks at the 3 and 4 o’clock positions. Put springs in parallel Spring orientation matters. Some of the LSDs I’ve disassembled had the springs in series, like “()”, but you want them in parallel, like “))”. When Belleville springs are stacked in series, it only produces a spring load of one spring; in parallel, spring load is additive. To illustrate that concept: Series: Parallel: I speculate that Nissan may have used series to deliberately dumb down numbers, though I don’t know for what purpose beyond that. It could easily explain why the same configurations had grossly different specs (I don’t think the use of thick pieces alone explains those deltas). It may have just been another case where Nissan was slowing clearing out inventory before the next generation of trucks. Anyway, put the springs in parallel if they weren’t already. They should also be oriented so that concave side faces the side gear, like so: G1234567890123 GPDPDPDPDPDPSS #|O|O|O|O|O|)) Not: G1234567890123 GPDPDPDPDPDPSS #|O|O|O|O|O|(( "Triple Spring" Nissan only used spring configurations with 1 or 2 springs. I’ve done repacks with 3SS, which is 50% more stack compression. When doing this, a friction piece gets removed to keep 13 pieces in the stack. I’ve been removing a FD because in all applications where SS are used, an FP is next to them, like so: G1234567890123 GPDPDPDPDPPSSS #|O|O|O|O||))) This results in a 4FD, 6FP, 3SS setup with 9 friction surfaces. Notably, if you happen to have two of the weak 03-04 LSDs, they can be combined to make this setup, but you may end up having to use 1.4mm discs if they were used. Now, even though 3SS isn’t an OEM setup, it’s also technically not out of spec. The stack height remains with spec, though it might be debatable if the additional spring load is detrimental to the spider gears. Personally, I don’t think it will be, so we’re gonna send it. Keep in mind you can also run a series/parallel configuration like "())" if you need to scale back the spring load...but I know you won't be doing that. Shim it Several years ago, I tested a configuration of 5FD, 7FP, and 2SS (14 pieces for the mathematically challenged). All but one FP was 1.4mm, and the stack height barely exceeded the spec range (20.40mm vs. 20.25mm). The breakaway torque far exceeded what my “tool”—a torque wrench with an extension that had a calculated max of 350 ft-lbs—could measure. It would not recommend doing this setup. I have not tested any other shimming means, but technically you could either make shims from raw material, or by machining a friction piece to half-height (which a fellow NPORA’er did with positive results), provided you have access to the appropriate tooling. If a stack of nominal pieces is 19.5mm (13 x 1.5mm), and the max spec is 20.25mm, then a 0.75mm shim will max the stack. Note that for this stack measurement, the springs are not included, but will add 3.0mm (2x 1.5m) to the stack height and remain in spec. Clean everything This is a given. Get all the crud out. During assembly, everything should be lubed with new gear oil.2 points
-
Technical Objective The purpose of repacking is to increase the breakaway torque of the LSD, or the amount of torque required to rotate one side gear while the other remains stationary. I will use the following codes and symbols to describe stack configurations: This picture shows two different configurations: The top stack will be described as “5FD, 6FP, 2SS” and conveyed as: G1234567890123 GPDPDPDPDPDPSS #|O|O|O|O|O|() The bottom stack will be described as “2FD, 9FP, 2SS” and conveyed as: G1234567890123 GPDPDPPPPPPPSS #|O|O|||||||() The first row just indicates the piece position (1-13) relative to the side gear. I’m providing two conventions because some people might see one better than the other. All the springs will have the same code and symbol, but I will still describe them separately, making special notes about using them (in general, use SPs and SDs instead of SS if you have them). Note, too, there will be a distinction of spring orientation. Configurations will be described as a single stack. A typical stack consists of 11 friction pieces and 2 springs, or 13 pieces, so the LSD will then have 22 friction and 4 springs, or 26 total pieces. A breakdown of H233B (and some C200) configurations: This table is primarily of US-market models, compiled using publicly available FSM data. While it’s fairly comprehensive, it lacks data from international markets. It excludes Patrols because the 90+ LSD is completely different (similar in concept, though), despite still being H233B. Terrano and Navara owners can generally use Pathfinder and Hardbody/Frontier numbers, respectively, but expect possible differences (as noted by the 2002 Terrano), including the use of C200 axles in older applications. Terrano II owners are on their own, as I know nothing about them, but the numbers look extremely promising. Although many models also had C200 axles, those listings are omitted if the FSM does not indicate a LSD existed, or if it lacks specs for it (for example, 03-04 Xterra FSM lists an optional C200 LSD, but provides no specs, unlike the 03-04 Frontier FSM which does). The most obvious observation is that WD21/D21 trucks—and apparently Terrano R50 and II R20 (wtf, Nissan?)—got far better LSDs than 2003-04 trucks did. The ratings were attributed to the parts used, which is what the rest of the chart shows. Older configurations maximized friction, while newer configurations practically eliminated it. It’s also obvious that similar configurations produced dissimilar results, and dissimilar configurations produced similar results. Rather than try to justify what torque range is best, the real goal of this document is to make a unit that is presumptively “best” given all parts on hand. Since most people won’t have means to test the LSD, results will be entirely subjective anyway. From my experience, a basic repack using the “optimal” configuration has yielded around 140-160 ft-lbs, which is respectable given the parts used. I also ran a repacked unit testing around 165 ft-lbs and found it to be very streetable with off-road improvements, especially when it was paired with a front Lokka. From a starting-point perspective... Worst: 03-04 R50/WD22/D22, 02-03 QX4 These units require the most replacement pieces because of the spacers. It doesn’t make for a suitable donor in most cases, but since these would also likely come from lower-mileage trucks driven by grandmas, the parts probably see less wear than better units. However, two of these units yield enough parts to make a decent setup discussed later—something to consider if that’s all you can get your hands on. Meh: 01-02 R50, 97-01.5 QX4 By having 18 total FPs, it means that 12 are “unused” because they are stacked consecutively and no friction occurs between them, just compression. These units make for good donors because of the unused pieces, but not good starting points because they need FDs to replace FPs. OK: 96-00 R50 This is close to the optimal setup but needs 2x SS to replace 2x FDs Good: 01-02 D22, 00-02 WD22 This is the optimal configuration, but with any donor LSD you can replace any thin pieces with thicker ones. Best: 90-95 WD21 or D21 This is the optimal configuration, but due to age and mileage it’s unlikely they still hit stock specs. They are best starting points because of the potential for having thicker pieces, plus SPs and SDs (those provide friction and load). A 01-02 R50 donor is ideal for this.2 points
-
LSD 101 The H233B clutch-based LSD uses plates, discs, and springs to create friction—the product of surface area, surface composition, and compression. Those pieces are shown below: Top row, L-R: friction plate guides; friction plate; friction disc Bottom row, L-R: spring plate; spring disc Plate pieces have exterior tabs to stay stationary to the carrier, while disc pieces have internal teeth to fit the side gears. The springs are large Belleville washers. Older LSDs had spring plates with tabs (not shown) and spring discs (bottom right), and used longer guides (not shown). Both springs were replaced with ones lacking tab or teeth features (bottom left), but were still called “spring plates”; shorter guides (top left) were used. The guides prevent the tabs of the plates from digging into the cast of the carrier. The friction pieces have grooved patterns in them to build friction and channel gear oil. The nominal thickness of each piece is 1.5mm, with “adjusting” pieces of 1.4mm and 1.6mm to bring the clutch pack height or breakaway torque into spec. The springs are all 1.5mm nominal. Newer LSD configurations use a spacer that occupies the space of 4 pieces, or 6.0mm, but has no friction-adding properties. Just a big, dumb spacer that probably saved Nissan a fortune. Each configuration describes how many of each piece is in the clutch pack (henceforth, “stack”); alternating plate and disc pieces create friction. The side gear fits into the stack, and two identical stacks are used. The LSD carrier, or “differential case”, has two halves: “Case A” is on the pinion gear side, and “Case B” with the ring gear. The stacks and side gears fit into the cases, and a pinion mate shaft (“cross shaft”) with pinion mate gears (“spider gears”) is situated in between. Eight bolts draw the cases together, causing the springs to compress the stacks. “Slip” is basically the ability for one side gear to rotate independently from the other. LSDs work by applying pressure to the side and spider gears, which reduces their tendency to rotate. It’s “limited” because it will proportion torque 50/50 to both axles until the breakaway torque of the stacks is met, at which point it quickly begins to act like an open diff until the applied torque returns to below the breakaway torque. Torque always takes the path of least resistance. That’s why open diffs suck for off-roading: once a tire slips, 100% of the torque goes to that tire. That’s also the principle behind the LSD-check tests described earlier: you’re checking for resistance that prevents the side gears from rotating separately. Even a worn LSD will exhibit some resistance. An open diff will completely lack resistance and spin parts with ease. Nissan notables With the exception of ~1990-up Patrol LSDs, H233B, C200, and H190 LSD clutch pieces interchange The splining on 31-spline C200 and H233B are identical. The splining on 29-spline C200 and R200A are identical. The carrier dimensions on C200 and R200A are identical. You can use a 29-spline C200 LSD in R200A front axle. 31-spline and 33-spline LSD differentials are dimensionally identical, differing only by the side and spider gears. 31-spline differentials (open or LSDs) have thrust blocks if the axle shafts use single-cone bearings; trucks with dual-cone bearings don’t use thrust blocks. 31-spline H233B differentials up to the mid 1980’s used 10mm ring gear bolts. They cannot be used with 12mm ring gears because the 10mm holes are slightly farther away from the center, but the 3rd members interchange if two of the studs are removed (9-stud vs 11-stud). Some H233B have their ABS sensor on the 3rd member snout, behind the pinion flange, while others have sensors on the axle tubes with tone rings on the axle shafts. The length of the 3rd members, from pinion flange face to the diff mounting surface, is the same for all units. If your truck has the sensors on the axle tubes, then either style 3rd member will work (the snout sensor just remains unplugged). If yours has the snout sensor, then you need to reuse your housing, or find a suitable 3rd member if swapping it in. Prior to disassembling the carrier, check for “match marks” on the carrier halves. Since these pieces are machined together, they should be reassembled together in the same orientation. The marks may be faint or incomplete, but you can make new marks (if using paint, be mindful not to clean the marks off before assembly). The ring gear does not need to be removed to repack the LSD.2 points
-
This is for anyone wanting to “repack” their H233B clutch-based limited-slip differential (LSD). It applies to C200 and H190A LSDs, too. It does not apply to other Nissan/Infiniti RWD/AWD diffs, such as the viscous LSD in R200V. It won’t cover the specific how-to’s of differential removal, setup, or installation, but will cover the basic assembly process. (I’ll answer any questions related to those topics, though.) All specific information (instructions, service data, torque specs, etc.) is in the “Propeller Shaft and Differential Carrier” (PD) chapter of the Factory Service Manual (FSM), and I’ll expect you to read it; there’s a section specifically for H233B LSDs. FSMs are available at https://www.nicoclub.com/nissan-service-manuals. Table of Contents LSD 101 Technical Objective Repacking Assembly Testing Some Q&A first... Do you have a LSD? With very few exceptions, LSDs were not standard equipment. You probably have one if: There’s an orange sticker with “LSD OIL” verbiage on the backside of the axle’s diff hump. Any of these test conditions are true (if there’s no distinguishable resistance, or if test #3 is false, then it’s an open diff): Transmission in neutral, one tire off the ground, spin the tire slowly; there’s resistance before the driveshaft rotates. Transmission in park/gear, both tires off the ground, spin one tire slowly; there’s resistance before the other tire spins in the opposite direction. Transmission in neutral, both tires off the ground, spin one tire slowly; the other tire spins in the same direction while the driveshaft rotates You’re cool enough to have the window sticker and it lists it. I shouldn’t have to mention to chock the front wheels and disengage the parking brake when testing, but there it is. What LSD configuration do you have? This boils down to “what truck do you have?”, since it’ll determine what configuration you have, what improvements can be made, and which parts/donors will help the most. What if you have an open diff but want LSD? You’ll need the entire LSD carrier from a truck with the same spline count. You don’t “need” the entire 3rd member, just the carrier, unless it’s got the gears you want. In most cases, the entire 3rd is easier to obtain. What donor trucks can you use? Pieces can come from any 2004 or older LSD, except Patrols. You should mainly limit this search to only WD21, D21, 00-02 Xterra, and 01-02 Frontiers. If you already have an LSD, the spline count on the donor is irrelevant. What’s your budget? Expect to pay $75-$500 for LSD carriers or complete 3rd members from local junkyards or eBay. If you want new OE pieces, some are still out there for $40-$50/ea (and you typically buy in pairs), but Nissan has discontinued the pieces. There are also other costs (fluids/oils, gaskets, seals, bearings, tools, etc.). Are you considering a gear swap? Make that decision since you’ll have the 3rd member down and apart. For R50 owners, you can get 01-02 Frontier or Xterra rear diffs with the same 4.363 and 4.636 gears and a desirable LSD configuration, but you’ll still need to find a 96-00 R50 to get the front gears if going to 4.636. All H233B 3rd members can be swapped to any other H233B axle housing, as long as the number of mounting studs and splines are the same. What’s your mechanical aptitude? Dropping the differential can be done with hand tools in an hour or so, provided no issues with hardware or rust. It’s a 70lb chunk of metal, so don’t drop it on your face. Rebuilding a diff can also be done with hand tools, but there are some specialty tools and knowledge required. Disregarding certain steps of the process can lead to noise and possibly failure. However, it’s highly unlikely you’ll find a shop willing to do this work, including 4wd and differential shops that do gears all day long. Don’t let those Jeep shops touch your truck; they’ll just fskc everything up, I promise. A Nissan dealerhip probably won’t do this work, either (at least not to the specificity discussed here). Consider this a DIY or HAFDIFY (have a friend do it for you) job. Is it difficult? On a scale of 1-10, I’ll put it around 7. It’s probably an all-day task for the average Joe/Jane, on par with changing out a timing belt or chain. The advantage is you can do much of the work on a bench, but the disadvantages are needing some specialty tools and the smell of gear oil. The job also involves bleeding the brakes, among other basic wrenching tasks. Is it worth it? If you off-road, yes. Even a weak LSD is better than an open diff any day. It’s not a locker (I don’t care what you or Nissan calls it—it’s not a locker), but it’ll act like one until it can’t. Although this guide is geared for off-road use, a moderate rebuild would do well on the street. It’s more affordable than a locker...however, requires as much work as installing one. So, if you’re on the bubble and the price of a locker is within reach, and you want max traction, consider getting an actual locker.1 point
-
That turned out nice - looks perfect for your usage1 point
-
1st test, Lokka Talk: Here's an obstacle that has stumped me twice before by either getting hung up on my sliders or rocker panels. You pick either the rock on the left side or the right side to pivot/bottom out on, and proceed from there. I have a sneaking suspicsion that the obstacle has been rearranged since last summer, but I also got stuck on it in March, and its less likely the rocks have been changed since then. The first time I got hung up in June 2019- I'm a tire rotation away from obliterating my driver rocker panel: The vehicle ends up coming up and over the rocks with the front tires lifting and dropping at seperate times. On open diffs, this obstacle generally wasn't possible for me. We managed to get @micahfelker through without damage, but I couldn't replicate the feat. Adding sliders just meant I got stuck sooner w/o any risk for body damage. With the lokka however, it's a different obstacle. I crawled over this (unspotted) in one slow but succinct motion, pivoting on the passenger slider throughout most of the motion. Sure, if I had the stones I could probably throttle and bump my way up it, but I'd take the lokka over that any day. My sliders are more useful now too-they don't just protect, but they actually now can slide over rocks in certain situations. There are still plenty of ways to get this thing stuck, bottomed out, and immobilized, but I think the lokka will prove to be a worthy upgrade. Steering: It's affected by adding a lokka, don't get me wrong on that. I found that it depended pretty predictably on the terrain and to what extent you had the drivetrain engaged. Obvioulsy, with hubs unlocked you can't feel it. 2WD w/ hubs locked has practically zero change in steering on most surfaces, including pavement and hard packed dirt. Little to no self centering. 4WD High/Lo: Noticeable self centering/resistance in steering. In a ~2hr test run with it, the self centering didn't really let up or lighten much while in 4WD. It's 100% driveable, but its also 100% different than an open diff. The more torque you supply the lokka with (and the less traction/grip a certain surface has), the stronger the steering will get. So, in between obstacles I coasted through turns and supplied throttle on straightaways, and that made it totally driveable. Or if you're in 4HI, popping it in to 2HI works as well. I also wouldn't try to drive super fast in 4WD. The steering got the worst when I decided to try a U-turn on a trail only slightly wider than my vehicle while still in 4LO. It was fairly sandy, and I could immediately tell that my turning radius was diminished under those circumstances. The steering wheel was pretty heavy at full lock, and in the sand (with all the torque available in that gear), the vehicle plows forward through sand as it turns. It turned a ~2.5 point turn into a solid 3-4 point turn. So, if you were in a dire situation I could see how the lokka might put someone at a disadvantage. I was just goofing off and could've put it in 2HI if I was trying to turn as quickly as possible. A little long-winded, but I wanted to give a thorough idea of how it's gone so far and what changes I've noticed. I'll revise any of the above statements as I get used to the lokka, these are just my first impressions. For me personally, I'd call the first test a success. I couldn't necessarily "feel" the LSD, maybe I'll have to test it out in 2WD. 4.6's are good, and the low end torque is nice for all things dirt and rock.1 point
-
Technically yesterday but installed my locker finally. Nobody told me how heavy this thing was gonna be [emoji23] In the process though I found that one brake cable is stuck in the backing plate and my driver side hard line twisted off Sent from my SM-G965U using Tapatalk1 point
-
My 02 QX4 did, however it never worked when I owned it, and it was only 13 years old when it got to me. I've seen a couple with them since, but the standard antennas seem far more common.1 point
-
I got the water valve replaced, fuel injection back on, some rain and the day running out I quit for today, I'll finish putting intake back on in the morning. If that doesn't do it the only thing left is a radiator or waterpump. Sucks to have to do all this when I could be working on mine. So while we waited on a radiator to arive I went ahead and flushed the coolant system. Didn't remedy the problem, but the new radiator did! Thanks for the help! The way I see it, everything else was prevented maintenance, to include power valve screws, pcv, and cleaned the maf & TB.1 point
-
Well, I did your collective advice and used the tie-down hooks as my base. Really surprised how beefy those things were considering. Anyway, I did not weld (because I don't have one but was this close to going to HB to buy a flux welder). I bought four 1/2 inch fine thread bolts (3.5 inches long). I just used a stack of washers along with the bolt through the tie down base to secure the bar, and used the same bolts to secure the hitch (I could have used 1/2 inch shorter bolts but eh). I installed my makeshift Yakima bike holder (probably weighs 40-50 lbs total),stood up on the end (I weigh 150 lbs) and tried to impart some downward motion and it did not flex. I then test drove around with my 30 lb bike and the bike looked solidly held. It's 11 inches to the lowest point (for reference, the diff pumpkin was 8.5 inches). I say it's good. Thanks for all the help! https://www.pinkbike.com/photo/18743859/ https://www.pinkbike.com/photo/18743858/ https://www.pinkbike.com/photo/18743857/ https://www.pinkbike.com/photo/18743856/1 point
-
Double post1 point
-
Replaced the transmission mount. After test driving it is confirmed that literally all of my cabin vibrations were coming from the broken mount... thought it was my tires. Sent from my iPhone using Tapatalk Pro1 point
-
@mjotrainbrain ‘s QX41 point
-
Install video. Not perfect, but hopefully it gives good insight into the process. Its ultimately only a guide, but I followed Lokka + FSM instructions pretty tightly.1 point
-
I completely agree with you! Desert rat is a great company. I live here in Az and have been into their shop several times and their great guys. Never had a bad experience with them. I’d honestly rather use OME coils from them with a half-1 inch spacer over 4x41 point
-
I think you’d be hard pressed to find many who “like” AC. The relabelling of brands, hiding brand identity & the shipping leave a bad taste. I tried to limit myself to one painful purchase as I couldn’t find some of the poly bushings elsewhere. Their deliveries arrive in a package with the real cost of shipping on the outside - it lets know just how much they overcharged you. Absolutely no reason to buy ARB OME from them at all. Personally, I’d buy from Desert Rat out of AZ (free shipping/no tax/good reputation). My local 4WheelParts manager simply matched them by discounting to essentially a “no tax” purchase (my only 4WP purchase).1 point
-
That area is likely meant to collapse in an accident - it is not a crossframe member like it would be in a body on frame truck. The best indicator of this I can recall is when [mention=40912]KiwiTerrano[/mention] (I think) crushed his just by trying to bridle using his two front recovery points. A real front receiver will require some kind of bumper bracket - I was trying to get@hawairish to incorporate one into his - though I think that project has been set aside.1 point
-
The ARB OME HD are engineered springs from an excellent offroad manufacturer. I would argue that they are the top of the line spring for the truck. You will definitely have a more palatable ride. I would look at @02_Pathy / theblackpathfinder [iG] prior to his PTSO SFD for an optimal 2” lift build. That truck was just about perfect - his SFD is fun but was not necessary. Personally, I would try it without the spacer first. You might find you like a little rake - especially if it levels out when loaded. [mention=37543]TowndawgR50[/mention] bypassed his OEM cooler but we live in a temperate climate. He notes it can take a but to warm up when it’s cold out.1 point
-
Swapped out my 95 factory console for a 99 console.uca frame bolts haven't moved since they spoke japanese,but trying to get at the bushings. My camber is way off..centerlink patiently waiting.1 point
-
Some updates on a project that’s been a while in the undertaking. First, big thanks to the behind-the-scenes guys who had done this before and could point me in the right direction. Donors: Front: 96 R50 HG46 Front diff. All R50 diffs will work, nothing else will fit. Rear: 00-Xterra HG46 LSD- all 00-02’s have factory break way torque of 140-180 ft lbs if equipped with LSD. This is the highest breakaway direct swap OEM LSD setup available to us. I’ve yet to see an HG43 LSD and cannot confirm or deny their existence. Lokka: it set up just about perfectly on the first try. Symmetrical around the cross shaft, and acceptable inter cam clearance. Upon jack stand test and test drive, everything seems to lock/unlock fine. I have loads of footage to sort through in what I hope will be a thorough and well done install guide. I ordered diff adjusting shims from China, they’ve yet to show and will be available for cheap if they ever show up. They are NLA from Nissan. Hoisting the respective diffs: it can be done solo, but bring lots of jacks and patience. Everything you see is direct bolt-on swap. If both diffs are in good working condition, they’ll work just as good in your vehicle as they did in the vehicle they were pulled from. The lokka is designed specifically to be set up by DIY mechanics not unlike myself. An in spec diff will still be in spec after installing the lokka, as long as you put back everything the way you found it. lots of punch marks, labeled bags, etc required. Special tools will be required such as roll pin punches and feeler gauges as well as an angle-torque gauge (please please please use an FSM while doing this stuff. Find them by googling them and clicking on the nicoclub link) The 4.6’s seem to pull good, I’ve only logged a short 4 mile jaunt on them so far. Better gas pedal response as you start from a stop and continue to accelerate. It seems like the engine isn’t screaming for power at 3k quite the way it used to. No Offroad testing yet.1 point
-
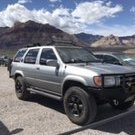
Took a quick trip up to some public land to burn some ammo and get the tires off the pavement for a bit. Beautiful day1 point
-
Hello everyone, the lock down has allowed to do surprising thing... I had my old pathy was parked for too long and this is what I have done so far.1 point
-
I hooked my cooler up in line with the stock one. Unless you're working with an R51 (they had crap coolers that broke and dumped coolant into the transmission), or you've had a trans fail and fill the stock cooler with gunk and you don't want to replace the rad, I'd leave it in.1 point
-
Hello and welcome to NPORA. I'll try to answer some of your questions. Your rear differential should have a sticker on it telling if it's a LSD. I recently installed an OME lift using their HD front springs and MD rear. I used KYB GR-2 front struts (p/n 335015 and 335016) and Bilstein 5100 series shocks(p/n 24-185509). If you use the "trim packers" as suggested you'll need to replace the bolts on the top mounting plate with longer ones. I made that mistake and I'm eventually going to have to replace them. You might also check your sway bar bushings, end links and steering rack bushings if you have any oil leaks at all. Those bushings catch the oil and it deteriorates them. Replace with polyurethane if you can. I hope this helps.1 point