
- Sign In Changes: You now need to sign in using the email address associated with your account, combined with your current password. Using your display name and password is no longer supported.
- If you are currently trying to register, are not receiving the validation email, and are using an Outlook, Hotmail or Yahoo domain email address, please change your email address to something other than those (or temporary email providers). These domains are known to have problems delivering emails from the community.
Leaderboard

Popular Content
Showing content with the highest reputation on 05/15/2019 in all areas
-
Any decent shop should have no problem doing an inspection and rebuild on an H233 axle. They are actually quite easy to work on, but failures are also very rare since they are a very robust axle. You might want to check the transmission mount and motor mounts. A broken mount will cause noises like you are getting. Very common to have the trans mount break on a Titan and it will make a clunk. Replaced more than a few while I was working at the dealership.1 point
-
Oh then I must've misunderstood when I read it a couple years back lol. Well hopefully I don't need to replace the valve covers anytime soon hahaha Sent from my SM-G960U using Tapatalk1 point
-
Shoulda tried to score some of the aluminum covers to replace with so you can service the spark plug seals in the future1 point
-
Thank you! That gives me something to work with. I'm building mine from scratch and wasn't exactly sure how to go about mounting it.1 point
-
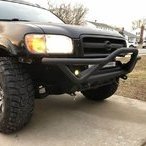
Well, after giving the feedback/criticism some thought, I decided to pull the winch back off and add some reinforcement to the winch and fairlead mount. I’m sure it still isn’t the best design, but I do feel a lot better about this being able to spread the load out across more of the bumper. I was going for a minimalist design at first, but I agree it was a bit too minimalist.... Sent from my iPhone using Tapatalk1 point
-
Went to my local Pull-A-Part today and stocked up on some much-needed r50 supplies. Also grabbed some Hella Saab relays some Nissan's as well. Didn't know Hella made relays for Saab do now. Got some switches out of a 97 Mitsubishi Montero. Exact same switches Nissan uses(Niles) just slight differences. They fit perfectly. Also picked up some rear glass hinges and the rubber that sits on the bottom. Boost sensor, and 2 other emission sensors(cant think of the names) ashtray light,clock, cam sensor, diode and rear hatch bumpers. All in all a great trip. Sent from my SM-S737TL using Tapatalk1 point
-
Sorry I never saw this comment. For the thread, I used Valspar Color Radiance in flat black. I got it at Lowe's but I don't think they sell it any longer. I painted another set of wheels with Majic Tractor, Truck and Implement enamel from Tractor Supply. I'm happy with the results but that paint took FOREVER to dry.1 point
-
Just out in the woods playin. Sent from my iPhone using Tapatalk1 point
-
Had someone walk up and offer me another one! Apparently she's got a '91, manual trans, new tires, couple of electrical gremlins. Sounded like the mileage was pretty low. $1k. It's out of my budget at the moment but if any of you are interested, let me know. I was just amused that WD21s are old enough to be conversation starters now.1 point
-
got the 40s mounted. Sorry in advance if the picture is rotated. I have no idea how to upload pictures here. I have to use other websites to upload bc this site has a tiny size limit when directly adding pictures. I use a third party that makes the picture into a link, and the link shows up as a picture.1 point
-
.....and the fun begins. Sent from my iPhone using Tapatalk1 point
-
First Nissan Build Advice. Hello NPORA, I'll admit I have been stocking this forum from the shadows of the internet and decided today was the day to join. I also understand that my questions have most likely been asked and answered at least a dozen times so don't hesitate to point me to an existing thread. About a year ago I picked up my first 4x4, an 02 SE, automatic with 117k on it at the time of purchase. I've offroaded a few times in my uncle's 3rd gen 4runner and '85 Landcruiser but have not had the opportunity to have a rig of my own until now. First Impressions: On the highway, the Pathfinder is a rocket ship compared to the 4runners. Even while driving at elevation the Pathfinder still out performed the 4runner climbing mountain roads. I'm 'whipped for the VQ35de. Harsh winters are common here in Nebraska and the Pathfinder handled the snow/ice this year without a hiccup. With harsh winters comes the salt on the roads. The amount of rust on the undercarriage is not terrible given the vehicle has been in the southeastern part of Nebraska its entire life. However, the plastic fender flares are packed with dirt and also trapped a lot of moisture causing some rust on the body around the wheel wells. Poor design, IMO. (see attached photo) Overall, I'm highly satisfied with my purchase and can't wait to get started on making it my own overlander. Question 1: Has anyone here ever coated the bottom half of the body with bed liner? How did it turn out? Do you regret the decision? I plan on removing the flares, cutting out the rust and trimming the well up to fit 31's and coating the bottom 1/4 or so of the body with bedliner to prevent further rusting. Question 2: Has anyone here ever installed an air locker or e locker for either of their diffs? Which brand/model did you go with and why? Have you experienced any problems with the vehicle since installing the locker? Thanks for taking the time to read and respond. Send me your thoughts and suggestions. Thanks!1 point
-
Haven't been doing the picture taking I had planned on in the process of getting my poor old 93 back to drivable on public roads condition. The last 3.5 years of sitting out in the back yard has done nothing good to my truck. So far I have replaced 3 ball joints (tomorrow gets the left lower and questionable right upper replaced along with the tierods), idler arm mount and bushings (I have the steering upgrade), replaced rear shocks with a pair of Bilsteins from a Titan pro4x. Replaced the damaged headlights with some I had found a few years ago in a salvage yard. Replaced the headlight bulbs with a set of LED bulbs and decided I didn't need to build a headlight harness after all, those lights are white and bright. Seem to have a good pattern also. Took the old Hella 500's off and put a 20" 3 row LED light bar on in their place. Cleaned out the wiring mess of the last 20 years and got most of it cleaned up and sorted out. Have a bit more to do there, but am burned out on the wiring for now. Going to take a break from that for a few days and get other stuff done. Removed the ignition lock assembly and installed a cheap push button starting system a friend gave me. It is working better than I expected, and in that process, cleaned out a lot of added wiring and the remote start security system I put in about 15 years ago that was a bit temperamental. Finally decided to take a shot at swapping the HVAC control head and stereo locations. That project was a miserable bugger that is still needing some tweaks. However, I do like having the stereo up just under the center vents much better. Did LED bulbs swapped into the map lights, after 26 years the bulbs finally died. Did a LED panel upgrade in the center dome light that is very bright. My cargo bay light has rotted to dust(so much for the idea that plastic lasts for a thousand years bs) and finally found one that is just a little bigger but will fit in its place. Have to Fab a mounting plate for it. Added 4 high current USB charging ports and a 12V outlet to the center console. Replaced the in-track vent visors that never worked right with a set of Wade low profile visors I found on Amazon for $18. Figured at that price, I couldn't loose. Things still on the short list to get done is replace the broken muffler, get it cleaned up, get the replacement foglights and turn signals in, replace the tires when I can find an extra $1k for those, replace all 10 rear suspension bushings (again, sigh). And finish the wiring. Hopefully in another couple weeks, I will get the registration renewed and be able to drive it legally again. All fun and games in my limited spare time and as I manage to squeeze out a little extra money for the repairs and upgrades. Also need to find a practical way to post what few pictures I have taken in this project. Nothing has gone simple or easy. I managed to bend the new right upper balljoint and suspect the other new one I replaced it with is starting to bend as well. Never saw one bend like this before and didn't think it was possible, but I did it somehow.1 point
-
The seats in my 97 QX4 leather of course are not in the best of shape. The driver seat 45% is by far the worst, passenger 75% back seats 85%. Had some extra cloth seats that I got out of a 2001 Pathfinder taking up space so I refurbished them and I'm going to put them in my QX4. I will be getting rid of the heated seats. As some of you know the heated seats in these old R50s don't work quite well I don't use them much anyway. Sent from my SM-S737TL using Tapatalk1 point
-
Thank you for your patience everyone! We're excited to make a few important announcements... First, our company name: Pines to Spines Off Road. Affectionately "PSO" in our regular discussions, the name refers to the regions we call home and the challenges in between that inspire us to design and build our rigs to tackle all terrains. Our primary goal is to provide a comprehensive line of products that focuses on design, function, and quality. Since our product line will come from two locations depending on our fabrication processes, we also couldn't proceed without proper facility names: the "Tiger Mountain Test Lab" in WA, and the "Spines Fab Lab" in AZ. By both combining and splitting the production, we're able to make solid use of our respective areas of expertise and assets. Second, our SFD components. Let's step backwards for a moment, though: we know there are "kits" (pieces?) out there. Everything we've seen is based on antiquated prints that have been floating around the internet for years, with very basic designs, zero improvement, limited tooling access, and little assurance that the alignment issues are addressed. The design got folks down the road, but many have experienced problems with fabrication quality or alignment issues. The original kits were also intended for a specific outcome (either 4" to 6" of lift), and potentially required removal of prior upgrades; even that company got out of the game for some reason. Fast-forward to now, and we're addressing all those points. Our SFD solution is modular and bolt-on, backed by CAD and CNC equipment to produce consistent and efficient results. Our SFD "kit" is actually multiple kits, including a non-SFD lift option! We'll be offering 1.75", 3", and 4" strut spacers, all of which feature camber adjustment, and pairing those with 3" and 4" SFD kits. This allows us to cater to practically any desired setup! The 1.75" base spacer can be used without a subframe drop, or combined with OME or AC springs and 3" SFD to produce something more moderate. The base spacer is also the heart of our 3" and 4" strut spacers, so upgrading later is easy. None of the spacers require strut disassembly, and because they are two-piece spacers, installation is as simple as attaching one part to the strut, the other part to the chassis, and then bringing the two together. All materials meet or exceed OE specs with grade 10.9 metric hardware, 1/4" plate for the strut components and subframe risers with 3/16" plate for the motor mounts. Shown above are the unfinished prototype 3" and 4" motor mount spacers, the 4" strut spacer demonstrating full camber offset, and the upper mounting plate for use as a 1.75" spacers. These are fresh from the plasma table and press break processes this past weekend with a quick mock-up to validate core assembly so they have not been welded yet. We are still prototyping, using our personal rigs and a 3rd vehicle--an 03 Pathfinder LE (a.k.a., The Gambler) that @ferrariowner123 graciously sent our way! This rig will be fitted with all of our gear and serve as demo vehicle and eventually participate in the Washington State Gambler 500! Soon after, we'll be working with several local NPORA members (our "Piners & Spiners" Team) to personally install the first batch, among other things we've already been field testing. We are very grateful to these folks for the support and a chance to provide real-world feedback to further improve our products. We have also been eagerly developing other products we hope to offer in the near future: · static and adjustable rear control arms and panhard bars · polyurethane motor mounts · swing-gate installation kits · roof-rail mounting system for roof baskets, lighting, storage, etc. We are excited for the coming months as things roll out and our products get put to the test. Going forward we ask that all posts to this thread stay on topic with questions and comments pertaining only to our offered products and services. Stay tuned for up to date progress and product release dates!1 point
-
One important thing about #1 that I forgot to mention is that the rear of the chassis is also supported by jack stands. That is, you need 4 jack stands and a good floor jack to do this. In the first pic, the red jack stand set is used for supporting and pivoting the axle, but there's also a silver jack stand set (the driver's side one is just visible over the floor jack) that the truck is resting on them. Amended (clarified) instructions: 1. Lift the rear of the truck and use jack stands to support the rear chassis. There are oval-ish jack/support pads under the rear passenger doors on the unibody rail. Height of the truck depends on your jack stands...lift as high as possible, reasonable, and safe. I've used blocks to gain a few more inches to my basic 2-ton stands (it becomes especially helpful if installing lift springs and/or spacers). A proper floor jack (2.5-ton+) is capable of lifting the entire rear of the truck just by placing the jack directly under the rear diff. 2. With chassis supported, lift the rear axle and support both sides with jack stands on their highest setting. Position the jack stands under the lower spring perches, leaving enough room for your jack between the jackstand and axle end. 3. Remove the tires 4. Disconnect the shocks at the bottom, or remove them altogether. 5. Place your floor jack near the end of the axle. Lift the axle up enough to clear the jack stand, then remove the jack stand from the area. 6. Slowly lower the jack, allowing the axle to pivot on the opposite jack stand. Watch for line stretch if applicable. 7. As the end of the axle gets lower, the spring will decompress, and eventually loosen in the seat 8. When the axle is as low as reasonable, you should be able to lift the spring up to clear the lower perch, then tilt the bottom out and slide the spring down off the bump stop. (In my pic, the axle is resting on the drum, but that hasn't always been necessary if you can get the chassis supported high enough.) 9. Re-use the rubber spring pieces and install the new spring and/or spacers by reversing step #8. 10. Lift the end of the axle with the jack until axle, put the jack stand from step #5 back in place, and lower the axle onto the jack stand. 11. Repeat steps 5-10 on the other side of the axle. 12. Once both springs are in, reconnect/install the shocks, put the tires back on, and lift the truck off all 4 jack stands.1 point



.thumb.jpg.25b244d5d65b03c239febbd2654162e5.jpg)

