- Sign In Changes: You now need to sign in using the email address associated with your account, combined with your current password. Using your display name and password is no longer supported.
- If you are currently trying to register, are not receiving the validation email, and are using an Outlook, Hotmail or Yahoo domain email address, please change your email address to something other than those (or temporary email providers). These domains are known to have problems delivering emails from the community.
Leaderboard


Popular Content
Showing content with the highest reputation on 01/22/2019 in all areas
-
AC springs vs stock3 points
-
Wow, looks great! Really aggressive sidewall on those Wildpeaks, are they the load range E? I've heard the sidewall on those has a more aggressive tread than range C.3 points
-
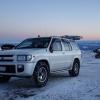
New wheels and tires. Really happy with how it turned out. 32x11.5r15 Falken Wildpeaks on DX4 Gear wheels (15x8 -19mm)3 points
-
Sent from my iPhone using Tapatalk2 points
-
mjotrainbrain volunteered to manage the Truck of the Month section 14 months ago and has done a great job handling it. Tonight I'm happy to announce that in addition to the TOTM section he has decided to become a full forum-wide Moderator as a member of the Mod Team! Please join me in welcoming him to his new position.1 point
-
Nope, that’s very similar to my rear WAAG bar. The dip on the lower bar looks like the WAAG rear bar for the XTerra- this company may have just modified it for the R50. I note, however, that this version doesn’t appear to be a solid piece all the way to the frame like mine is. Beware, the front & rear bumpers have very different profiles - the rear is much more straight.1 point
-
I don’t know if you can get it off with the door closed1 point
-
If you live anywhere near the northeastern end of the country, I have a whole Pathfinder with a mint and tight engine and drivetrain. IF you want to hop the border and pick it up!1 point
-
In mjotrainbrains pic Sent from my iPhone using Tapatalk1 point
-
Yes! I don’t want anything too big I just would like something that would attach to the plastic like the one in the pic Sent from my iPhone using Tapatalk1 point
-
Ok, thanks. I'm thinking personally I'll be going with E just because I'm paranoid about tire punctures in the woods.1 point
-
Definitely some clean looking rides over there, but the one in this link incorrectly lists it as having the 3.5. The 3.5 didn't come into play until 2001.1 point
-
I’m new to the forum, friends with@joshrichard , this is my Buttercup Sent from my iPhone using Tapatalk1 point
-
Welcome! Nice ride!1 point
-
Looks incredible! Really makes me wish I had gone up another inch & went with 32's. Oh well, I am loving my new AT3W's though!1 point
-
Welcome!! Literally just an FYI (it’s my OCD, the meds just aren’t working) fair·ing /ˈferiNG/ noun - an external metal or plastic structure added to increase streamlining and reduce drag, especially on a high-performance car, motorcycle, boat, or aircraft.1 point
-
There's plenty of wreckers around the country, I'm sure it wouldn't be difficult to locate a clean set. Shipping it would be a right pr*ck though...1 point
-
Sprayed the linkage and it loosened right up.1 point
-
I've heard of headlights popping bulbs like that. Makes sense that a tail light would do the same. I did a similar fix on a friend's Yota years ago, except we couldn't be arsed to remove the housing, so we just drilled a little hole through the lens to let the blinker fluid out. Hers didn't pop bulbs that I remember, but it sure looked funny following her at night watching the tail light slosh. As for how the water gets in, I had a headlight start fogging up a while ago, and found that the seam between the glass and the housing was leaking. I dried it out, covered the seam with JB weld, and put it back together. It hasn't fogged since! Nice!1 point
-
I have never seen this before but posting it for anyone else who ever has this problem. The right side tail/brake light bulb blows a day or two after replacing it. I thought it had to be a short somewhere but the left side never had a problem. Thinking maybe it was in the light socket I pulled the tail light assembly to check it out. When the assembly was in hand I kept hearing a rattle that sounded like something loose in the assembly. I couldn't find it on the exterior so proceeded to pull the tail/brake light socket out of the assembly and found that the lower cavity was half full of water. For some reason the water could get in but could not drain out. As the water would slosh around and hit the hot lit tail light it would blow the bulb. SOLUTION: I drained the water from the cavity through the light socket hole then drilled an 1/8 inch hole in the bottom of the tail light assembly that will allow water to drain if it gets there in the future. I don't like to drill holes where they don't belong but sometimes it is a good solution to an expensive or unsightly alternative. I hope this can help someone having this problem in the future. Good luck & happy wheeling. BTW the 3.3 engine swap is successful and running great.1 point
-
Mine wasn’t too bad, but I did remove the torsion rod so that I could turn the nut on the control arm easier. Ordering the parts this week, hopefully get to replacing everything by the end of the month and I will report back. Sent from my iPhone using Tapatalk1 point
-
Ill do some more research and talk to my transmission guy to see what options I have. As far as mods really all I have done is removed under fender box and removed silencers on stock intake tube. Drop in K&N cut stock boot to accept smooth tube. Had an engine clatter at 98K found I was missing 2 screws on the power valves and 2 others loose. The plates were chattering in the intake sounded bad like I broke the timing tensioner. So I removed those upper plates all together and spent some time doing some intake smoothing to some of the surfaces. Raised my stock MASS air meter about half an inch out of the intake tube. Removed the secondary resonators after the primary cats left it 2 into 1 muffler delete into a single magnaflow muffler straight out the back. Thought I would get a lean bank condition after doing exhaust with the Mass air lifted but did not and have put about 5k miles on it. Other than that took off roof rack and step bars. Next up is NWP intake spacers if anyone is interested the guy has tested a couple for our intakes. I plan on ordering a set soon along with 75MM throttle body which will work. Need to email him and let him know what you have and how to order as they have nothing listed online for the pathfinder. I would not bother if you guys don't see upper RPMs much as the throttle body helps a little in mid range but mostly above 5K rpm. Tried to find someone local with a Consult 2 to raise my timing 2 degrees but all 4 dealers do not have one. Most likely will wait and see how it reacts to the larger throttle body and intake spacers. I found a guy about 4 hours from me that can and will custom tune it for me. Ive had a couple of smaller Nissan vehicles but never a Pathfinder. Bought this one as a cheep run around vehicle with 96K a year ago old lady owned it from new. After I cleaned it up started playing around with it I really like the old girl. Being a car guy cant leave nothing alone and was very shocked with a few little tweaks this little motor rips. My 2013 Durango RT has corsa exhaust and CAI but enjoy driving my pathfinder more....1 point
-
Man, that would be insane! Even with the lifters removed(which are hydraulic), the cams are still not going to move. The tension is going to change continuesly. Thats why you set the tension as I described. The factory manual wants you to set the tension with a pull gauge, but 10 years of doing timing belts, this is the easiest way to do it. And, I have never heard of that procedure before! What a gigantic pain that would be.1 point