
- Sign In Changes: You now need to sign in using the email address associated with your account, combined with your current password. Using your display name and password is no longer supported.
- If you are currently trying to register, are not receiving the validation email, and are using an Outlook, Hotmail or Yahoo domain email address, please change your email address to something other than those (or temporary email providers). These domains are known to have problems delivering emails from the community.

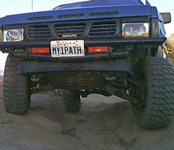
MY1PATH
-
Posts
5,803 -
Joined
-
Last visited
-
Days Won
27
Content Type
Profiles
Forums
Calendar
Everything posted by MY1PATH
-
It occured to me that some of you may find this useful, entertaining or maybe a little funny... name="allowFullScreen" value="true"></param><param name="allowscriptaccess" value="always"></param><embed src=" type="application/x-shockwave-flash" allowscriptaccess="always" allowfullscreen="true" width="500" height="405"></embed></object>" wmode="transparent" style="width:400px; height:326px;" id="VideoPlayback" type="application/x-shockwave-flash" flashvars="">Using the factory bottle jack and an electric dirll you can rapidly raise and lower your vehicle.
-
OK, I got the Calmini in and cranked a little more than it was w/ the stock arms. I didn’t crank it allot because I don't wan the CV's to bind, they do so about 1/4" from the bump stop. so I guess I'll be doing a diff drop one day... I also got my 3" longer Rancho's in (9112's) and took it out for a few cheap flex shot. Same position, just left and right side(sway bar attached); the shocks are definitely worth it, no more toping out over speed bums, less body roll, better acceleration and braking. my old ones were trashed. lastly I started Planning my panhard drop since my right tire sticks out almost 1.5" more than the left. the blue lines are bend lines, the brown are cuts, on the left is the bracket and on the right is the filler that will go inside the bracket to keep the inside width the same. Its 1/8" 304 stainless 1/2 hard (I think). The bracket will drop the panhard 2.5”. Why 2.5" when the lift is just over 3"? 2.5" instead of 3" will keep it closer to parallel thru its entire working range since w/ passengers in back it sags to exactly 2.5”
-
X2!!! most things come off easy on my pathy, its not plagued by rust or stuck bolts but that upper drivers pin took quite a beating b4 it went anywhere. The new pins and bushings fit snug I had to hammer those in.
-
If you look @ the recent hinge pin post you can see the wd21 doors are a 2 hinge single pivot, just like that jeep. but unlike the jeep the pivots are inboard of the body instead of on the surface. half doors tube or not should be fairly e-z to do but re-hanging the heavier stock door between offroad trips may prove to be a PITA unless you devolop some sort of hinge pin that can be gripped easliy enough to remove by hand and notch the door to clear such a pin...
-
For those of you who have done the Calmini Lift...
MY1PATH replied to Nytrosfinder's topic in 86.5-89 WD21 Pathfinders
Pros: (the first 2 are the biggest IMO) Well the calmini uses a Very Beefy 3/8 plate design for the UCA Calmini uses its own bushing and "fulcrum sleeve" This sleeve Is machined to make allot more contact with the fulcrum pin on the UCA spindle. Other UCA's re-use the stock bushings & sleves. The stock sleeves only make contanct on the inner most edge of the spindle.(not very much bearing surface) The UCA's come with NEW Ball joints (greaseable ones now) They offer a Complete kit for those who want to do it all @ once and keep it simple. I hear their shocks are pretty decent in this kit. Con's: The UCA's are designed to clear their shocks, If you run something large like rancho they will dent the tube on bottom out.(linky) Material prep is bad; the welds on the UCA's look good but they left slag on it and prolly didn't prep it b4 powdercoating over the slag-balls. I expect they will need a proper re-coating in the future $$$ the UCA's do come w/ BJ's and new bushing set-up so that does offset the cost a little and yes its heavier materials but the cost is still HIGHer than others and when you cosider poor material prep after welding and bad coustoemer serive/support it makes it seem not as worth it. the cutout for the BJ (like mine) isn't perfectly aligned. My BJ shims sloved that problem but others may have to bevel the BJ hole a little with a dremel. SQUEAKY SQUEAKY SQUEAKY or so everyone says most have just installed grease fittings...In 2006 IIRC they swithched to a "vecton"(vekton?) bushing(they used to use derlin bushings). I used "Energy Suspensiong Formula 5" grease and no squeaks yet (1 month) I expect this super thick grease combined with the newer bushings may have resolved this issue. Poor coustomer service and product support. stock washers are re-used but the inner ones have to be ground down in order to be istalled with smaller bushings. All in all I really wanted the Beefy design and was ready to takcle the con's for it. when I go-rancho I'll be trimming the UCA's to fit them and geting them re-powdercoated. edit: and so far I am very happy with my UCA's edit: 12Feb2011 Still no squeaks after 18 months. -
x2 I was thinking the same thing PO musta done it. MY passenger door is only a little bad, If I can find my "rat-punch" I'll be doing the pass side b4 is damages the door catch like the driver one did. Then I can add some pin-removal pix. Thanks 4 the props guys, I'm just tryin' 2 give back a little.
-
I think that's everything, Mod's if you don't mind moving this to the HOW TO's for future reference that'd be great.
-
With one upper and lower bushing out you now have room to use a bigger punch to remove the remaining bushings. Use a 5/16 offset punch or a long 5/16 bolt that has been bent to clear the door (make sure there is enough straight section to slide freely into the hinge and rest on the remaining bushing.) Tap the remaining bushings out. There will not be room to pre-drill them and it shouldn't be necessary since the 5/16 punch will make 100% contact with the bushing compared to earlier w/ the angled 1/4" punch. Installing New Pin Bushings Firstly, get some wd40 and soak the old hinge and then clean all the old grease and rust and dirt out of it, as much as you can, 3/8" round brushes should shove in there pretty good and then wipe it clean w/ Q-tips. Now take a good waterproof grease like bearing grease or thicker (I used Energy Suspension Formula 5 since I ordered a whole 8 oz tub of it for my Calmini UCA’s) and pack the hinge hole. Lightly grease the new bushings and tap them in using your special 5/16 punch. If your grease is thick enough it will hold the bushing in place long enough for you to pick up your hammer and punch to drive it in. Leave the excess grease in place it will be there to grease the vehicle side of the hinge. Re-Hanging the Door OH! This is the fun part... Actually its not too bad if you are clever with your knots (like the taught line) and have a helper. I didn’t have a helper but I got the door to the perfect height by adjusting my knots a little. Pull your hinge tether spring back out and remove the roll pin. Lightly grease your new hinge pins. Remove the jack stands and push the door to the body and line up the hinges. Wiggling the door and tapping the pins will help these next steps. Take the lower pin and push it in from the top until the pointy part of the pin starts to go into the bushing(some tapping may be required). Take the upper pin and push it in from the bottom until the pointy part of the pin starts to go into the bushing(some tapping may be required). Tap the lower pin all the way in and then tap the upper pin all the way in. Install your E-clips on the new pins, and your door tether back to the door jamb with the roll pin. after doing this my diver door has zero play in it. I cannot move the door up or down w/o shaking the body. enjoi =)
-
This is for the WD21 front doors, other models and other doors(4 door) may be similar but I do not know. I noticed one day when parked on a pile of logs that my drivers door had to be lifted up to open and closed... Upon later inspection I found I could lift the end of the door about 2" before it started to rock the body. I found a set of Nissan OEM hinge pins on eBay for around $15 IIRC and I'm sure Alkorahil could get you some reasonably priced ones as well. Anyway Here's the how to Removing the Pins I broke this up into 2 days the first day (which was actually a few months ago) I got the pins out and was out of time so I just re-installed them. Support the door I hung the door from my car port and had jack stands under it for a little more support. I used a knot called the taught-line so that I could readily adjust the height of the door when needed(this came very much in handy when getting the new pins in. Using a small flat screw driver remove the E-clip from the pin. Take a long 5/16" or 1/4" punch, It helps if you grind or drill a dimple in the end to help keep it centered on the pointy end of the pin. I didn't have a punch long enough so I chopped the handle off of a rat-tail file and ground a dimple into the end of that. My upper pin was very rusted and took allot of beating and pb-blast to get out. the Lower pin was not as bad. here's how the upper pin and bushings looked today after I pulled it out again. Removing the Pin Bushings If you didn't already do this when pulling the pins go ahead and remove the roll pin from the door tether spring and move the door away from the vehicle(as far as the wiring will allow) stick the roll pin back in the spring and shove the spring all the way into the door so that its out of the way.(if you don't put the pin back in you will lose the spring inside the door) Using a long 3/8 drill I drilled about 3/16" deep (about half the bushing length) into the top upper bushing and the bottom lower busing. Because of how the door is shaped you cannot get the drill straight into the bushing so if you drill more than half the bushing you will wind up going crooked thru the side of the bushing and into the hinge body. Drilling just softens up the wall of the bushing so it gives less resistance coming out. With a long 3/16" or 1/4" punch slide it into the opposite bushing diagonally so that it rests against the inner edge of the bushing you just drilled. Again I didn’t have a punch long enough so I used a long 6mm allen key, use vise grips to help control in the tight area. Whatever you use make sure it has a good square edge so it drives the bushing rather than slipping off of it. And rounding the inside edge(making it more difficult). When hammering upward I removed the jack stands to let the weight of the door do more work for me.
-
when I installed my rear discs I took a chisel and poped of the dozen or to spot-welds that held the dust shield on. Is it that simple for the fronts? I guess prolly not unless I do it when I have the rotor off... I'd rather have the whole sheild of than to cut it and still have pieces there. maybe I can drill the spot-welds out.
-
4-1987-1989 300zx lsd. The R200 rear ends equiped with LSD will have a finned style heatsink diff cover. EXCEPT the Pearl white SS editons came with a VLSD bad this is not what you want. Stock beakaway torque of the Clutch type LSD lies @ 60-80ftlbs. Funny, the nismo R200 front lsd for the frontier and X (also fits pathfinders) breakaway is in the ball prak of 45 Ftbls. I check the 300zx's every time I go to the JY the only one that may have been was snagged. Today I saw a 300zx in the JY that was more like a garden. all the carpet had some sort of mossy grass growing from it and there was a black berry bush (w/ not ripe berries) growing out of the back. lol If it weren't for all the trash it would looked like the interior was meant to be lawn aphostered. I stole the sift knob from it but now I'm really of point.... If I don't find one I will eventually fork up the cash for the calmini or 4x4parts CLSD.
-
1) drain the radiator 2) losten AC and alty tentioniners 3) remove clutch fan and AC tentioner bracket (belts can be left hanging and fan can be pulled back to rest inside the fan shroud if you can't get it out.) 4) remove radiator hose and 3 bolts on the thermostat housing. 5) replace thermostat 5a) make sure jiggle valve or bleed hole it @ the top 5b) use gasket ONLY if thermostat brand says to (some themo's don't require one) 6) seal lip of Thermostat housing with RTV (red or orange) and install 3 bolts a little more than finger tight. 7) after allowing rtv to set up for 30 min torqe down the bolts and re-assemble AC tentioner, clutch fan and hose. 8) re-fill radiator, run engine and squeeze upper hose rapidly(to move bubles arround) top off radiator. If your odd like me you can skip 2&3. It'll be harder to get to but with the right extentions and finger movements it was a 20 min job.
-
I'd think you'd feel that in any mid to light weight vehicle.
-
I'm sorry to say that a cheap welder will not cut it here. yes, Mig welders are a good choice but its going to take allot of amps to get good heat penetration on the bearing cup other wise you welds will catipillar and their strength may be questionable.
-
Found this video of some jerks TRYING to kill a WD-21
MY1PATH replied to jitterymonkey's topic in General Forums
still running @ the end of the day with a 2.4 KA No doubt it would be the same w/ a VG but would they have inflicted more damge b4 the day was in w/ that little more power? -
Found this video of some jerks TRYING to kill a WD-21
MY1PATH replied to jitterymonkey's topic in General Forums
Hell yet usually being airborn and landing in mud can = some major stuck potential. it just worked its way thru it. what made the cat glow like that? -
surges/misfires on acceleration at normal running temp
MY1PATH replied to 94mudrat's topic in The Garage
Yes it will show some faults (stored codes) did you do new plugs and wires when you did the cap an rotor? are the plugs gaped correctly? Is your timing @ 15 deg? -
x2 your line will just keep drippin if the tank warms up and not allowed 2 vent. a while back I used a tiny scribe to peel back some of the hoes and then work a little bit of oil under the lip of the hose. A little vasaline on the barbs of the new filter will reduce future hose cracking and also make then next change easier.
-
14x1.5 appearantly his father who works a pefromance suspension shop (street not offroad) had one that they use for custom TRE's all the time... anyway for waiting, he knocked down the price 116 instead of 205. Still seems like a bit high considering all they did was tap it since the threads were not bad enough to deem welding. but what can I do, the threads had to be cleaned. I shoulda inspected more carefully and bought the tap and done it but I was in too much of a hurry to want it done for when I came back from michigan (which it wasn't) I prolly would've had it done tuesday if I'd just ordered a tap and parked it B4 going to michigan. Then I'd only be out the cost of a bolt and tap.
-
every oil change I drain 90% out of; Brake, Power Steering & Clutch resivors using a syringe. Then I top them off with new. This really isn't necessary but its a good way to make sure the fluids say clean and since the interval is so often and it evtually mixes downsream there is less need to do full sevice bleeds to get all the bad fluids out. Just make sure when draining that you leave enough in the resivor to keep air out of the system or you will be defeating the purpose. I do transmission, t-case and differentials every 2 years or less. Diffs I check after any time I've had my axles spinning in water. Don't know what the reccomended schedule is but that what I do. Bug juice- when its empty Coolant, maybe every 2yrs I'll do a complete flush(pull block plugs, run a garden hose straight into upper coolant neck.), and every year I change out @ least a gallon just to keep the rust inhibitors fresh. I prolly do stuff more than I should but oh well, can't hurt it.
-
THESE ASSHOLES HAVE HAD MY TRUCK FOR 2 WEEKS NOW! IT SAT IN LINE FOR 5 DAYS WHILE I WAS IN MICHIGAN AND THEN WHEN THEY LOOKE AT IT THEY SAID IT JUST NEEDED RE-TAPED AND A NEW BOLT. EVERY TIME I CALL THEY SAY THEY ARE STILL TRYING TO "BORROW" A 14MM FROM SOMEWHERE TO FINISH THE JOB INSTEAD OF JUST BUYING ONE. I FEEL LIKE I'M GETTING THE RUN-ARROUND, MY WIFE DOESN'T UNDERSTAND THE SITUATION AND I JUST WASTED 3 DAYS OFF THAT I HAD PLANNED TO SPEND WORKING ON THE PATHY. can you tell I'm starting to get frustraigthed? what should I do if I don't have it by Friday? I wanted to make a panhard drop for it @ "work" this weekend...
-
Yes, that was 18 or 20 degrees and it was actually the injectors that failed. I still run 15 instead of 12 but I wont push it any farther for the time being. one of these days I'm a hook up a dwell tach and find out jus how much it ajusts from a set base timing
-
the full kit from rugged rocks its what I got(it has everthing but the bar lol). Make sure to use the icluded grease w/ the poly bushings or they will squeak.
-
what is the stock ground clearance for a 90 pathfinder
MY1PATH replied to shane's topic in 90-95 WD21 Pathfinders
i think It was about 9" or something like that. It also depends on the tires you are using. -
my 89 had the factory amp tucked below the factory deck. The thing had a 50A fuse on it IRRC. no other makings except the nissan logo molded into the vented casting.It only fed the rear speakers (6x9 rear 4.5" round front). I guess the later models can't have it there cause there a compartment there... anyway, I pulled it out and bypassed the wires when I installed my aftermarket deck (& 6" round fronts). I did some re-search later on and found out it is always reccomended to bypass the factory amp when using an aftermarket deck becasue the aftermarket deck biases power differantly than many stock deck+amp setups and it can damage the aftermaket deck if you don't do so. Aftermarket amps work differantly and do not fall into this category if wired correctly.