Leaderboard
Popular Content
Showing content with the highest reputation on 05/09/2023 in all areas
-
Yeah, so far so good but I need to drive it more to really consider this issue fixed. I took some photos of the whole process, mostly because I thought I would need them later to put everything back together, but it was so easy it wasn't needed. Still, maybe this will help someone in the future, especially if you don't know where the screws and clips are so you don't break any hard-to-find dash panel: First thing you need to do is take off the kick panel. It's held in place with one screw and a couple of clips. The clip shown here is very, very strong. You can see the other one in the next photo. You may have to remove the plastic door sill first. It's clipped on and just pulls up. The reason for removing that kick panel is that there's a screw holding the bottom dash cover just behind it, here (also, the other clip for the kick panel): There is another screw for the bottom dash cover on the other side, under the cabin temp sensor. Once you remove both, the panel slides towards the back of the car (don't pull down). Be careful as there will be plugs for the dimmer switch, temp sensor and electric mirrors still connected. You need to unclip all those: Once the lower dash cover is out, you will be able to remove the steering wheel cover. First thing you need to take out is this plastic ring highlighted in red. It's held in by friction and just pulls out, no clips and no screws. Just use something sharp: Finally, you need to remove the 5 screws at the bottom of the steering column cover. Once those are removed, be careful as the two halves of the cover are still clipped on. You can press on the sides of the upper plastic part to help release the clips. It's also easier if you loosen the steering wheel adjustment lever, gives you more room: With the cover away, you will have access to the ignition switch. Two small phillips screws hold it in place. Unclip the connector, remove the screws and put the new switch in the same position. Before putting everything back together, reconnect the new switch and test it.1 point
-
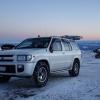
Lift kit finished. Now time to save my Pennie’s for 33s1 point
-
1 point
-
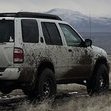
Shakedown run Sent from my iPhone using Tapatalk1 point
-
All your images are really inspiring ? Hit me up on Instagram @darthfinder1 point
-
Ran rug road to turkey creek this week, what an incredible trail and area!!1 point
-
An alpine lake evening!1 point
-
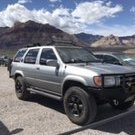
New addition to the family Four months later - overhauled, lifted and dressed up1 point
-
I re-used mine even though it was split. On another note, keep up the photo updates, they're great!1 point
-
I suggest leaving the spacers out entirely, but if you do feel the need to use them then definitely wait until later after the coils have settled. With manual hubs you can get around the CV binding issue for the most part, but they won’t save you off-road when the hubs are locked. Me personally, I want to know that my CVs won’t break when off-road under non-extreme conditions, so I went with the AC coils up front One thing to mention about rear coil installation, forget about spring compressors. I have done it twice, both in a tiny garage and on a two post lift, and never *NEEDED* to use the compressors. It’s an extremely easy job. The first spring I did, I used them to help, but once I figured out how to drop the axle far enough I never needed them again. You just need to do 5 things in order: 1. jack up the frame where the front of the rear lower control arm is bolted 2. disconnect the shock at the lower mount 3. disconnect the sway bar end link (the bottom end of it) 4. The whole time you should have a second jack or the OEM scissor jack under the axle supporting it, and then lower it as far as necessary 5. Once its low enough, push UP on the coil (hard, it might be a bit rusted into place), then pull it out sideways, and reverse the process for installation. For the right side the process is identical, but you also have to undo the right side bolt for the panhard rod as the last step to get enough droop. Only thing to watch out for is the brake lines. They will be slightly tensioned at the necessary droop for 9449s but not to the point of damage. Still worth it to be careful though, as I have no way of knowing the condition/length of your specific brake lines For the front, just make sure that all notches and marks are oriented correctly in the struts, and that you use OEM parts for the bearings and mounts Edit: Almost forgot to mention! You have the AUTO Tcase like I do, so be aware that it will hate the addition of manual hubs. Mine has been giving me some trouble since I installed the hubs, the computer is confused about the lack of “correct” sensor data coming from the front and you’ll probably see a 4WD warning light after a long stretch of highway, and maybe other weird stuff. You will also have to consider the fact that with the hubs unlocked, your TCase won’t be pumping fluid around because the pump operates by way of the spinning front shaft under normal locked conditions, so it’s best to lock them a few minutes before switching to 4wd so that it has time to circulate the fluid.1 point
-
1 point