- Sign In Changes: You now need to sign in using the email address associated with your account, combined with your current password. Using your display name and password is no longer supported.
- If you are currently trying to register, are not receiving the validation email, and are using an Outlook, Hotmail or Yahoo domain email address, please change your email address to something other than those (or temporary email providers). These domains are known to have problems delivering emails from the community.
Leaderboard

Popular Content
Showing content with the highest reputation on 04/08/2019 in all areas
-
I went to the leather shop and bought some scrap finished leather. Grand Total $6.99 I ripped the seams on the old boot and made a template and cut all the pieces out of the new leather (I used about half the leather I bought) I dug out the sewing machine. I had some issues with it since it had not been used in years. (time to have it serviced I guess) I ended up having to sew most of it by hand. I am not that great at hand sewing, but I figured that even with some messed up stitches it has to look better than the ripped up one that was on there. Here is the almost finished project. Just have to get some new snaps and put them on the boot and insert the metal rod and sew it up Not too bad. I may redo my stitches once I get the sewing machine serviced. The stitches I made with the sewing machine are prefect.3 points
-
I like it2 points
-
So what's next on the agenda... I need to quit being lazy and get started on mounting the OEM rear tire carrier! Purchased the rivnut tool everyone recommended.2 points
-
My 2002 SE Buttercup. She’s a real work in progress, I’ve had her since summer of ‘18 and have had multiple misfires and other unfortunate events. She had been moved from lot to lot before I picked her up, so prior maintenance wasn’t too shabby (she just didn’t get many miles for awhile). Only minor problems, so it’s been mostly enjoyable for us. Sent from my iPhone using Tapatalk1 point
-
yep.you can spray it with some silicone lube and work it back and forth a bit.. sometimes the spring gets overly compressed too and doesnt contact all the way and you can fix that by making a shim. ive heard of people gluing pennies to the door frame so it pushes the spring in farther1 point
-
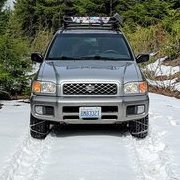
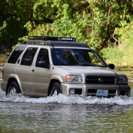
Thanks Micah! I got the thread moved over from the New People Start Here! section, might get a few fresh eyes! It would be cool to get together, I'm going to be out goofin' around all summer so PM me if you're ever in the area, there's quite a few Seattle-area NPORA members. Been a while since I've posted an update- After the little smoking tire incident I pulled apart the wheel hub and inspected the inner/outer bearings. They seemed alright so I re-greased them and re-assembled. Next up was brake caliper. I ended up ordering two new calipers and replaced the fronts. I bled the brake system per FSM (5 bleeders including LSV) and so far everything seems to be running well! I pulled a 3rd OEM crossbar to help support my rack in the middle along with another set of the ROLA clamps to go with it. I also picked up a ROLA roof bag which should work fantastic to hold a bunch of misc gear! I'm looking forward to testing this thing out. Bonus, I finally bit the bullet and picked up some Kayaks from Costco. Got some cheap antlers mounts, but they'll probably go on our other vehicle since the Pathfinder's basket doesn't have crossbars as easily accessible. Makes for a fun photo though!1 point
-
Just a mock up of what I’ve been considering: Rhino lining the bumpers, fenders, and rocker panels. Thoughts? Also put some coloring on the window because I’m planning on getting tint as well. The rims I’d paint black until I can get some steelies and new tires. Sent from my iPhone using Tapatalk1 point
-
Open doors one at a time a push the plunger in and see if you can get the light to go off. If it does....that’s your door.1 point
-
Picked up my 96 pathfinder in December from a guy who was using it as a 3rd vehicle and was moving. Got a pretty good deal on it, and have done some things to it to get the mpg’s up, as when I got it I was getting single digit mpg (like 9mpg). So far I’ve: -Changed out the MAF sensor, TPS, coolant temp sensor, relocated the knock sensor, and changed both bank 1 O2 sensors. -Fixed the rear hatch (it had been rear ended and the lock mechanism was destroyed in the process, locking the hatch closed) -Changed the fluids. My future plans for it are to find some Land Rover springs for the rear and spacers for the front, new struts and rear shocks, new steering rack (mine is pissing power steering fluid, only leak on it), and a roof rack of some type. I’ll add pictures as soon as I figure out how to resize them from my phone.1 point
-
Is it possible to touch up that area with vinyl wrap?1 point
-
Like anything you get what you pay for. This was not their cheapest special, it still cost just under $1000 which is still very reasonable. Sent from my iPhone using Tapatalk1 point
-
That looks more like a paint prep failure at some point. The ventshade was just what it took to bring it to light. The tape didn't fail as pointed out, the paint is still attached to it. A couple months of double sided tape being stuck to it wasn't the cause, just the showing symptom. Your upset at the wrong target. As for the Maaco comment, we had a wrecker at work redone by them. Crap job but got what we paid for, didn't really care as it was getting vinyled anyway AMD even if we wanted to couldn't do anything since they got evicted from their building shortly after1 point
-
Sent from my iPhone using Tapatalk1 point
-
That really sucks, sorry you have to deal with it! Although technically the 3m tape did exactly what it’s supposed to, it stuck to the paint but for some reason the paint is failing and didn’t stick to the truck. From your pics it even looks like the duct tape is pulling paint up with it? Do you have any idea if those areas have had paint work done or if the paint is original? Wondering if it’s a failure from poor prep work or if the oem paint is peeling up. Fwiw, Maaco tends to get a bad rep but I’ve had great experiences with them. They’re all franchises so it all comes down to how each local owner runs their business. If you find a good one run by people who care, then they can put out some nice quality work. I actually just had my 94 Vette repainted at my local Maaco about 2 weeks ago (the paint job was a bday present from my wife). It looks great! I don’t have much money invested in this Vette so I couldn’t see taking it somewhere that wanted more to paint it than what I spent on the car.1 point
-
The seats in my 97 QX4 leather of course are not in the best of shape. The driver seat 45% is by far the worst, passenger 75% back seats 85%. Had some extra cloth seats that I got out of a 2001 Pathfinder taking up space so I refurbished them and I'm going to put them in my QX4. I will be getting rid of the heated seats. As some of you know the heated seats in these old R50s don't work quite well I don't use them much anyway. Sent from my SM-S737TL using Tapatalk1 point
-
Correct it appears that it was 3M adhesive Sent from my iPhone using Tapatalk1 point
-
Just to clarify, these are the adhesive ones not the in channel ones? Sent from my iPhone using Tapatalk1 point
-
Alright I got the limiting straps finished up today. The sway bar presents a bit of an obstacle so I used some one inch square tube make an upper mounting bracket that helps clear the sway bar for a relatively straight pull. I probably went a little overboard, but I wanted those brackets to be strong so I boxed in the end of the square tube and also reinforced the area of the frame that I welded to with some 1/4” plate to stiffen the area up. The lower mount is welded to a piece of 1/4” plate that is then welded to the control arm. It works! No more noticeable top out over potholes and such. The limit straps are designed to stretch about an inch so instead of a jarring jolt they cushion the impact as they hit their limit so the violent bang of the strut topping out is gone. I also cut off my rusty exhaust, and put in a Y pipe that goes into a single inlet stainless magnaflow muffler with a turn down before the rear axle. Simple set up, and it sounds really nice. It sounds a little like a 350z but in a non ricey way, lol. Sent from my iPhone using Tapatalk1 point
-
Not sure why I never saw this thread, awesome writeup man, and AMAZING pictures!! My folks live in Woodinville so I'm over in the area quite a bit if you ever want to go wheelin!1 point
-
CDN went to the dark side. IIRC, it was folded sheet metal.1 point
-
I know somebody who heard about the hockey puck bumpstop trick and massively misunderstood...he just slipped 3 or 4 through the coil and leaves em loose. Anyways...that's another good one, if done right!1 point
-
Update. As of Sunday, I sold the Titan and now own a 2009 Xterra.1 point
-
Strut rod bushings installed on both sides. About to go check that they haven't loosened since install.No torque wrench..but tight as f@#k seems about right. Things hadn't moved since they spoke Japanese.1 point
-
Land Rover Springs and 5100's in the rear. El cheapo struts and 2" spacers in the front, about to be replaced with KYB/OME HD and 1" spacers.1 point
-
New grill and fog lights installed, hopefully the headlights will be next. Also currently considering wheel spacers for a more aggressive look. Sent from my iPhone using Tapatalk1 point