- Sign In Changes: You now need to sign in using the email address associated with your account, combined with your current password. Using your display name and password is no longer supported.
- If you are currently trying to register, are not receiving the validation email, and are using an Outlook, Hotmail or Yahoo domain email address, please change your email address to something other than those (or temporary email providers). These domains are known to have problems delivering emails from the community.
Leaderboard

Popular Content
Showing content with the highest reputation on 03/23/2019 in all areas
-
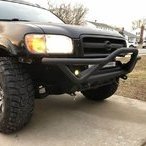
New grill and fog lights installed, hopefully the headlights will be next. Also currently considering wheel spacers for a more aggressive look. Sent from my iPhone using Tapatalk3 points
-
Tomorrow I’m checking Hi-Lift mounting on[mention=37543]TowndawgR50[/mention] rig. I’m mocking up a horizontal carrier which I’m dubious will work because of the handle. When it doesn’t he’s going to weld on a vertical Hi-Lift carrier from a Jeep just lateral to the Jerry can carrier. It should look something like this: Really, just welding two bolts on in the same area or bar adapted mounts could work too though with welded bolts I’d worry about fatigue over time.2 points
-
I took care of a couple little details tonight. I didn’t like that the spacers don’t have a locking collar or anything to lock the spacer in position. I thought about tack welding them, but I want to keep the option open to change the height in the future. I drilled and tapped the collars and added a couple set screws. Also, I didn’t like that the spring and spacer diameters are different enough that the spring could slide around a bit. So, I made some rubber isolators that slide over the spacer and fill the gap so the spring sits squarely and can’t move around at all. Sent from my iPhone using Tapatalk2 points
-
Springs and spacers came in the other day. They look good, very robust! So far all I’ve done is trim the base of the spacer down a bit since I’m keeping my strut spacers and don’t need as much height as the whole spacer would have provided. Hopefully I’ll get some time to actually work on this tomorrow. Sent from my iPhone using Tapatalk2 points
-
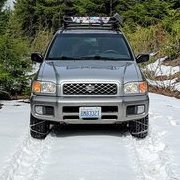
The boys, dogs, and me taking the pathy out to Lynx Lake to do some camping for spring break!2 points
-
Thank you for your patience everyone! We're excited to make a few important announcements... First, our company name: Pines to Spines Off Road. Affectionately "PSO" in our regular discussions, the name refers to the regions we call home and the challenges in between that inspire us to design and build our rigs to tackle all terrains. Our primary goal is to provide a comprehensive line of products that focuses on design, function, and quality. Since our product line will come from two locations depending on our fabrication processes, we also couldn't proceed without proper facility names: the "Tiger Mountain Test Lab" in WA, and the "Spines Fab Lab" in AZ. By both combining and splitting the production, we're able to make solid use of our respective areas of expertise and assets. Second, our SFD components. Let's step backwards for a moment, though: we know there are "kits" (pieces?) out there. Everything we've seen is based on antiquated prints that have been floating around the internet for years, with very basic designs, zero improvement, limited tooling access, and little assurance that the alignment issues are addressed. The design got folks down the road, but many have experienced problems with fabrication quality or alignment issues. The original kits were also intended for a specific outcome (either 4" to 6" of lift), and potentially required removal of prior upgrades; even that company got out of the game for some reason. Fast-forward to now, and we're addressing all those points. Our SFD solution is modular and bolt-on, backed by CAD and CNC equipment to produce consistent and efficient results. Our SFD "kit" is actually multiple kits, including a non-SFD lift option! We'll be offering 1.75", 3", and 4" strut spacers, all of which feature camber adjustment, and pairing those with 3" and 4" SFD kits. This allows us to cater to practically any desired setup! The 1.75" base spacer can be used without a subframe drop, or combined with OME or AC springs and 3" SFD to produce something more moderate. The base spacer is also the heart of our 3" and 4" strut spacers, so upgrading later is easy. None of the spacers require strut disassembly, and because they are two-piece spacers, installation is as simple as attaching one part to the strut, the other part to the chassis, and then bringing the two together. All materials meet or exceed OE specs with grade 10.9 metric hardware, 1/4" plate for the strut components and subframe risers with 3/16" plate for the motor mounts. Shown above are the unfinished prototype 3" and 4" motor mount spacers, the 4" strut spacer demonstrating full camber offset, and the upper mounting plate for use as a 1.75" spacers. These are fresh from the plasma table and press break processes this past weekend with a quick mock-up to validate core assembly so they have not been welded yet. We are still prototyping, using our personal rigs and a 3rd vehicle--an 03 Pathfinder LE (a.k.a., The Gambler) that @ferrariowner123 graciously sent our way! This rig will be fitted with all of our gear and serve as demo vehicle and eventually participate in the Washington State Gambler 500! Soon after, we'll be working with several local NPORA members (our "Piners & Spiners" Team) to personally install the first batch, among other things we've already been field testing. We are very grateful to these folks for the support and a chance to provide real-world feedback to further improve our products. We have also been eagerly developing other products we hope to offer in the near future: · static and adjustable rear control arms and panhard bars · polyurethane motor mounts · swing-gate installation kits · roof-rail mounting system for roof baskets, lighting, storage, etc. We are excited for the coming months as things roll out and our products get put to the test. Going forward we ask that all posts to this thread stay on topic with questions and comments pertaining only to our offered products and services. Stay tuned for up to date progress and product release dates!2 points
-
So they’d only be 50 shipped to you and then whatever to ship to people who want to pick one up from you? I might be down if I can convince the wife for that price probably 20 bucks to AZ. Hmmmmm....a snorkel for 70 bucks. Gonna have to finagle the wifey!1 point
-
Roof rack done! It’s fairly strong and fits the look I needed. You can barely see the u-bolts sticking up, but sawing off some of the extra threads fixes that. Probably about $70 to make, but it beats the $200 it would’ve taken for a flat rhino rack. Also painted my tow hooks while I was at it.1 point
-
Luckily the prices I've seen to do a run of a fairly simple design isn't really all that bad.Personally just want a hat..I figured a patch is pretty versatile.. Hat ..jacket ..bags of whatever type.Not trying to make money... Just figured if I'm getting it done.. Why not share.You can get small batches of one design or another..a few of the classic oval..few back country silhouette (good idea by the way)...whoever wants one til there gone..(cant cost much to mail a patch)...sounds good to me.1 point
-
Alright boys, it's happening! I scored the tire carrier off a 97 along with what might be an aftermarket trailer receiver hitch. Everything came off super easy other than one of the receiver bolts. Man was that difficult... Anyway, I grabbed all the associated rear tire carrier hardware and bolts. One thing I forgot to do was take a template of the existing holes, but I'll figure it out. Definitely excited, not much rust at all once I scrubbed it down. I'll be painting it and then step 1 of the install will be to fab up a reinforced latch area on the bumper a la Hawarish style. I'll probably go rivnuts to mount everything unless my machinist buddy doesn't let me. I'll also be fabbing up a jerrycan holder and of course something to mount the license plate to. Has anyone mounted a high-lift? We'll be building sliders soon so a high-lift will be doable.1 point
-
one word. allignment. start with all parts involved with your allignment at the same time. get it alligned and then work on the other stuff. if your tires are good . if your tires are in bad shape then you can do the alignment last. but changing all of your bad parts with good parts can make your allignment worse until you get it done. the parts that can effect your alignment are upper and lower control arm bushings centerlink, inner and outer tie rods, adjusters and idler arm upper and lower ball joints inner and outer wheel bearings. I just went through all of this. edit: btw shocks while they may not affect the alignment can ruin new tires if they are bad. best replace them before new tires, if your tires are good right now you can replace the shocks without needing re-alignment Almost forgot, Torsion bars will also effect your alignment, especially if one of them starts to weaken and cause one side to sag.1 point
-
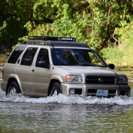
Breather extensions are important for your diffs, tranny & TF case. While electrical is important, water in the air intake will ruin the engine. Snorkels are also useful at elevating the air intake out of heavy dust.1 point
-
Have fun!1 point
-
1 point
-
That was fast. Not sure when I can get these on, but at least I have em1 point
-
I too was lucky enough to get on the PNW swinggate fest. Just like what@Stpickens said install was straight forward and that kits from Pines to Spines will make it a common mod for post face lifted R50's. Also different configurations for a license plate as well.@Stpickens had his mounted underneath the Jerry can holder and I had mine mounted off to the side with a plate relocation bracket that fits perfectly with the body lines of the R50. Also with the swinggate it helps makes things easier to haul and add on to a trip. Sent from my SM-G960U using Tapatalk1 point
-
Crank time. Pistons and rings. Crank. Sent from my iPhone using Tapatalk1 point
-
Went out for a little drive today and explored some new little hideouts. I'm now experiencing a new little problem (see below). When attempting to accelerate, uphill (under load), the RPMs will stall out around 2000rpm and either not increase, or struggle to increase. Depressing the accelerator pedal more can cause the RPMs to then jump to around 3000 and increase/drive like normal. The symptoms are a rough/intermittent stutter that pops every few seconds as it struggles to increase in RPM. No CEL (MIL), but I pulled the codes- P0302 (cyl 2 misfire) and P0325 (knock sensor). I cleared them and now need to go for another little drive to see if they throw again. They could be old... Well I fixed it. My new #2 spark plug had a gnarly crack going down two sides. Bought a new plug and it works great now. Glad it was a $2 fix!1 point
-
Completed a pretty major maintenance milestone on Friday. timing belt water pump passenger camshaft seal crankshaft seal harmonic balancer (crankshaft pulley) thermostat passenger side valve cover gasket (I'd like to do driver's, but there's so much sh*t on top of it... on the to-do list) sparkplugs that hidden little 90* coolant bypass hose, and a few other misc coolant hoses fresh new coolant I basically followed this 1A Auto YouTube video for the timing belt, and referenced another one for the little water pump excursion. There were a couple other misc YouTube videos I referenced for the crank/cam seals. I labeled everything as I took it apart with masking tape/a number, and then wrote down the number and what it went to. That made reassembly at the end brainless and quick. Honestly, the timing belt looks fine. Who knows when it was last replaced, but at least now I know for sure. The sparkplugs were the worst as you'll see below. Started up fine and so far no leaks, seems to be running great! Took me about 10 hours to do all this including maybe 2hrs of parts runs and Googlin' things. Now on to more funsie projects. Everything off including camshaft sprokets and wanter pump- New timing belt and water pump- I've never seen sparkplugs so worn down, all six were like this. Honestly easy to replace, I used tape to hold my extensions together, just that last back sparkplug.....1 point
-
Thanks guys, glad you like it. Also, I have a few other suggestions for those considering the project: I bought an Astro Pneumatic 1427 blind nut tool (~$40). You can make a basic tool using simple parts and set them manually, but it's a more work and may produce inconsistent results. And you'll be doing a few of them. I have a few other projects that I can use the 1427 for, and it's worked well for me already (also used it on the motor mounts and skid spacer for my SFD). It has mandrels for M6, M8, M10, and M12 coarse thread blind nuts. You can obviously go the Standard route; hardware is cheaper and easier to find. But, I'm a metric guy when I have the choice. Don't buy from Fastenal. Those guys suck. They couldn't even get an order for 10mm washers right, and they kept sending me the wrong blind nuts. Couldn't tell you why I didn't go through McMaster-Carr first. The blind nuts are a little hard to find locally, at least in my case. I went to several local hardware stores, and only one even stocked any blind nuts, but they were too small or stocked in very low quantities. McM-C has them (they're listed as rivet nuts, btw); you'll want 95105A199 (M10) and 95105A191 (M8). These are zinc-plated steel with a low grip-range and large flange...be sure to get these features. These need a 13.5mm or 17/32" drill bit. I had the advantage of being able to remove the lower hinge bracket for mocking up placement and punching marks. Since the hinge brackets don't normally come off, you'll need help holding the carrier in place. To lighten the load a little, I'd remove the part that actually holds the wheel from the carrier's frame. Plan on punching then drilling 1-2 holes first, then mocking up placement again, then punching and drilling 1-2 more holes, then mocking up placement again...until all holes are drilled. The hinge brackets have wiggle room, but if some of your holes aren't exactly where you want them, you'll consume that wiggle room quickly. I recommended starting with the outer holes on the lower mount. Also, I'd complete the holes for the lower mount first...that way you can have it support the carrier for finishing the upper holes. Be mindful of keeping it level when it's in the closed position before drilling too many holes. For cutting the bumper, I have a wannabe Dremel and hand wand. I used painters tape to set lines, and cut-off wheels specifically for plastics to make quick work of things. A utility knife is good for getting the corners, then a flat file to clean things up. Any other questions, feel free to ask. I thought about doing a build thread, but I think this content is best kept here so people are aware of the OE reinforcement.1 point





.thumb.jpg.3351162271e2c1bf86fe7c0c7e657df0.jpg)