- Sign In Changes: You now need to sign in using the email address associated with your account, combined with your current password. Using your display name and password is no longer supported.
- If you are currently trying to register, are not receiving the validation email, and are using an Outlook, Hotmail or Yahoo domain email address, please change your email address to something other than those (or temporary email providers). These domains are known to have problems delivering emails from the community.
Leaderboard



Popular Content
Showing content with the highest reputation on 01/10/2021 in all areas
-
I don't think/know that those fog lamps will work in that model year. I have a 92' and have the factory/dealer installed fog lamps that mount under the bumper. I have yet to see how they mount in the bumper without modifying the plastic insert. All of them that I have seen, while it appears to be a fairly clean installation, have cut the plastic insert. I have been wrong before.1 point
-
When I had my 88, I did the 93+ front bumper (I did a one piece though). You will need the bumper to frame brackets and if I remember correctly may have to notch one of the frame side holes on the bracket (might be case dependent as mine were originally D21 brackets as it was a setup off a previously owned Hardbody).1 point
-
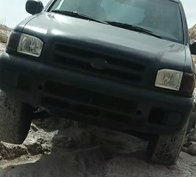
Yeah, I actually didn't realize how much it looked like my Pathy until I uploaded the photos. It's uncanny lol. I gave my friends a good scare with that one. I have no idea what happened to the Runner but it looks like a head on collision. No trails above so it wasn't a roll. Funny thing, on my way out a few hours later, a flatbed stopped by me as I was airing up. The trooper following him had to get on the horn and tell him I'm not the one.1 point
-
Those lights would likely work well and the way you want to wire them is legit, but I echo R50JR's concerns; it's probably technically illegal and may cause you trouble using them on the road. Some states even require them to be covered when on the road, but ones that small in the bumper would fly under the radar with regards to that. If you want brighter fogs you should be able to find LED bulbs that fit in the stock housings, but a picky cop could probably get you on that, although it would be very unlikely and pretty much isn't a risk in my opinion. Unlike just dropping an LED in a headlight housing, you shouldn't have any serious negative side effects from using an LED bulb in a fog light. You may be able to find something like this from a place light superbrightleds.1 point
-
I appreciate that, thanks. I don't mind helping with more specific questions, but the post is too broad right now. Since @TowndawgR50 and I still make kits occasionally, there's a conflict of interest to divulge all we know here. Keep in mind nearly all of this is either documented around the forum (loosely or otherwise), and practically none of it is off-the-shelf. I applaud DIY effort, but I think more research is required here before I can help with anything. For sure, spacer dimensions have been posted for years, and I've personally detailed everything about the most expensive part, the steering link, on NPORA previously.1 point
-
Love that green... The bumper spot won't be a good one, unfortunately. There is body metal right behind that spot, and the bumper will block nearly half of the camera view because of the wide-angle lens. Even on my setup, the lens picks up the edge of the rims (which is part of the reason I want to relocate it to the center hub.) The spot above the license plate would be ideal if drilling through, though you'd probably want a style like the Crux CUL-03 instead, where the body of the camera is angled out. The wide angle lens will just pick up everything in view along the horizon, but perhaps not be too practical for reverse use if it's not angled downward a little. You'd just need to check if the image can be rotated 180° to support both vertical and horizontal (under) mounting. Alternatively, Slart's suggestion of using one of the integrated license plate mount cameras would allow you do drill a concealed hole behind the plate...but either way, you'll be drilling a hole. Yet another option is to mount an enclosed camera at the top of the lift gate, perhaps even mounted to the spoiler. There's a significant amount of space to route the wires inside the weather strip without it getting pinched. You could drill two small holes into the spoiler to undermount a CUL-10 style camera with adjustable bracket, or a fixed-mount lip style like the CUL-09 or CUL-06. Double-sided adhesive would also be suitable, though I prefer mechanical fastening personally. Wiring to that point is easy; I run my GMRS antenna wire out of the chassis along the weather strip. @R50JR has his reverse camera mounted up top on his roof basket and it gives a good reverse view.1 point
-
A flush mount angled camera would be your best bet...single hole, one and done. Drilling into the liftgate (or truck, for that matter) takes a little courage, but mask it off, double check your clearances inside the liftgate (particular for the wiper motor and linkages), and take your time. It is possible to get wiring through the liftage tube/grommet going into the chassis. I've run wiring there previously for some LED lights I installed. Just need a rigid wire to fish/pull wires through, and removal of all the trim liftgate trim and weatherstripping. For the reverse signal, you've some options: Behind the front passenger kick panel, one of the harnesses has a yellow wire that is the reverse signal. The harness will depend on whether it's AT or MT, but they're in the same area. The FSM details it (I can help with more info about your truck). Many cameras will have a power wire "tail" at the RCA side and a positive and negative lead on the camera side. The camera-side wires can be tapped into the reverse signals at the tail light with the pos/neg wires (or just pos from the reverse pos signal and ground the neg wire). You can then connect the tail wire to the reverse signal on the radio, without having to use the reverse signal from the kick panel. (The tail light will power the camera and signal the radio.) If the camera side signal wires aren't long enough to reach the tail light (plausible in your case if installing on the lift gate), but you plan to use the reverse signal at the kick panel, you can cap the pos wire at the camera side and just ground the neg wire. You then need to connect the reverse signal, radio reverse wire, and the camera's tail wire together (this will send the radio the signal and power the camera). If the camera lacks the tail wire, you'll have to use the reverse signal from the kick panel for the radio signal, and also the tail light for the camera's power leads. Note that if your radio supports live camera viewing, you won't be able to utilize this camera for it because the camera will only be powered when in reverse. I recently added a reverse camera to my truck as a Phase 1 project, and while it fits the immediate need, it's not the end product. Because of the tire carrier, I made a bracket and ran the wires externally along the frame: This setup is temporary, and I may even redo the camera mount to center it in the hub. Phase 2 setup will require rewiring this camera completely as part of a quad-view setup using front, rear, and forward- and rear-facing undercarriage cameras for trail use. The live views of those will probably make my wife throw up.1 point
-
Pretty close! The all-mode switch is in the OE spot. "2WD" controls my tire inflation/deflation setup, "AUTO" charges the system (for locker or quick-connect use), "4H" engages the rear locker, and "4LO" engages both lockers. I just put the full details on my TJM thread to not clutter your thread.1 point
-
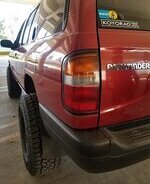
Finally found a tire carrier last week after searching for a while. This thread made it a lot less daunting but man that was still one of the most tedious things I've done on the truck. I'd definitely recommend making a template for the latch hardware off the donor vehicle if possible, I didn't do this and was kicking myself for it. My bumper support is pretty mangled though and I'm missing all the plastic fasteners so it's not surprising it didn't make the best template lol. I welded rather than riveted the reinforcement piece. Feels real solid! Had to make some relief cuts on the underside and bend it ever so slightly to match the curve of the truck. Installed I'll be spacing out the mount and raising it 2" asap as I don't like how low the 33 sits, thanks hawairish for the idea (and for starting this whole thread!). And thanks to everyone else in this thread, couldn't have done it otherwise!1 point