- Sign In Changes: You now need to sign in using the email address associated with your account, combined with your current password. Using your display name and password is no longer supported.
- If you are currently trying to register, are not receiving the validation email, and are using an Outlook, Hotmail or Yahoo domain email address, please change your email address to something other than those (or temporary email providers). These domains are known to have problems delivering emails from the community.
Leaderboard




Popular Content
Showing content with the highest reputation on 06/11/2019 in all areas
-
Swapped the front ends on @ferrariowner123 1996 and the Pines to Spines 2003 today. He graciously donated the 2003 last year to @hawairish and I with the request that we swap front ends at some point, which he and I knocked out this afternoon. All body parts and lights bolt on with only the hood latch on the 2003 and wiring for the lights on both rigs needing some modification. The 2003 uses 9003 series headlights and has the corner/turn signals combined where the 1996 has separate signals and corner lights and uses a 9004 series headlight. With both rigs present and @ferrariowner123 's electrical knowledge it was a fairly straight forward job to swap and modify the plugs to get everything sorted out. The fender flares do not swap over and have to travel with the appropriate fender but once paint matched shouldn't be too noticeable. All in all a neat project with both rigs fooling you at first glance.9 points
-
Easy way to tell is to look at the oil filter. The oil cooler is the oil filter adapter. If the filter threads onto a can that has 2 hoses attached to it, then you have an oil cooler and the o-ring seal is probably leaking. It is very easy to replace the seal. Take the filter off, put a deep socket onto the hex of the filter stud and unscrew the filter stud. Pull the cooler away from the engine and replace the o-ring. Reassemble by threading the filter stud back in and tighten it down. I suggest degreasing the engine and just let it run for a little while without actually driving to see where the oil is leaking from. The most common oil leaks on the VG and the VQ engines are the valve cover gasket and the oil cooler. A commonly missed oil leak on the VG is the camshaft bore block off plate on the back side of the heads. The bolts tend to loosen over time and the gasket gets hard so that the oil will flow out the back of the head. It is often mistaken for a leaking valve cover gasket because it is up high and hard to see.1 point
-
There are two coolant lines running to the throttle body. One of them comes from the coolant rail on the back of the heads, located behind the Bank 2 head (Driver Side). As for size, I’m fairly certain it’s 1/4”. The other hose to the throttle body extends down under the intake boot, running along the heater core pipe along the side of the engine above the exhaust manifold. There are two sections to the PCV System. The valve itself is located on the intake side of the Bank 1 valve covers, on the back of the valve cover. It is a small plastic piece that is inserted into a rubber grommet, on the 2001 VQ. The valve itself is rather fragile, and if the hose back there has dry-rotted, you’ll have some difficulty removing it. This valve feeds the crankcase gases into a tube under the lower intake manifold, and exits into the intake near the butterfly valves above cylinder 4. The secondary part of the PCV is an extension of the chambers within the valve covers. The valve covers on the 2001 VQ are large and typically made of aluminum, having chambers at the top for the gases to collect. On the Bank 1 side, there is a large outlet (about 1/2”) that utilizes a hose along the top of the timing cover to reach the other valve cover. The inlet on that side is roughly the same position as the Bank 1 side, but mirrored. There is then a large outlet on the back of the Bank 2 valve cover, on the exhaust side, which feeds directly into the intake boot, before the throttle body. It is a rather efficient PCV system, and I don’t recommend tampering with it. The VQ is quite sensitive to crankcase pressure, and will often react with oil seepage, misfires, or moisture buildup in the oil. It’s cumbersome, but it works. Above is a picture of my engine stripped down to the heads. I highlighted the PCV path along the valve covers with yellow.1 point
-
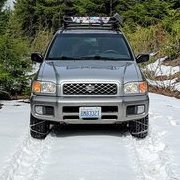
My parents came down to visit me and we decided on a little camping/kayaking adventure in the Olympics. The Pathfinder was loaded up with enough gear for 4 adults, one dog, and two kayaks. The vehicle worked great! I'm definitely itching to do some more updates/upgrades, trying to hold off until fall and winter though. Parents next to the load out! Getting up to elevation. Cool side view. Tire carrier + heavy drawers (need to rebuild) + gear and the truck levels out. I'd like to lift the rear up more to compensate. At camp. It was fun to see the Pathfinder loaded out! I enjoy these short trips because it helps me practice planning/packing for future trips.1 point
-
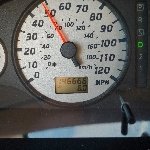
have both, odometer is reading 257.0001 point
-
maybe these will work..1 point
-
https://www.walmart.com/ip/Coker-Tire-99110-White-Tire-Paint-Pen-Enough-for-2-Tires/378650948?wmlspartner=wlpa&selectedSellerId=18397&adid=22222222228248744727&wl0=&wl1=g&wl2=m&wl3=293213134005&wl4=pla-511568930343&wl5=9017519&wl6=&wl7=&wl8=&wl9=pla&wl10=125215519&wl11=online&wl12=378650948&wl13=&veh=sem&gclid=Cj0KEQjw3PLnBRCpo8PCoaGM99MBEiQAppRuC2p5ir4OrLl6Ny5V4k_tqhV8cUGok7-NodvmC9xghu0aAllM8P8HAQ ?1 point
-
I’m late as well but, I to like the white letters out. My tires did not have that option.1 point
-
The cluster itself isn't too difficult to get to, just some Phillips screws around the surround and then IIRC four around the cluster (surround comes out first, then the cluster). Pull the cluster and make sure that the speedo cable is still clipped into the dash behind the speedo and the square drive end is intact and turns when the truck moves. I haven't had an '88 dash apart, but on my '93, each instrument is pretty easy to unscrew from the rest of the cluster for inspection. The mechanism's pretty simple. The cable spins a gear and a magnet. The gear spins other gears that spin the odometers. The magnet drags at the cup around it, pushing it against its spring, and that's what makes the needle move. There's also a little reed switch next to the magnet on mine (not sure if '88 had that yet) that sends a speed sensor signal to the computer. I don't think just the gears are available. If the assembly is buggered, I'd look for another cluster of similar vintage to either swap in or rob the required parts from. Also, if you find that the cable's damaged, check the odometer and its gears before replacing the cable. If it was just the cable that went, it should've all gone at once. One then the other makes me suspect that the odometer or its gearing bound up somewhere, overloading the cable and causing it to fail soon after.1 point
-
Late on the reply and my vote was going to be out. Looks great man! Sent from my SM-J327P using Tapatalk1 point
-
Looks good! Great choice on white out.1 point
-
I did letters out on mine. Looks good IMO.1 point
-
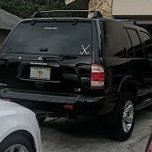
I vote out. My rig is white and I like the contrast of white on the black.1 point
-
Sent from my iPhone using Tapatalk1 point
-
Warning: Don't watch this if you're afraid of body damage ?1 point
-
finally get out in the woods after new purple spring bastard pack Sent from my iPhone using Tapatalk1 point
-
Man, I am sorry I do not get onto these forums near enough. Just moved to SoCal 2 months ago and life has been crazy. Had some free time to wrench on my 02 yesterday, installed new trailing arms (minus one that I rounded a nut on) and replaced a leaky O-ring on one of the camshaft position sensors. She's at almost 170k miles now and runs like a beast, I drive her to work everyday. Sent from my Pixel 2 using Tapatalk1 point
-
Nice photos! Looks like a blast! Im really digging the geology you guys have over there. Kind of reminiscent of the High Sierras. I gotta get up there soon! In this one pic it looks like you might be bottoming out on your driver side shock. Hard to tell but you might want to get extended bumpstops to save your shocks from damage due to over-compression.1 point
-
The answer is yes Aaaand a little something to remember the trail. There’s now a random boulder with a nice red stripe on it in the middle of the woods now. Time to build some sliders! Sent from my iPhone using Tapatalk1 point
-
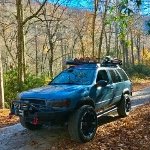
Haven’t been on here in a bit, so I figured I’d throw up some pics from the last couple weekends. Also I don’t think I mentioned it on here yet but I switched to AC’s up front and am running Land Rover 9448’s in the back now with a pretty long travel bilstein shock. Long enough that I can swap springs on the trail [emoji23][emoji1598] Anyway, here’s the pics. I think I’ll split them up in a few different posts for each trip Here’s my car camping setup. Don’t judge the flowers, it was free haha Sent from my iPhone using Tapatalk1 point