- Sign In Changes: You now need to sign in using the email address associated with your account, combined with your current password. Using your display name and password is no longer supported.
- If you are currently trying to register, are not receiving the validation email, and are using an Outlook, Hotmail or Yahoo domain email address, please change your email address to something other than those (or temporary email providers). These domains are known to have problems delivering emails from the community.
Leaderboard




Popular Content
Showing content with the highest reputation on 04/24/2019 in all areas
-
I had several XJ waves that got more confused as they went past. Always fun breaking the neck of a guy driving a big Jeep haha. On the original topic of this thread, it's always cool spotting R50's in published things. Fun to keep an eye out when watching movies.3 points
-
Lol. Every time I see one on the road I wave and they just stare at me like wtf is up with this dude.3 points
-
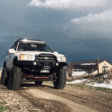
Went for a bit of a drive!2 points
-
Here’s how to do a rear disc brake conversion for a 96-04 R50 using 88-95 WD21 rear brake parts. First things first, though: I’m not getting into the drums vs. disc argument here; both have advantages and disadvantages. I’m not advocating one over the other; in fact, I’m fairly neutral about the discussion. I’ll be the first to tell you there’s nothing wrong with the drum brakes...they’re reliable, long-lasting, and quite easy to work with and maintain (in my opinion, of course). Feel free to discuss the merits of either system, or ask any questions later, but I’m not writing this to justify why you should or shouldn’t do this swap. This is just the how-to. So why did I do it? Curiosity and opportunity. At some point, a few people asked me directly about whether I thought it was possible. And I know it’s been discussed heavily in the past. A fellow NPORA’er gifted me a set of WD21 axle assemblies after I helped him out with some info. I’ve been sitting on this project for about a year now, only finally deciding to go through with it when I swapped my LSD for a TJM the other weekend. And well, here we are: an R50 with rear disc brakes. I’m not aware of any R50/QX4 that has done the swap, but the process is essentially the same as what’s already been documented for WD21, D21, D22, and WD22. For the most part, I’ll only be going into detail about the parking brake cable, since this is the only thing specific to the R50. Otherwise, the process and parts are the same as others have documented, so be sure to read those posts linked below (but, I’ll give a brief breakdown of steps, too). Prime at XterraNation did a great write-up of the process for his Xterra (although he never installed them; he tried selling them, but not sure how that went), and Roastbeef at Pirate4x4 (among other sites) did it to his SAS’d Frontier and provides some decent info, too. Nissan Nut has done it to a D21 and provides some generic info for other models. The parts and process is no different for an R50. Prime’s (WD22): XterraNation Roastbeef’s (D22): Pirate4x4, RoninWheelers NissanNut's (D21/WD21): NissanNut The gist is that you use the WD21 disc backing plates (and consequently all the brake components that bolt to it) on your R50 axles instead of the drum backing plates (and components), then figure out how to adapt the parking brake cables. To that extent, one major note is that it’s basically bolt-on, but by no means a direct swap and is not without some customization. It’s not a practical DIY project unless you have the means and tools (a floor press is required). The R50 parking brake cables get reused, but they are permanently modified, and fabricating a bracket of some sort is required. If you plan to do this swap, you’ll very much need to budget for parts and labor. If you know a guy, who knows a guy, who has a floor press...get to know that guy. Any driveline shop should be able to do the work (at least as far as the axle/brake assemblies go), but you’ll need to provide them specific instructions on how to reassemble everything. (A couple local shops quoted in excess of $150 for just labor.) Parts Needed: Rear disc brake assemblies* from a 88-95 WD21 If you have a 96-99 R50, you need shafts from an 00-04 R50 (or Frontier or Xterra) -or- you’ll need to have yours lathed down...more info below. Long brake line for passenger side (I used AGS Poly Armour Brake Line, PAJX-351; 3/16” line x 51” length w/ M10x1.0 fittings available from AutoZone for about $9) Short brake line for driver side (I used AGS Poly Armour PAJX-340; 3/16” line x 40” length w/ M10x1.0 fittings, also from AutoZone for about $7) Replacement parts: wheel bearings, oil seals, grease seal, axle o-ring, axle nut lock washer (see my 31-spline axle swap write-up for more info) Brake parts as-needed for your specific donors, setup, and/or liking: rotors, pads, shims, piston, calipers, short hose, rebuild kits, springs, parking brakes, etc. (There are performance rotors (http://www.cquence.net/partfinder/product/list/?cat=16&make=Nissan&model=Pathfinder&year=1995) and premium pad options out there , btw.) 4x Nissan C200 axle studs (p/n 43083-EB000) Optional: 12x wheel studs (Dorman 610-320)...now’s a good time to change them. I’d recommend an open nut (Dorman 611-065), a stack of ½” ID washers, and some anti-seize to aid installation. Optional: 8x axle stud nuts (p/n 08912-9401A) Brake fluid Wheel hub grease *About the assemblies: you need, at minimum, the backing plate that mounts all the brake components to the axle shaft. This is the most important part, but there are also some parking brake pieces that you need. If you can also get the parking brake cables, do so, but you’ll really need the springs from the end of them. It’s easier/better to just have the whole assemblies just in case, like so: Below is the backing plate shown, cleaned up with parking brake shoes installed, caliper and bracket assemblies. There was a shroud around the backing plates, but I cut them off because they were damaged (not too tough to do with a Dremel and small cut-off wheel): If you have a 96-99 R50, your axle shafts are yet another Nissan variant. The wheel hub flange has a greater diameter than other shafts, so the rotor won’t fit it. You’ll need 00-04 R50, D22, or WD22 33-spline shafts or, in lieu of new shafts, you could also have them lathed down. Larger diameter wheel hub on right: Fits... Doesn’t fit... Tools Floor press — I bought a 12-ton floor press from Harbor Freight for just a little over $100. It’s more than paid for itself doing the 31-spline swap, this projects, and replacing u-joints. Keep in mind, though, you'll need other parts to break down and re-assemble things. Bearing splitter — needed to pull the ABS tone ring and outer bearing off the axle shaft. Nissan Nut shows being able to pop it off with a crowbar or screwdriver, but yeah, that'd didn't work for me at all. Brake line bender (optional) — helpful to get clean bends, but the brake lines can be bent by hand Hydraulic crimper — highly recommended for parking brake cable modification; available at Harbor Freight, but I found one a bit cheaper on eBay and included more dies Brake line flare tool (optional) — depending on how you approach the brakes, you can either use a pre-flared line and bend it, or make your own line using M10x1.0 fittings and a flare tool. Mini-sledge, dead-blow hammer, mallets, sockets, tool aptitude, etc. In my case, to make the parking brake brackets, I used: Chop saw (well, I have a modified mitre saw and metal-cutting blade that I use) Drill press M6x1.0 tap Dremel w/ metal cut-off discs 1.5”H x 3”W x .125” steel tube (two 2.75”L pieces Basically... Again, I’m not going to go into great detail about axle shaft disassembly and assembly...when you read the other write-ups, you’ll know quickly if you can or can’t do it. But basically, you need to: Disassemble the WD21 axle shaft and brake assembly to the point that the disc brake backing plate can be removed from the wheel bearing retainer cup. Disassemble the R50 axle shaft and brake assembly to the point that the drum brake backing plate can be removed from the wheel bearing retainer cup. (This is where you would also want to pull the outer bearing and grease seal, press the bearing race from the bearing retainer if you intend—and you should—to replace them with new parts). Reassemble the R50 axle shaft and all R50 shaft parts with the WD21 disc brake backing plate. You’ll need to use the C200 axle shaft studs at the top of the plate, and the R50 studs at the bottom. Bolt the assemblies to the truck. Remove the OE brake lines, and use them to mirror the bends on the custom lines. Modify the parking brake cables. (I am grossly oversimplifying this part!) Assemble the brakes. Adjust the parking brake. Bleed the brakes. Go! (er, Stop!) Brake Lines As noted, you’ll need to make two brake lines. The WD21 and R50 ones will be too short. At first, I bought some 3/16” line and fittings from eBay, only to realize it was too thick to flare. The ready-to-bend lines (which are already flared and have fittings installed) are a great solution, although the 40” line I used for the drivers side was a little long, so I cut it down a little and made a new flare...but you could easily add another bend to take up the slack if needed. My brake line bending skillz need improvement, but they’ll do the trick. I bent my lines using my spare axle housing to mock up, but it would have been much easier to just wait until the OE brake lines were removed and match the bends to them. You can use a cheap tool (HF sells one) or just bend them by hand. Then, just loop them over the axle shaft and into the short flex lines (images shown below with the parking brake brackets). You could also make an extension line and re-use your R50 line if you just twist the end that goes into the drum about 90°. I don't recommend this approach because: That 90° twist may weaken the line The coupler and short line (they have small 12” lengths like the AGS lines I mentioned above) cost more than the longer lines It adds more connections1 point
-
I believe it’s because some of us at NPORA forget that other people with Pathfinders may have not yet discovered their vehicle’s true potential. They haven’t been awakened yet. Soon.1 point
-
More OHV fun on a day off1 point
-
Got everything all buttoned up and now runs smoothly. No more check engine light and a happy driver. But man ran into some issues first being the access to the passenger side upstream O2 sensor. I grabbed some extensions and swivels and broke it loose and managed to cram my arm in there and loosen it by hand. Installation was the reverse way. Next being as I was crying on the inside getting at the O2 sensor I noticed that my fan was being held on by a thread and like a revolution from blowing up lol. So I Amazon primed a new fan that's coming in 2 days. Lastly the passenger side VVT solenoid didnt come with a gasket so I made a emergency run to the dealership and snagged the last one in stock. Sent from my SM-G960U using Tapatalk1 point
-
Finally finished mine, from Coastal. I think it’s a fantastic build. It’s very heavy but very sturdy. There ARE some flaws in the design that they don’t account for, such as the dinky little power steering line that runs across the front of the frame, so that was a huge pain to bend and move out of the way... resulting in some crushed fins on my condenser, but oh well, more reason to install an aftermarket cooler eventually. I really took my time welding the kit, made sure it was solid throughout, but I also have a pretty decent set of welding machines at work. It’s not going to be easy with a smaller welder, so be prepared to either have a decent one at your expense, or someone that can weld it. The total time it took me to bevel the edges, tack it together, weld, grind, stitch-weld the inside, etch, prime, and paint was a little over 36 hours, and I was definitely taking my time. All in all, it’s a fantastic kit, the piece quality was actually great, and the metal was very clean and ready to weld, minus the edges that all had to be beveled. For the price and availability, I strongly recommend their service.1 point
-
Got my new coils today straight from England, these things got here fast! They shipped yesterday and got here this morning. These are the LR 9449 coils, I'll post before and after measurements although I'm not sure if I'll be able to install these today but probably tomorrow Sent from my SM-G960U using Tapatalk1 point