- Sign In Changes: You now need to sign in using the email address associated with your account, combined with your current password. Using your display name and password is no longer supported.
- If you are currently trying to register, are not receiving the validation email, and are using an Outlook, Hotmail or Yahoo domain email address, please change your email address to something other than those (or temporary email providers). These domains are known to have problems delivering emails from the community.
Leaderboard

.thumb.jpg.3351162271e2c1bf86fe7c0c7e657df0.jpg)
Popular Content
Showing content with the highest reputation on 03/30/2019 in all areas
-
3 points
-
Sent from my iPhone using Tapatalk3 points
-
Mile markers need studs changed, but it’s easy. Take two nuts and thread them onto the end of each stud so they jamb together, then just back the stud out with a wrench on the bottom but. Mile markers come with new bolts to replace the studs. I don’t know that any brand hub will clear the SE rims like you have. I had those same rims and needed 1.5 inch spacers to clear the hubs. Personally, I like using spacers because it opens up the options for aftermarket rims a ton because there are very few choices in the offset needed for larger tires to clear the strut mount.2 points
-
I took my radio and climate dash trim bezel off to install my electric brake controller display and manual activation lever. Getting the whole thing installed is a project that will never end. When I unscrewed the screws at top, the plastic ears broke off above the mid-point of the circle. I superglued the plastic back together to have a flat foundation, but I knew that would not be strong enough to last. So I used JB Weld to glue 2 metal washers to the plastic to reinforce it. It seems to have worked well. Just a warning if you take it apart, be ready for the plastic bits to fall off so you can find them. The 2nd pic shows how I installed the manual activation lever through one of the switch knock out panels.2 points
-
Warns do not need the studs changed, at least on the 2001 with the manual transfer case and locked flanges. I don't remember if there are any differences across years or front drive options. Sent from my SM-N950U using Tapatalk1 point
-
You have a few options for hubs. Warn, rugged ridge, and Mike marker. Mike marker is the cheapest, but not the slimmest. You can do your own research on which one you prefer, but I think if you want to fit hubs on your stock wheels you need to bezel out the center bore/use wheel spacers. Should be plenty of info on the forum1 point
-
Sorry I don’t know any particular brands to recommend. The spacers I’m running are amazon/eBay specials so no specific brand that I recall. I’ve used spacers a lot on many different vehicles, never spent more than $100 for a set of 4, and have never had any trouble with any of them. Hope that helps!1 point
-
Ooh, gotta be careful with those! At least you didn't lose any fingers.1 point
-
My stock 03 se wheels were 16x7 with 45mm offset. The easiest wheel for you to find will be a 15x8 or 16x8 with -19mm offset. Otherwise, spacers will suffice. But honestly, a working set of steelies isn’t more than $70 a rim. You sell your old wheels for $150 (I sold mine for $120 on Craigslist) and you’re not out much, especially compared to what it takes to buy good spacers.1 point
-
tranny is horny. lol1 point
-
I finally connected up the aiming motors to the HID's on my fixer upper 96 Pathy. Made my wiring harnesses and went to town. I'm that guy that takes forever, but when completed it's done near perfect and the right way. OCD just a little. Ha Ha. Following the wiring diagram to a T with little to no problems. The key here is making sure your connections are In it for the long haul and your wiring is in the back seat buckled up. I always take a little more time making my harnesses and triple checking to make sure all the connections are ran and done right the first time. I've in the past learned it goes together a hell of a lot easier than coming apart simply by triple checking your wiring you can avoid the cussing segment.. Lol. I've included some pictures of the install. Please feel free to ask any questions you have. This is my second factory HID install and I'm here to help. SUPPLY LIST- purchase a set of Factory HID's with aiming switch. Bussman Eaton easy I.D fuse panel, 2 - 30amp Nissan relays or equivalent, (red,black,yellow)14awg rolls of wire, butt, ring, Male and female connectors. Heat shrink rap, 3m rubber splicing tape, 3m super 33 black electrical tape, wire solder, blow torch, wire loom and wire ties/holders. I wanted to use a fuse box making things look 100 times cleaner eliminating a cluster f#$k of wires connected to the + side of the batt. Hope this helps Sent from my SM-S737TL using Tapatalk1 point
-
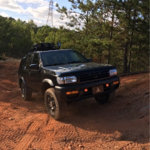
Sweet R50 along with beautiful landscapes of this place we call home. Sent from my SM-S737TL using Tapatalk1 point
-
Are you sure that’s not a model?1 point
-
I don’t have any experience with the JY/oem route, but if you’re looking to buy new I recommend ordering from etrailer.com. That’s where I got my hitch receiver and wire harness. About $180 will get both the hitch and a plug and play harness. The only other thing you might consider is an aftermarket transmission cooler, but I wouldn’t say that’s mandatory. A good plate and fin cooler can be had for around $50.1 point
-
Replaced driver side strut rod bushings.. No rust but breaking them loose was rough.about to finish other one..hopefully it'll go a little faster.1 point
-
1 point
-
Its amazing the effect new sway bar bushings had.The steering felt super loose...two simple bushings and it stiffened the wheel up significantly. Still have to do the ends but it's a great start.1 point