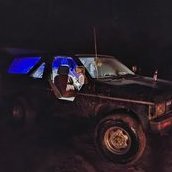
Backpacker Posted April 24, 2017 Share Posted April 24, 2017 Think this is the cause of my series of pop noises when I accelerate through a turn? I know it's not cvs and everything else is tight. It's hard to see without pulling the lower control arm completely off, but it looks like it's starting to tear through the metal on the welded mount. Sent from my iPhone using Tapatalk Link to comment Share on other sites More sharing options...
RCWD21 Posted April 24, 2017 Share Posted April 24, 2017 You're missing the little cup that is welded to the frame mount. It keeps the bushing centered. Check to make sure the hole isn't all worn and chewed up also. Sent from my SCH-I545 using Tapatalk 1 Link to comment Share on other sites More sharing options...
Backpacker Posted April 24, 2017 Author Share Posted April 24, 2017 You're missing the little cup that is welded to the frame mount. It keeps the bushing centered. Check to make sure the hole isn't all worn and chewed up also. Sent from my SCH-I545 using Tapatalk Well that's a bummer. Everything looks oem and not modified at all, I wonder what happened to it. Think I could make one myself and weld it on? I know how to turn parts, not the best welder but I have acces the newest Miller welders on the market at my school and have experience with stick, mig and tig. Sent from my iPhone using Tapatalk Link to comment Share on other sites More sharing options...
RCWD21 Posted April 24, 2017 Share Posted April 24, 2017 Look on the back side of the compression rod for what the cup looks like, they're not all that thick. Usually they crack and then break away from the welds and fall off after rusting apart. I've used bearing races ground down to replace the cups and that's what I plan on doing with my 87 if the cup can't be salvaged since it's still there. Sent from my SCH-I545 using Tapatalk 2 Link to comment Share on other sites More sharing options...
Backpacker Posted April 24, 2017 Author Share Posted April 24, 2017 You're missing the little cup that is welded to the frame mount. It keeps the bushing centered. Check to make sure the hole isn't all worn and chewed up also. Sent from my SCH-I545 using Tapatalk Also, if the hole is pretty messed up, which as of now looks like it probably will be, if I brace over it with some steel do you think it will mess with my alignment? Seems like it would be easier and faster than cutting the whole square plate off and putting a new one on to keep the mounts geometry the same. I can do that if required though. Sent from my iPhone using Tapatalk Link to comment Share on other sites More sharing options...
Backpacker Posted April 24, 2017 Author Share Posted April 24, 2017 Look on the back side of the compression rod for what the cup looks like, they're not all that thick. Usually they crack and then break away from the welds and fall off after rusting apart. I've used bearing races ground down to replace the cups and that's what I plan on doing with my 87 if the cup can't be salvaged since it's still there. Sent from my SCH-I545 using Tapatalk Great idea! I still have the old races lying around from when I did bearings on my ranger a while back. Sent from my iPhone using Tapatalk Link to comment Share on other sites More sharing options...
RCWD21 Posted April 24, 2017 Share Posted April 24, 2017 I enlarged and cleaned up the hole and welded in some hardened washers (may or may not have been the correct kind) but they happened to be the perfect thickness doubled up. Then dusted the fromt of the mount with a grinder and then welded on the bearing race. If you go into my posts there should be pics of it in place. I beleive the part number is L68111 for the bearing races. Sent from my SCH-I545 using Tapatalk 1 Link to comment Share on other sites More sharing options...
Backpacker Posted April 25, 2017 Author Share Posted April 25, 2017 I enlarged and cleaned up the hole and welded in some hardened washers (may or may not have been the correct kind) but they happened to be the perfect thickness doubled up. Then dusted the fromt of the mount with a grinder and then welded on the bearing race. If you go into my posts there should be pics of it in place. I beleive the part number is L68111 for the bearing races. Sent from my SCH-I545 using Tapatalk Thanks RC. I'll be addressing this in a few weeks when my semester is up and I have some free time. Sent from my iPhone using Tapatalk Link to comment Share on other sites More sharing options...
RCWD21 Posted April 25, 2017 Share Posted April 25, 2017 I beleive it's possible to do this without removing the control arm but I was replacing bushings when I did mine so I had a lot more room. Depending on your skills and the amount of damage done you could probably just fab a new cup and weld it on in a few places Sent from my SCH-I545 using Tapatalk 1 Link to comment Share on other sites More sharing options...
Backpacker Posted April 25, 2017 Author Share Posted April 25, 2017 I beleive it's possible to do this without removing the control arm but I was replacing bushings when I did mine so I had a lot more room. Depending on your skills and the amount of damage done you could probably just fab a new cup and weld it on in a few places Sent from my SCH-I545 using Tapatalk I read in another forum you can just remove the compression rod from the control arm to do it. It's rust free so I think I can go that route. Sent from my iPhone using Tapatalk Link to comment Share on other sites More sharing options...
adamzan Posted April 25, 2017 Share Posted April 25, 2017 I enlarged and cleaned up the hole and welded in some hardened washers (may or may not have been the correct kind) but they happened to be the perfect thickness doubled up. Then dusted the fromt of the mount with a grinder and then welded on the bearing race. If you go into my posts there should be pics of it in place. I beleive the part number is L68111 for the bearing races. Sent from my SCH-I545 using Tapatalk This is the proper repair. Common problem, relatively easy fix if you're handy. No need to remove the LCA. Just the 2 bolts that hold the rod, and the big nut on the end of the rod (it's a 24mm or 15/16" wrench you'll need). I found poly bushings really firmed up the ride, if you don't like it too rough, stick with oem rubber ones. 1 Link to comment Share on other sites More sharing options...
Backpacker Posted April 25, 2017 Author Share Posted April 25, 2017 This is the proper repair. Common problem, relatively easy fix if you're handy. No need to remove the LCA. Just the 2 bolts that hold the rod, and the big nut on the end of the rod (it's a 24mm or 15/16" wrench you'll need). I found poly bushings really firmed up the ride, if you don't like it too rough, stick with oem rubber ones. I'm going to replace all bushings when I do this, probably to poly. Sent from my iPhone using Tapatalk Link to comment Share on other sites More sharing options...
KovemaN Posted April 25, 2017 Share Posted April 25, 2017 (edited) http://s730.photobucket.com/user/koveman/library/Compression%20Rod Edited April 25, 2017 by KovemaN 2 Link to comment Share on other sites More sharing options...
RCWD21 Posted April 25, 2017 Share Posted April 25, 2017 What Koveman did in the link above is basically what I did except I placed the washers inside the hole after I enlarged it so I could weld the bearing race directly to the compression rod mount. Also I ground down the races so they were half as tall in height so they wouldn't pinch the edges of the bushing if a wheel were to fall into a hole or hang off of a ledge or something. Sent from my SCH-I545 using Tapatalk 1 Link to comment Share on other sites More sharing options...
KovemaN Posted April 25, 2017 Share Posted April 25, 2017 (edited) I believe my bearing races were LM67010. http://www.nissanpathfinders.net/forum/topic/36792-broken-compression-rod/?p=697589 Edited April 25, 2017 by KovemaN Link to comment Share on other sites More sharing options...
Slartibartfast Posted April 26, 2017 Share Posted April 26, 2017 I used the L68111s on mine. Could be a little tighter on the bushing, but they seem to work fine. If the hole in your frame is hogged out, you may change your alignment a little by putting it right. Looks like the bushings you have on it now are poly, the same ones I've got actually. The last guy just didn't do anything about the disintegrated stock cups. Link to comment Share on other sites More sharing options...
Precise1 Posted May 16, 2017 Share Posted May 16, 2017 Just for fun, or be pedantic, do those bearing codes have something to do with diameters and angles, or are they just an in house nomenclature? B Link to comment Share on other sites More sharing options...
KovemaN Posted May 16, 2017 Share Posted May 16, 2017 http://cad.timken.com/item/all-product-types/tapered-roller-bearings-ts-tapered-single-imperi-2/item-28644 I think it's just a catalog number for Timken. I didn't see any dimensional correlations. Link to comment Share on other sites More sharing options...
Recommended Posts
Create an account or sign in to comment
You need to be a member in order to leave a comment
Create an account
Sign up for a new account in our community. It's easy!
Register a new accountSign in
Already have an account? Sign in here.
Sign In Now