- Sign In Changes: You now need to sign in using the email address associated with your account, combined with your current password. Using your display name and password is no longer supported.
- If you are currently trying to register, are not receiving the validation email, and are using an Outlook, Hotmail or Yahoo domain email address, please change your email address to something other than those (or temporary email providers). These domains are known to have problems delivering emails from the community.

zeppelindrummer
-
Posts
250 -
Joined
-
Last visited
Content Type
Profiles
Forums
Calendar
Everything posted by zeppelindrummer
-
The three circled parts are what i'm confused as to how i'm supposed to remove them. I put a 10mm wrench and it fits fine, i just can't get it to turn. it just rounds the edges. Is there a different way to remove these? Am i doing it completely wrong? and then a pic w/o the drawing just... because
-
Ahh crap. haha
-
No more Rough Country UCAs? what do i do!
zeppelindrummer replied to zeppelindrummer's topic in The Garage
The only problem i ran into was the spindle inside the UCAs having it's threads junked up. I had to use a tap and die set to fix them. Getting the new bushings on the spindle, and inside the control arm also can be a little time consuming, and takes some effort. A rubber mallot on the end of the spindle works okay to knock em loose whileresting the old control arm so the holes that the bushings go in are on a pipe that is about the same diameter as the hole on the control arm, just pound on it. This is one way i used to get them in as well. To get them in, you can also take the the old bushings and put them on top of the new ones, to hammer them in, the center metal cylinder is the exact size, so that works good to knock em down. -------0 -------\ \ ---------\ \ -----------\ \ ------------l l <--------- UCA -----------/ / ---------/ / -------/ / -------0 -----# # -----# # -----# # -----# # -----# # -----# # <---Pipe -----# # -----# # -----# # You can also get them in, by pushing the bushing on just enough so you have some threads, and you can put the big washer back on, and screw the nut down the spindle to suck the new bushing on. (put a long screwdriver through the hole of the spindle to keep it from spinning when tightening the nut) Any other questions, just ask. Pretty much everything is very fresh in my mind still. If you have the stock shocks, they kinda suck to get out too. But what job has everything go right? Also, just remembered, if you have a good long X tire iron, it'll work good for the bolts that holds the spindle to the truck. -Zepp -
I was out night wheeling a couple days ago, and all of the sudden, my brakes went to the floor. I wasn't quite sure what had happened so i slowly headed to a flat place where i could check all of my lines. I got out the flashlight, and there wasn't any leaking to be found. Has to be the Master Cylinder... My friend in his Toyota pickup and I drove back to the dorms, downshifting as my way of stopping.... and Mikey in his truck in front of me incase i had to.... use him as a brake. After popping the hood, i could tell the Master Cylinder had gone. Fluid hadn't dripped everywhere, but it was all over the master cylinder itself and around it, and the leaked fluid had attracted alot of fresh dust. The auto stores around here didn't have any new master cylinders in stock, so i went to the "All Trucks Parts" junkyard down the road, and got a new Master Cylinder. Everything looked right, but the holes don't match up, and its obviously for a newer year, (mine being an 87) Kinda pissed, cuz i didn't think this would be that big of a fix, i threw the cylinder in the front seat, and forgot about it for the resta the night. Question One: Should i just get the parts store to special order one? it'll come in in a day, but its a bit more expensive than a used one. Or should i just make sure they give me the right year at the junkyard? i don't wanna be replacing one again, cuz driving without brakes sucks, and i was wondering if you guys think i should trust a used one? Questoin Two: When taking off my shot master cylinder, there are the three bolt things on one side, with the stiff "wire" or metal things going to them. I tried unscrewing but that didn't work, are those supposed to be unscrewed? or are they taken out a different way? Thanks! -Zepp
-
No more Rough Country UCAs? what do i do!
zeppelindrummer replied to zeppelindrummer's topic in The Garage
Hey guys, sorry i haven't been back in a while with an update but here we go! I got the Rough Country kit from Rocky Mountain Suspension Products. It was 328.99, or somethin very very close to that. I've got the new front shocks, and control arms on, and let me tell ya..... i LOVE the shocks. THey are a huge improvement from what i used to have... (the 22 year old stock shocks, haha) and i cranked the t-bars to give me around the 3 inches. My front was pretty saggy to begin with, so it's only a bout an inch higher than the stock rear right now. I haven't put the back on, because i've had strep... in fact, i had strep while i was puttin on the front, and it was killin me. I finished that, and luckily i'm thinkin the rear will be a bit easier. A big problem i ran into though while doing the front was a problem with the threads on the both of the bars that hold the bushings that go inside the new upper control arms. I didn't wanna search the junkyard, or buy new parts and hope the threads are good, so i finally splurged and bought a new tap and die set. (i've needed them before, and never got one cuz i didn't want just a small kit, and the bigger ones are a little pricey) It was almost 80 bucks at Harbor Freight, but its a HUGE kit, and is actually very high quality, works very well, and i used it for more than just those threads when putting the new control arms, and shocks on. Overall i'm very happy with the fronts results from the kit. Didn't have any trouble other than fixing those threads, and I'm hoping to get the rear on this weekend, i've gotten over my bug, and it hopefully wont be too tough. I'll post before and after pictures soon as i'm done! -Zepp -
No more Rough Country UCAs? what do i do!
zeppelindrummer replied to zeppelindrummer's topic in The Garage
well thats retarded. good thing i got my rough countrys!!! they're in the mail, and should be here early next week. and thanks again everybody for all ur help! -
No more Rough Country UCAs? what do i do!
zeppelindrummer replied to zeppelindrummer's topic in The Garage
siiick!!! so ima go with the 86.5-97 HB kit from that link (I've actually run across that site multiple times, but wasn't sure if they'd work), and i'll use the JGC coils that i got off craigslist, and those shocks that came with it will work too? i was wantin to get newer shocks that are specifically for 3" of lift, so i was considering getting the calmini's, but if these will do the same, should i just go with them? thanks for all the help guys!! -
No more Rough Country UCAs? what do i do!
zeppelindrummer replied to zeppelindrummer's topic in The Garage
i could call again and ask... it says 1.5" not 2... my bad, typo! anyway, are those the correct UCA's? cuz if its only gonna give me that much lift, idk if i wanna put all the trouble into gettin them -
No more Rough Country UCAs? what do i do!
zeppelindrummer replied to zeppelindrummer's topic in The Garage
I asked, and they said the only ucas they have are in a full 2" kit for the hardbodies..... kinda disappointin me, but i guess i'll have to look around for a used pair! i was really lookin forward to this project next week, but i guess it'll have to wait if any of you guys see, have, or know of a used set let me know! i've got paypal and am dyin to get this done! thanks all! -zepp -
Rough Country no longer carries the upper control arms for the WD21's (I've called, emailed, and live chatted them) and the Calmini UCA's are nearing the 400 dollar mark. I remember a while back reading the threads on new UCA's and 88 recommended not getting the "4x4 parts" brand. I was wondering why? is there a company i've been missing that has UCAs? What do guys you recommend i do? thanks!
-
haha, thats the technical term!! thanks! lol
-
Actually just went through that process last weekend when replacing my tie-rod ends. Its not super hard or technical, but it does take a bit of time. I was getting really pissed at Pep boys, because i had to replace 6 on just my fronts.... I learned a little bit though, that because the lugs and studs are very old, they get much easier to cross thread. If the lug nut has some small rocks or dirt, it can mess up the threads on the stud or the nut itself which then can mess up and cross thread when putting the lug back on. I was looking to get a tap/die set to clean up the threads, but instead i just replaced all the ones that were even a little hard to put on. Figured, may as well why i'm at it. Got all new studs and lug nuts, cuz they're about a buck and a half a piece. All you really have to do is take off your wheels, and remove the hub. The wheel bearings will probably need to be repacked with grease, so do that while you're at it. It's not difficult. The only tool you'll need other than sockets, screwdrivers, and allen wrenches are some reverse pliers. I didn't have any, so i had to buy them at home depot. 20 bucks, but i know i'll use em a ton. The reverse pliers are used when you have the hub off, and there is a little "C" shaped thing.... not sure what its called, that you have to remove in order to take off some other pieces. (what is stated below) There are about 3 or 4 different circular washer shaped pieces inside the hub that you'll need to take out. One of them has threads, and you have to unscrew it. Make sure though, when you put that piece back in you tighten it down enough. I didn't on one side, and the wheel was a little wobbly so i had to take everything back off and tighten it. Other than that, once you get the circular piece that holds the studs, hit the trashed ones with a hammer, they come right out. put the new ones in, and tighten the lug nut on them, so that the teeth will catch, and the new stud will be in. Put everything back together and you're done! I luckily did this job in my parents driveway when the Colorado weather was in the low low single digits. Of course it lasted into the night... so that was fun Hope this helps, Good luck!
-
Hey josh, still never got my stickers. i've pmd you. but didn't get anything... hit me an email man! zeppelindrummer@gmail.com
-
haha- first question i asked when i got a membership on this site too, and i've seen it asked many a times. No worries!
-
now for the one... problem. its running, and feels great, however there is a small sound. it sounds like something is rubbing... almost like a squeak. could my timing belt be rubbing on the t-belt cover? or could one of my cams, or belt pulleys/belts be too tight? i'll be runnin it to the mechanic down the street tomorrow morning to see what he says. hopefully its nothin too big! *crosses fingers* Thanks! -zeppelindrummer
-
Yeah! i actually just replaced the t-stat about 2 months ago, and got the bypass hose!! Thanks!! me and my dad got to work on it this morning, and we finished! thanks for the offer breemania, and thats exactly what we had to do! just spring forward, spring back, til we got it. no leaks or anything outta my new water pump, driving my pathy again is AMAZING! i've missed it, and i'm really happy to have it running again, especially with... pretty much no problems... Thanks again everybody!
-
Awesome!!! Thanks Slick! i'll get on that tomorrow after work! i miss my truck!
-
yeah, sooooooooo. so i should just keep turnin it til it gets into place? the mark i have is at about the 2:30 position, (left cam) and i need it at the 12 oclock position. is it okay to do it counterclockwise? or should i spin it all around clockwise? (like it normally spins when run)
-
So, after re-reading my post. i didn't even really ask what i posted this for in the first place. The upper two cams, have fallen, because i haven't had a belt on for about 3 days, (i was replacing it, and the spring on the tensioner broke, so i got one today. Lucky me, 3 bucks from one of the tech guys at the dealership down the street!) The pistons seem to have settled, which have moved the cams. I had marked their original positions, so its just a matter of getting them back to where they were. The right one is only 2 teeth away, and its no problem to get back, however. the left one has moved about 8 teeth, and its impossible to get it back without forcing it. I don't want to hurt anything... any suggestions? or is forcing it what i'm gonna have to do? Thanks!
-
So, i have finally gotten around to finishing up the replacement of the waterpump. Got back from my cruise a few days ago, and realized. i have no car! I got the water pump in, no problem, found, that the gasket in the old one had broken out, and thats why it was leaking from there. Put the new one in, got all new belts, and i'm in the process of putting on the new Timing belt. i'm just a little unsure of a couple things, and rather than guessing and hoping for the best, i'd better turn to the pros! I've found the dimples on both of the upper pulleys, as well as the lower ones, and dont know exactly what to do. There are the marks on the new timing belt, so i need to line the three dimples, with the three straight lines- correct? and at that, i'm moving the upper two pulleys, and they just spring back so its hard to get them, to line up. I'm especially concerned with the lower ones, because i can't get it to move at all (i haven't tried a ton, but from what i have tried its not movin much) I saw on the write up for installing the new timing belt, that the upper two pulleys had been taken off. do i need to do that? or can i use a strap wrench, or something to turn the pulleys, to get them to line up? I'm thinkin thats all i've got right now. but i'll be back later... i'm gonna head back out and look at it some more. Thanks!
-
Cool, thanks! i just checked on water pumps and they are less expensive than i was thinking. I had a good night at work tonight. a 95 dollar monday, good tips!.. anyway, i think i'll just replace the water pump, and i've been wanting to replace the timing belt, so while i'm at it i may as well. 75 bucks for the two parts doesn't sound like a bad idea. Any tips on replacing a water pump, or... the timing belt for that matter? My friend just recently replaced the belt in his 4runner, and he has the tools for it, so i'll head to his house. Thanks again guys!
-
Yup, mine is crazy loud and annoying! i think i'm gonna go take a vid/recording of it to show you how bad it can get. I've heard pathys with the bad tick, but never as bad as mine. I'll send an other post once i get it recorded
-
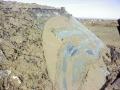
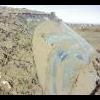
The Pathy has been running great for the last 4 months or so. I took it up wheeling, and ran into a bit of trouble on the way back. I had no problems with leaking coolant or anything once i had got up there (Thinking about it now though, it could have leaked in the dirt, and i wouldn't have noticed) On the way back home, me and my friend stopped in Breckenridge for his mom's art show, i parked the pathy in a lot, and came back about 20 minutes later... to my surprise there was a ton of coolant that had leaked out of my car. I saw the green liquid and figured my car overheated, and had filled up the overflow reservoir and pissed everywhere.... nope. Nowhere around the radiator, T-stat, or any of the hoses was a drip of antifreeze. It had filled up my skid plate, and was dripping from further back than the radiator. Today i looked at my car, took off the skid plate, and saw where the dripping was coming from... kinda. Is my waterpump shot? or, what are some other possible things that could have gone wrong? Video of leak. Drip location Puddle of Coolant, after car sat for very little time. Leaks very quickly, and takes alot to fill it up after the engine is on. (about a half container of Coolant) Thanks guys!
-
Hey dude... am i ever gonna get mine?... its been 5 months. just wonderin! THanks!
-
poor pathy! looks like the michael jackson of Pathfinders! back in the early 90's it was what it should be... but now... what is it?!?!?!