
theexbrit
-
Posts
1,266 -
Joined
-
Last visited
-
Days Won
33
Content Type
Profiles
Forums
Calendar
Posts posted by theexbrit
-
-
I'm just happy Steeevo already won one, otherwise I know he has a few recent pics that could definitely compete
 keep the nominations coming people!
Wait!! I object!!! It says "Rugged Rocks" on the bottom of Heloflyboy's door!
There's a connection to Steeevo!!
 :laugh: :laugh:
-
 2
2
-
-
F-me that is dead sexy!
:laugh: 
*edit*
Just measured & I think the winch will fit under the light bar!


-
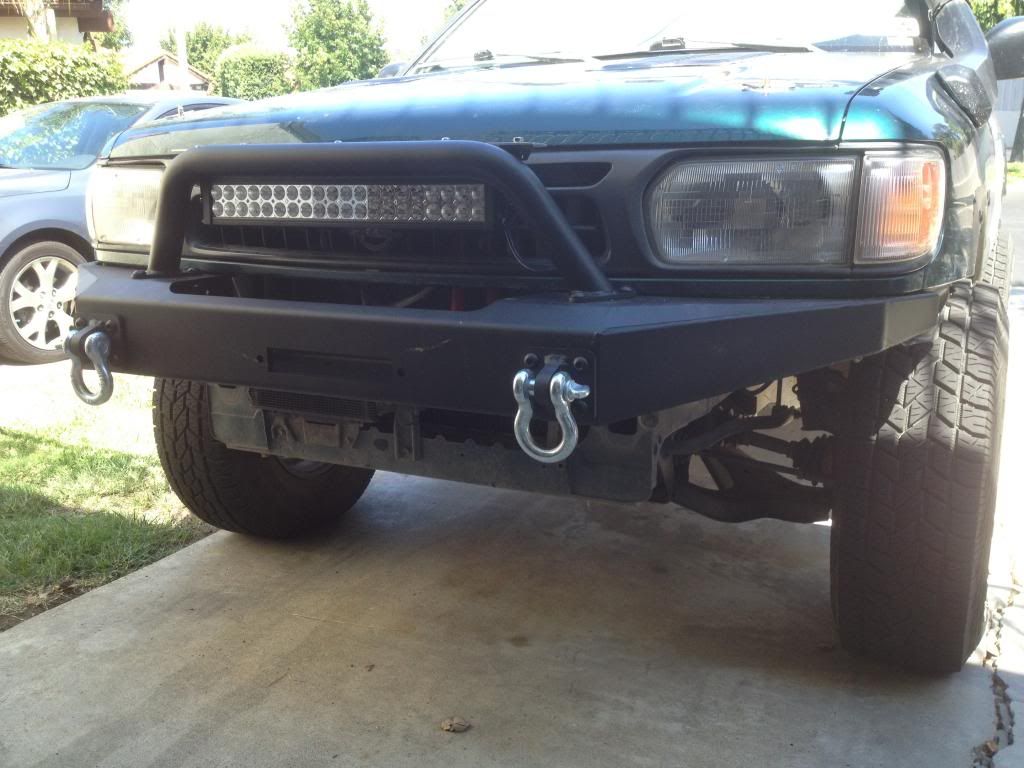
Got the $100 7500 lumens LED light bar fitted, just need to adjust it now. Not sure if I'll have to move it when i fit the winch.........
-
It's nearly finished, I have an LED light bar to go on & a vented skid plate to go from the bottom of the bumper down to the base of the radiator, etc, for protection. I'm also going to make the side pieces where the bumper ends a little more "finished". It's great because it's a very small bumper & weighs about 100lbs, I didn't lose any front height because of the weight.

-
2
-
-
Finished (sort of) fitting the XJ winch bumper to Old Green....................
-
1
-
-
Those years will fit 245/75r16s which correlate to a 30.5" tire. That's what I have in the Toyo Open Country ATIIs.
Off roading isn't solely about ground clearance, I used to think so, but so many trips at my now 9.1" of ground clearance have proved to me that it isn't. Just drive carefully with a brain and the Pathy will pull you through. They are very capable, reliable, comfortable, and a whole lot cheaper than the 4runner. Plus if you get an 01 or above you do earn the VQ which is quite a nice motor, and if I'm not mistaken has about 60hp over the Toyota's 3.4.... something to consider when you're merging on the freeway.
Hardware wise, yes they're at a disadvantage in terms of aftermarket support, BUT the factory components are quite solid, as previously said- 33 spline locking T-Case and rear diff with a 28 spline front axle. Factory equipped with 4.64 gears and a rear diff that's quite stout. Test drive the two and see what you like, what sold me on the Pathy was the motor and how much tighter it felt on the street vs the 4runner, FZJ80 land cruiser, Xterra, and Montero. And the price- I picked mine up for $5900 with 70k miles.
Amen brother!!!!
-
The steering wheel is on the wrong side!!!!!
-
Finally, you have a "real" Pathy!!
:laugh: 
Looks clean!
-
3
-
-
You know you drive a Pathfinder when you park on the curb and the tire carrier blocks you from getting stuff from the cargo area to the sidewalk.
Ah, but see in Europe or Japan that wouldn't happen
When your FJ Cruiser Froading buddies always let you go first so that you can haul them to the top of the hill after they get stuck halfway up.

-
1
-
-
Tackled drum brakes for the first time today... Always been scared, but went surprising easy... Only confusing part is adjusting afterwards, I did it so I could hear it scraping the drum, I'm sure it's fine, the adjuster will do it's job, rest drove it and it brakes fine... Does anyone want to add to this? How did you guys adjust it?
Btw this is on my d21 4 banger so it has a different rear axle but I'm positive the drums work the same
Usually I adjust mine until they're JUST scraping the drum, one time I adjusted them a little more & I got all kinds of noise from the LSD when I was cornering. If you have an open diff you shouldn't get this noise. I guess if they're too tight on a limited slip diff it acts like a locker, same as the old off roading trick of applying the parking brake a little to fool the LSD into thinking it has traction.
-
Finally got my CEL to go off, replaced the evap cannister & valve - hey presto! no more CEL or oxygen sensor codes

 Hopefully this also means no more barfing fuel out of the gas cap on a 100f + day
-
Congrats on the wedding, great idea for a honeymoon.
I drove from Calgary to Montreal in the early 1990's, great trip, the road around the lakes (Thunder Bay, etc) is just beautiful! Looking forward to seeing your pics of the trip.
-
$4.19 per gallon average in South Orange County, you can find it for around $3.98 pf you get away from the beach. $245 every 6 months for insurance.
-
Please don't ever tell me how or why you found that...
B
:laugh: :laugh: -
:laugh: Good job no one was near that camera!
This lady would have gone berserk if she'd been there........
-
I think they look pretty good.
-
As long as you're not compressing hi-lift springs, most compressors would be ok. I originally tried to compress my AC lift springs with a Pep Boys special compressor & nearly killed myself. I ended up having a shop do it for me, cost $50 I think.
@itsnotme, where you been bro, you're missing some cool trips with SCORE!
-
Truck looks great!
How's the gas mileage, handling, gearing, with those big tires?
-
You have done well there.
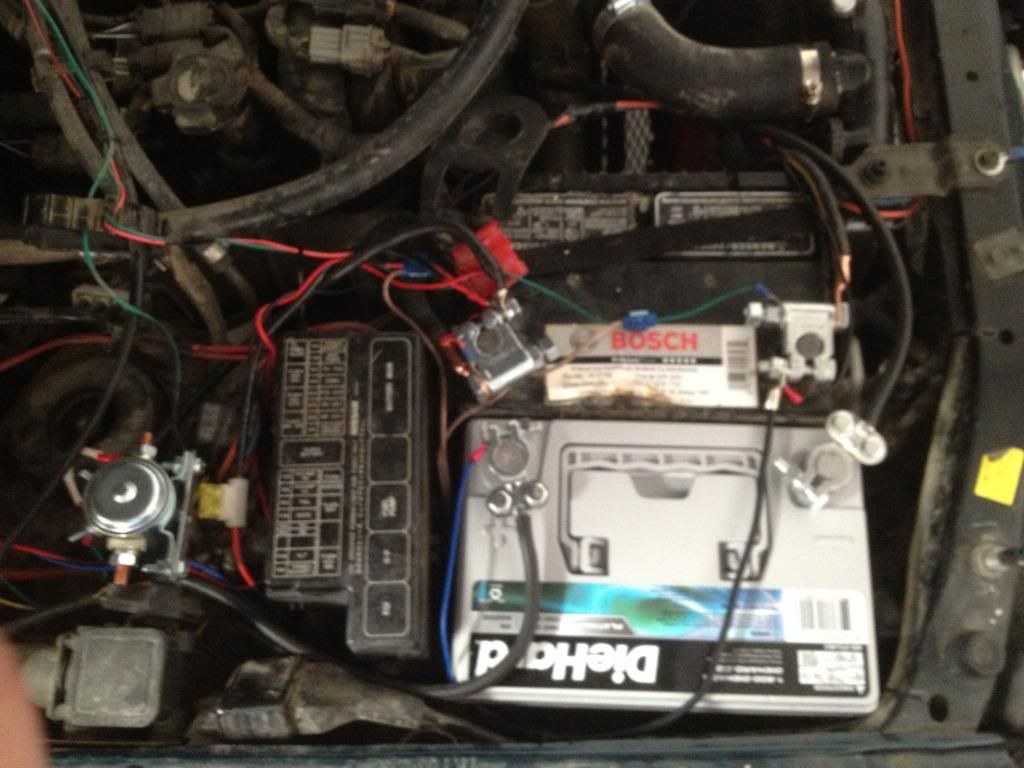
Can I put some constructive critisim across please? I would make some serious straps to hold those batteries inplace; as snug as they seem now, immagine how they will be with some serious "Offroad Highway driving" please.
Believe me they will try to lift off ;-)
All I would change is the two mounting bolts for the solenoid so they face the other way. That'll stop the threads locking horns with the main studs should something go astray.
Keep up the good work.

I hear ya!
I just needed them secured for this weekend as I didn't have time to fab a metal hold down, that's coming next week. Just as an addendum to this, after I got back from trip the batteries were still in place but the tie down I used had indeed come lose. 
Great advice about the solenoid bolts, I never even thought about doing that!!
I am interested in doing this on my hardbody build and I like they way you took on this! I was just going to throw both battery's behind my seat and on a couple switches (nothing special) so I can run both, or either one. But this is fancy and I like it, this is an r50 I'm not mistaken?
Yes, it's an R50, 1996 SE.
What is the Group size on the batteries? two group 24s? I've got an Group 25 in mine IIRC...it hangs over about 1/2 inch on the side...
That's a good question, I just went by the measurements & CCA!
According to the receipt the Die Hard is a group 35, so I'm guessing the Bosch is too. 
Not wanting to thread jack your post, I thought I would place a link to my dual battery install on my WD21 so others can get another prospective on what can be done.
http://www.nissanpathfinders.net/forum/topic/22195-kiwipetes-td27/page-7
Please direct comments on my install to my page and not clutter this one

No problem mate, more perspectives are always good in these mods.
-
After being stuck in the high Sierras with a dead battery & no one to jump start me until a Ranger arrived, I decided to install a dual battery set up.
I decided on the T-max system as the price was pretty good (about $100) & it got some good reviews. I'd heard that you can squeeze 2 batteries into the spot where the current battery sits if you turn them sideways. That suited me as didn't want to run a cable all the way to the rear of the vehicle so that I could put the second battery there somewhere. So, I pulled the main battery out & started measuring for a new tray. Then I noticed that by my measurements the batteries would only overhang the end of the battery mount area by a couple of inches, so I figured I don't even need a battery tray.
I was looking at an Optima as my second battery but after reading lots of reviews (& because of battery size) I decided to get a Sears DieHard Platinum which I read is a re-branded Odyssy battery which are supposed to be excellent. Anyway, I bought some zinc battery terminals (supposedly 3x conductivity compared with OEM) & lowered the batteries into place.
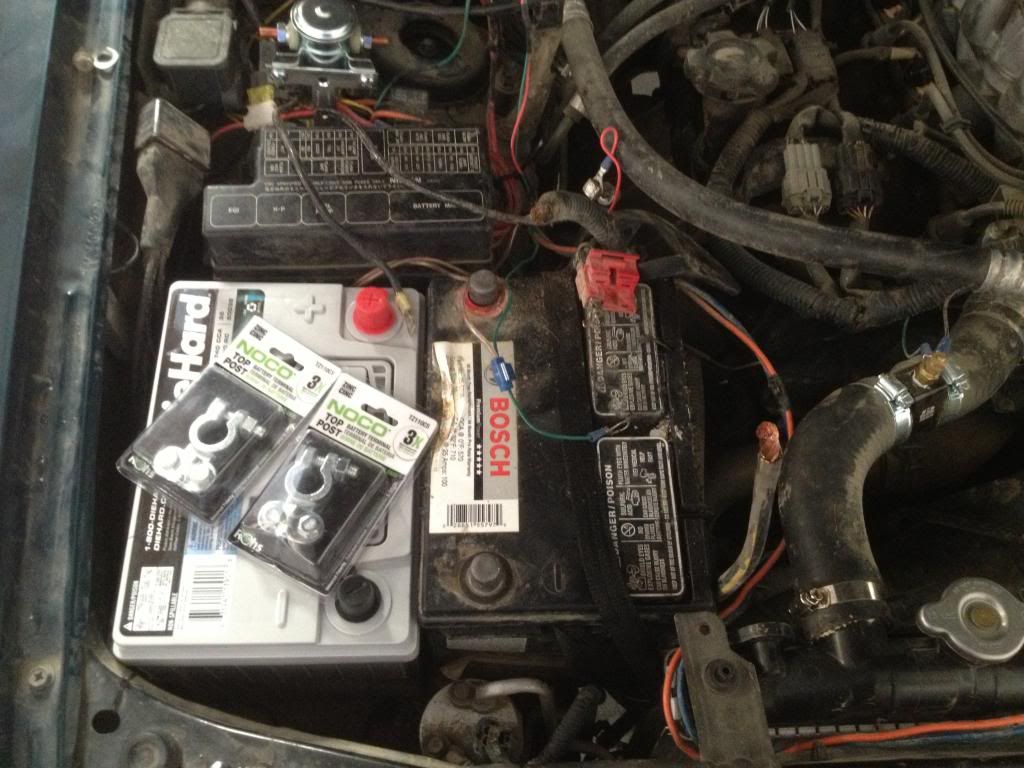
They fit surprisingly tightly & don't move at all. Next came all the wiring, the T-Max solenoid is very easy to wire up it turned out to be the monitor/controller that was a pain in the rectum to wire. The kit comes with enough wire to reach comfortably from the passenger side of the dash out to the batteries on an R50. I had to remove the glove box to run the wires behind the dash & remove the passenger side kick panel & drill a hole through the metal between the door hinges in order to get the wires out of the cabin into the engine bay. There is already a small hole there but my 2 meter radio power wires were already using it. I took the wires from the hole between the hinges up under the fender & to the place where I'd located the solenoid.
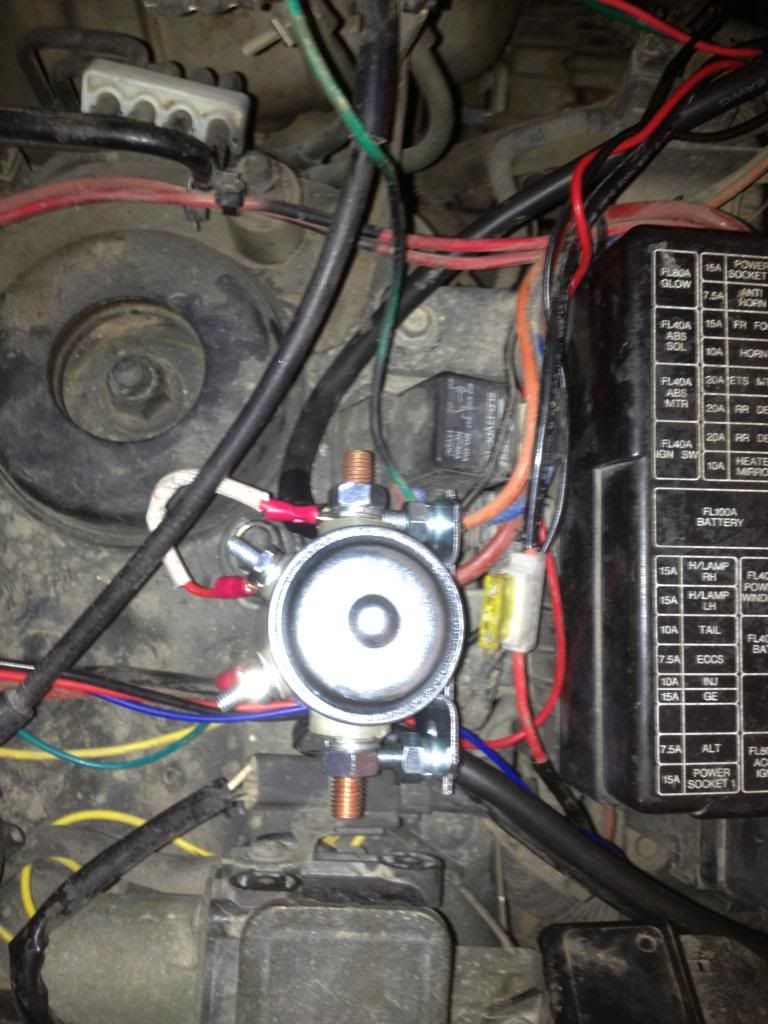
The solenoid is very sturdy & well made, my only beef is that all the connections are exposed & I had a few spitzen sparken moments when I was connecting things & accidentally touched a terminal with a wrench or something. Of course I then figured out "maybe I should disconnect the wires from the batteries, wire up the solenoid, then reconnect the battery ends".
:laugh: This worked well but I still coated the solenoid terminals with that liquid rubber stuff that you dip tool handles into, all the terminals are now nicely covered & insulated. I figure it's going to be a long time before I touch the wires & terminals again & if I need to then I'll just cut off the rubber (after disconnecting the batteries first this time!).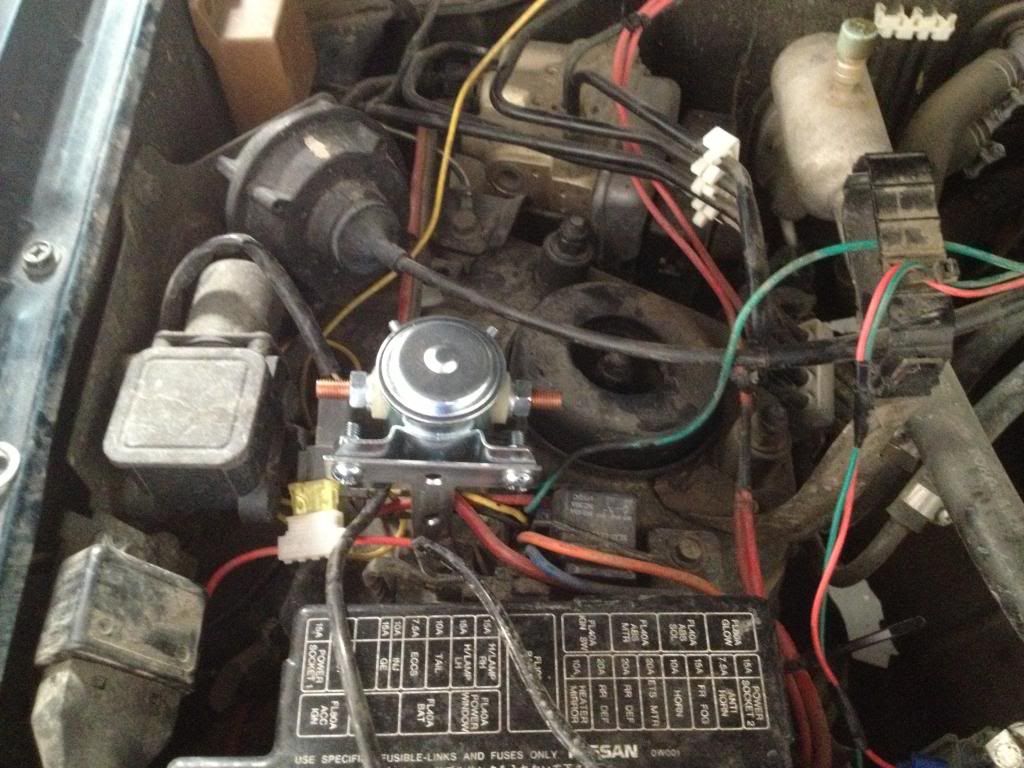
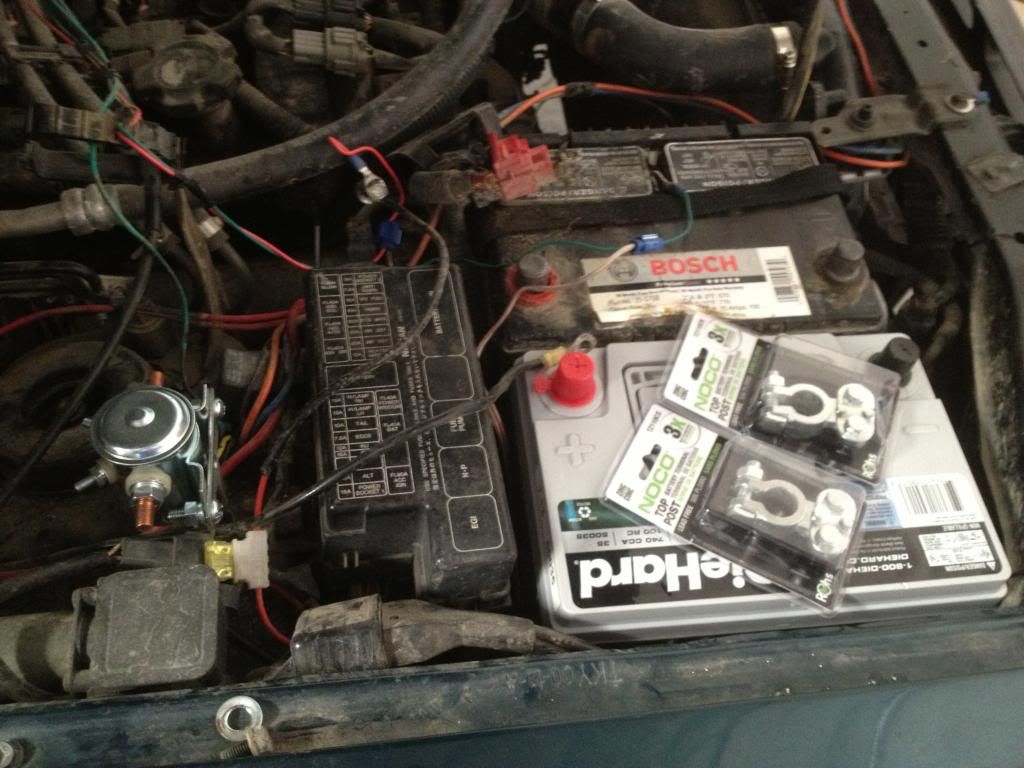
Ok, so after I connected all the wires from the monitor/controller I cut the appropriate lengths of 6 gauge wire to run from the batteries to the solenoid. All wire, connectors, fuses, etc, are supplied with the kit, they even give you a couple of battery terminals that I didn't use. I ran a new ground from the auxiliary battery to a good ground bolt that holds the lower hose to the block, reconnected my 2 meter radio, fridge/freezer power supply, etc, to the auxiliary battery (leaving enough available connections for a winch in the future) & fired her up!
The monitor/controller is great, it constantly gives you the charging rate of the main battery & indicates that the batteries are "linked" for charging.....
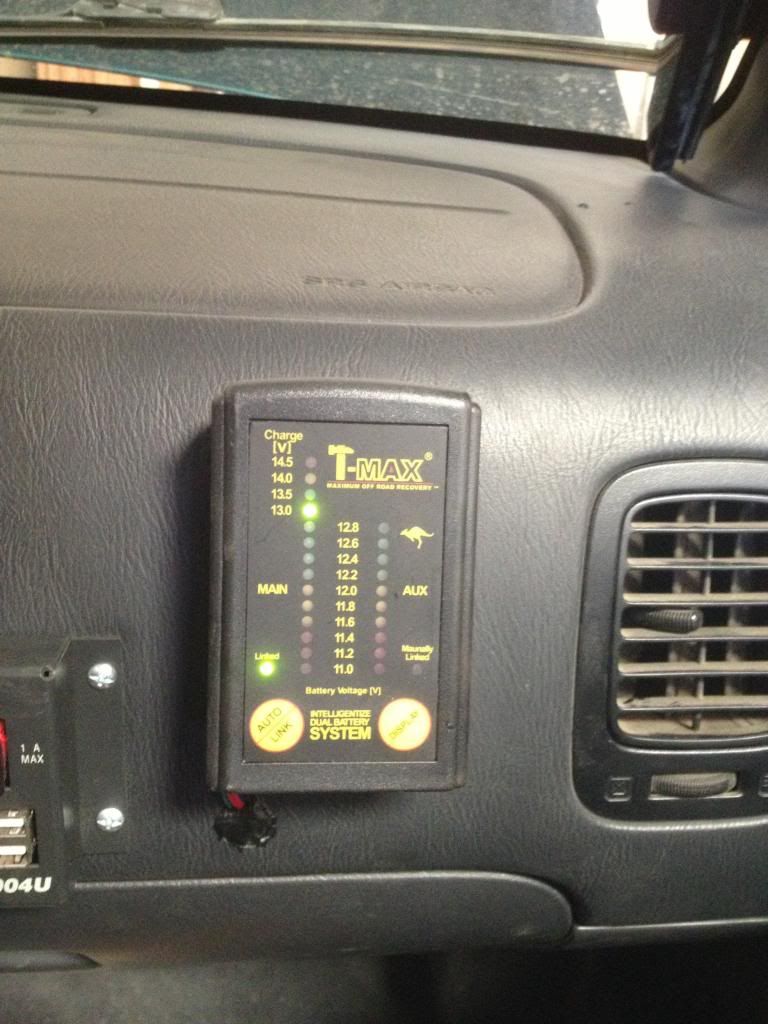
& at the press of a button gives you the charge rate & condition of both batteries.........
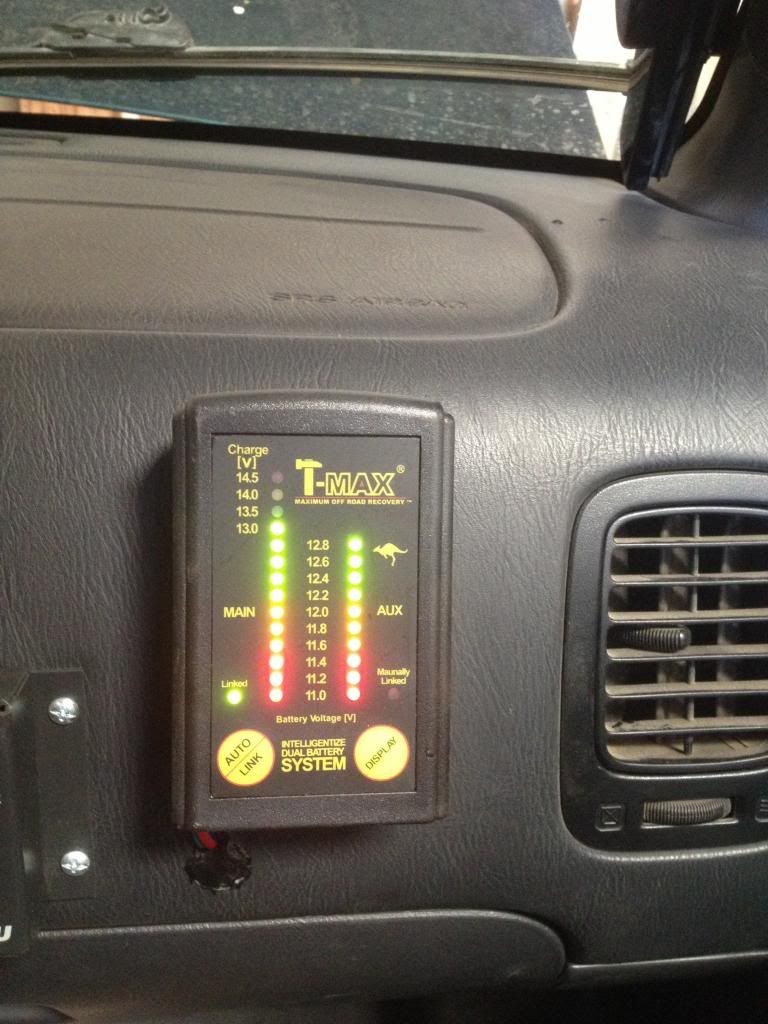
It also has a button that manually links the batteries if you need extra electrical power, this feature automatically switches off after 30 minutes but you can set it again if needed.
So far everything is working great. I cut a rubber mat to place over the top of the batteries & protect the terminals & temporarily rigged a tie down strap to hold the batteries in place, although as I said, they are pretty snug already. I'm going to make a metal tie down strap next weekend, but here's the finished product......
Sorry this write up is a little rushed but it's Friday night & my movie plus booze is crying out for it's pappa
-
2
-
-
Great job Darek, I've always liked that photo.
-
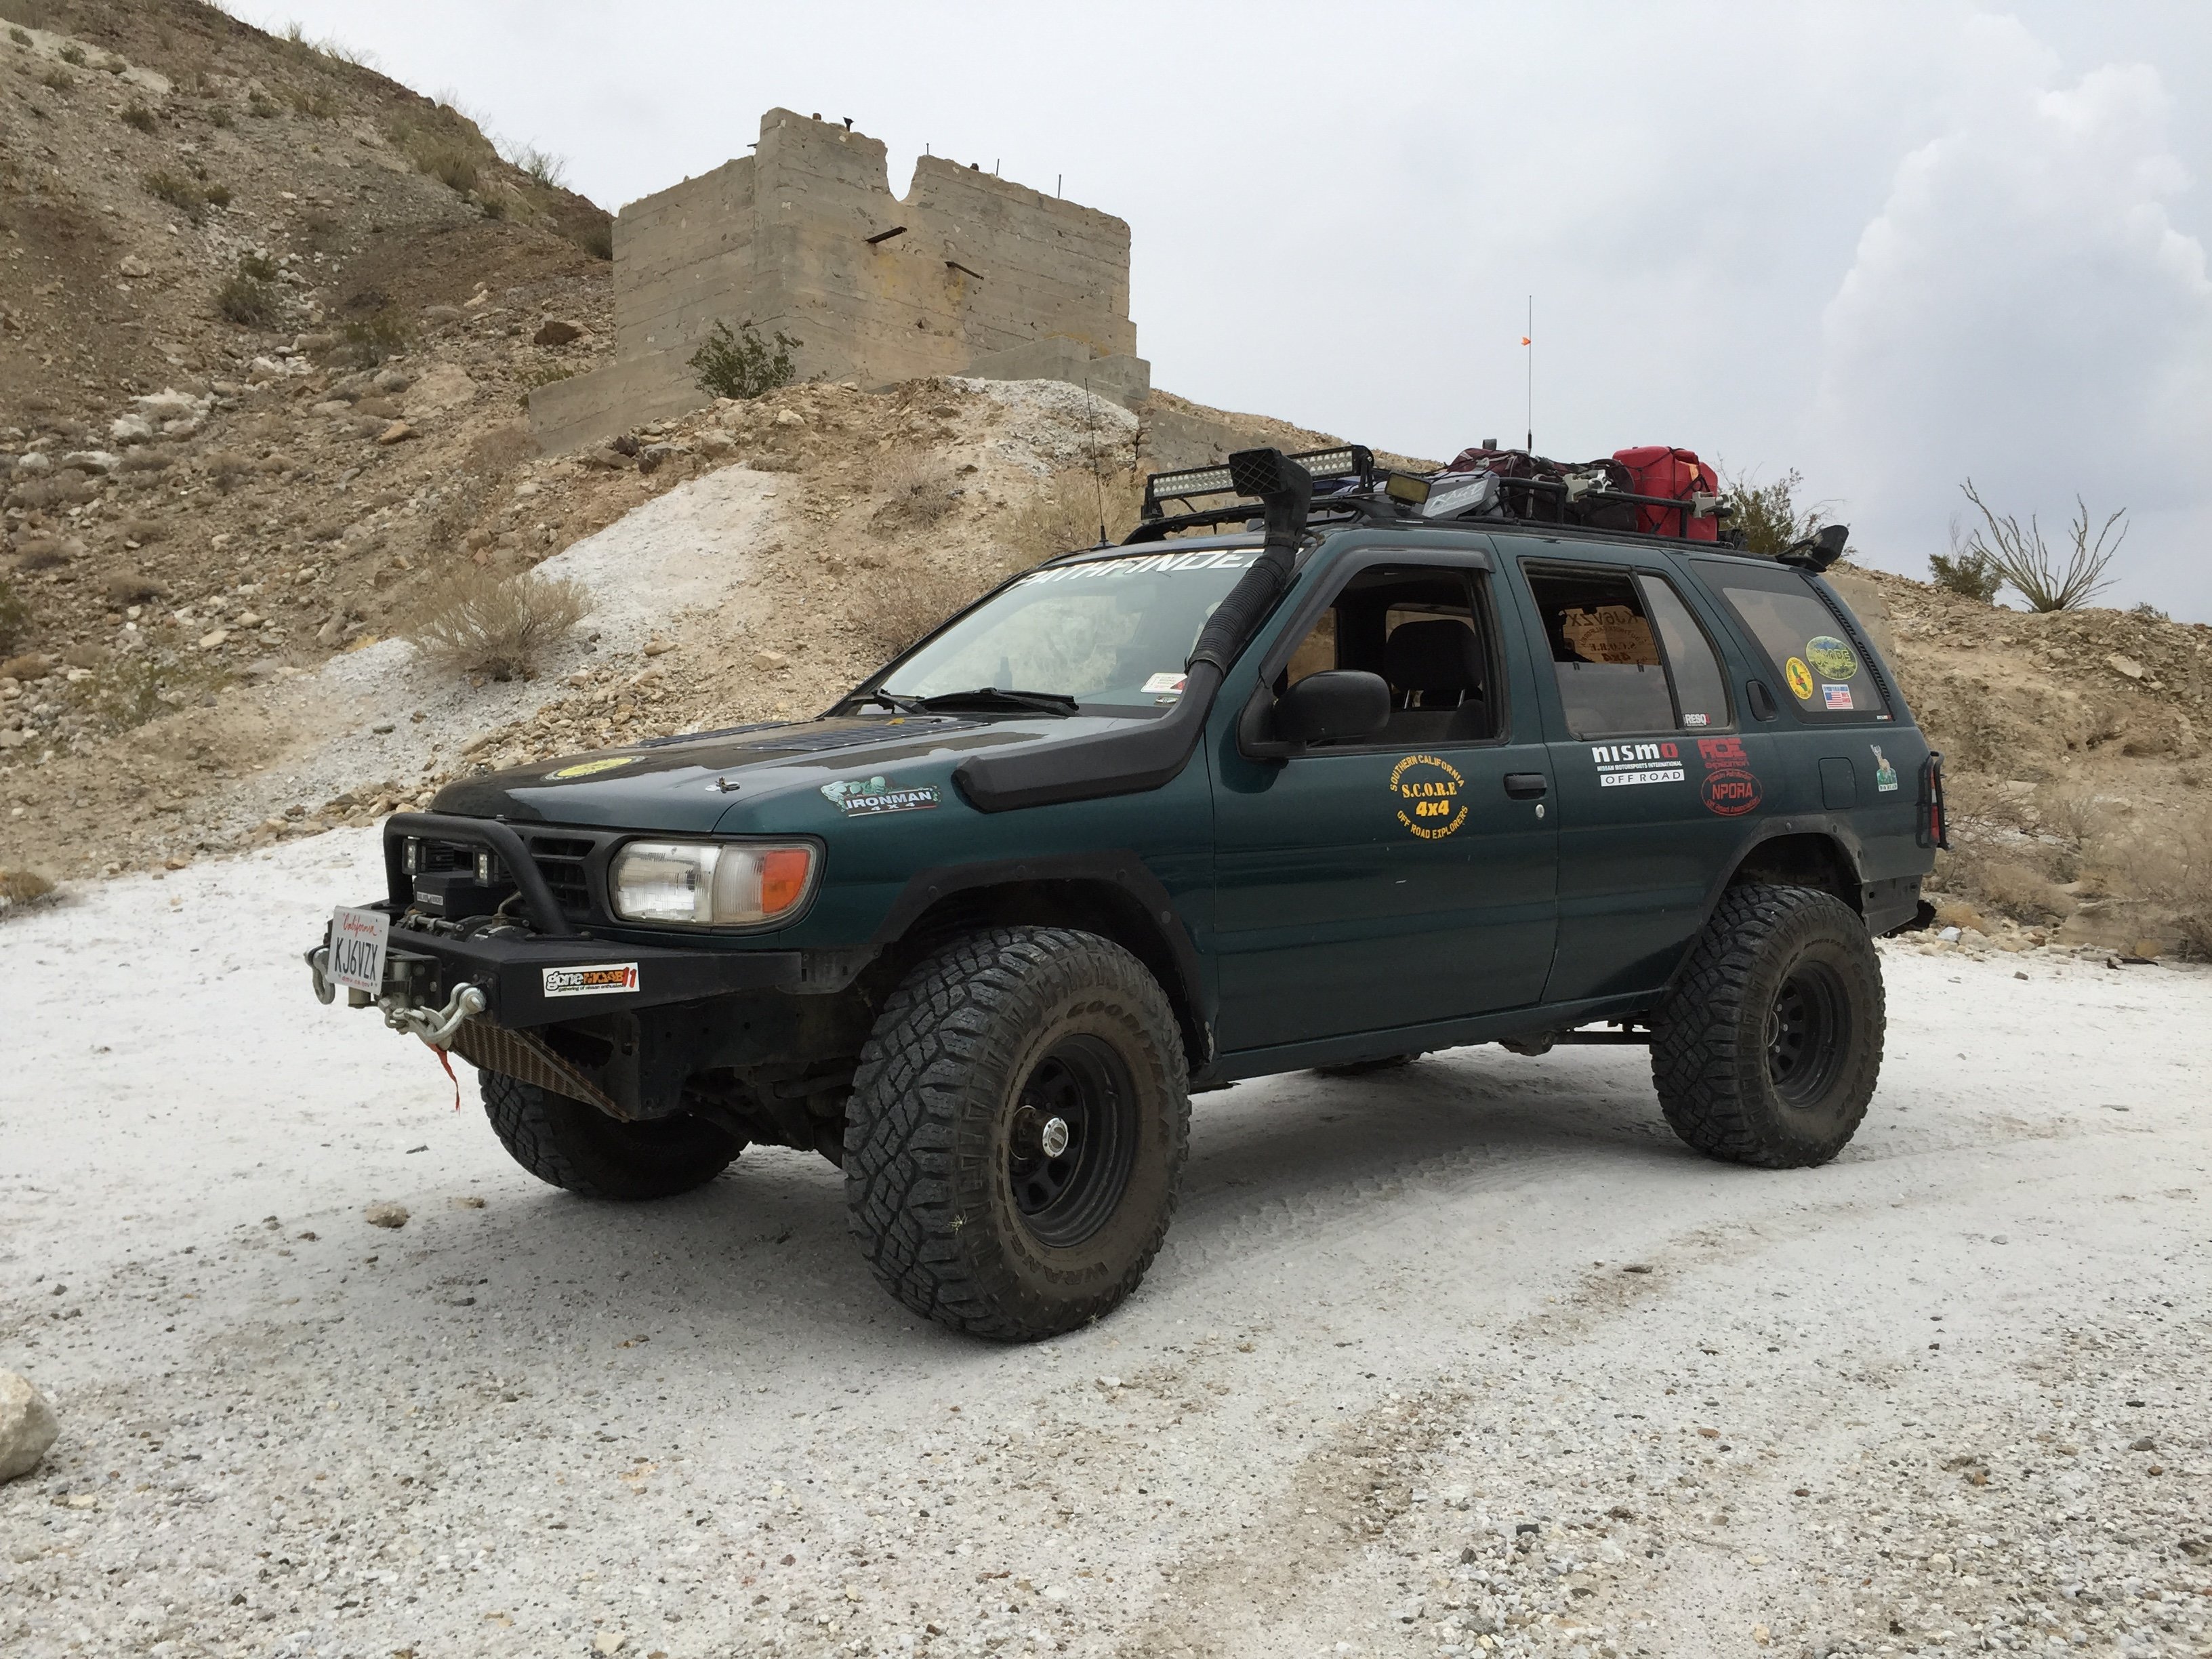
My ghetto rig is a poor mans expedition vehicle, I don't have an unlimited bank roll like some of the guys I go with but my Pathy handles everything I've thrown at it. I do expedition trips out to the So Cal desert & mountains all the time, going on a 3 day Mojave Road trip in November. Check out some of my posts for mods that I've done (just finished a dual battery set up).
Here's the group that I go with, check it out for some of the trips we've done & for more pics of trucks that are set up as expedition rigs, might give you some more ideas as well..........
-
I put semi-synthetic in mine as I've read lots of places that the smaller molecules of full synthetic oil can cause leaks in a high mileage car that has never run synthetic. I made a big difference, no more rattles, etc, on start up, seems quieter when cold & runs maybe a tad cooler.
-
Actually it says it "FITS FLUSH" with the gas skid, nothing about attaching to it. It looks like there's only 1 bolt hole in the skid so I'm guessing the 2 bolt holes in the bracket end fits to the body, anything with 2 bolts in that area?


filling in the holes...
in 96-2004 R50 Pathfinders
Posted
If you want the "Steampunk" look, you can use door panel clips