- Sign In Changes: You now need to sign in using the email address associated with your account, combined with your current password. Using your display name and password is no longer supported.
- If you are currently trying to register, are not receiving the validation email, and are using an Outlook, Hotmail or Yahoo domain email address, please change your email address to something other than those (or temporary email providers). These domains are known to have problems delivering emails from the community.

Casey.T
-
Posts
6,914 -
Joined
-
Last visited
-
Days Won
1
Content Type
Profiles
Forums
Calendar
Everything posted by Casey.T
-
Iteresting place to mount the relo filter assembly.... -bounce-
-
Welcome Back Looking forward to seeing you online more often -bounce- -bounce- Looks like you might have a little time on your hands, i would suggest some catch up on POHO I, II and III
-
Manual... Just make sure you park it on a hill with room too Rollllll... Swaping out the starter is pretty easy... Like was mentioned previously, pull it take it in to be tested and you got your core with you....
-
That will kill alot of tires... we have a tire review thread pinned around here some where... I do not beleive any of them address the Cactus problem though
-
Strip it down one belt at a time, that will also reduce the engine noise so you can more easily id where the Tap is coming from....
-
OMFG!!!! Its all down hill from here Grats Scotty!!!!! -bounce-
-
Lookin good, you are aware of the New Shoes New MUD policy????
-
My JDM Engine did not have that lower mounting hole, but it did have the Timing notch on the housing... I used the lower cover that came with the JDM and the upper from my Pathy with the 2wd H20 pump
-
This bolt
-
Slick did it(She has a Pic) and someone else more recently put one of the longer timing cover bolts in the bottom hole behind the HB. if so that will make a ton of noise. Just slide under the font end and look up(assuming the skid is removed) you will be able to see it.
-
Here is an obvious one... Did you put that long timing cover bolt in the bottom behind the HB? SeaFoam and maybe a lighter weight oil.... Did you also do a oilfilter relocation kit? might be a little low on pressure...
-
You got my ###
-
They disengage when you go from 4wd to 2wd AND move the vehical in the opposite direction of travel. If you do it slow enough you can hear them disengage....
-
Red do you need a crank???? Looks in Garage yep I still got that block....
-
I would suggest looking and seeing how much you currently have for Adjusting room on the bolts. I believe the stock measurement of the bolt sticking through it 2.03" if its like mine was there was barely .5 sticking through and I just adjusted them from there, no re-indexing required...
-
I like the bio/Nuc Hazzard sitickers
-
Almost all the R50 posts about BS state 3.75 BS or less... to prevent rubbing... Someone thats done it will chime in...
-
did someone say Calmini UCA???
-
ECU your welcome
-
Dam.... You could have bought a nice little WD21 for that... Seriously, glad it up and running the right way again...
-
Have you checked for any Codes on the ECU??? How to section has a pinned topic
-
why are we removing the Valve Covers??? are they leaking? No Leaks just make sure they are all torqued to spec before putting the plenum back on. That will come off with the Intake Plenum, leave it alone.... Once you remove the Plenum, see if you can reach in under the lower Intake from the back side... I was able to on my 91... its either a 10mm or a 12mm (patients) On the back side of the Plenum there is a Vaccuum line, and 2 coolant hoses, disco the hoses on the firewall side not from the Plenum assembly... and the breather hose from the right side valve cover, disco from the Valve Cover... My $.02 on the how to... buy a book or 3 Power wash the engine compartment(did that the 2nd time I took it off) Garage 1.remove hood for accessability(maybe over kill but you will appreciate the room and the light) 2. disco battery 3. pop the top of the air box disco MAF connector, remove air box lid and MAF Assy 4. mark and remove small vaccuum hoses from charcoal canister and intake tube and thorttle body, Remove intake tube. 5. disco throttle and CC Cables(2 10mm bolts then) slip them up and under the wiper out of the way. 6.On the back side of the Plenum there is a Vaccuum line, and 2 coolant hoses, disco the hoses on the firewall side not from the Plenum assembly... and the breather hose from the right side valve cover, disco from the Valve Cover... 7. Brake Vaccuum hose(spin it 90* it will stay out of the way) 8. You can remove the plug cables individually or pop the whole cap, disco the cables from the spark plugs. 9. (may have a loosening patern) Break torque on the Hex head bolts down the center of the plenum, then remove them careful not to drop the washers(did that too) 10. Plenum should be movable but there is 1 electical connecter hiding on the back drivers side, disco that and the whole assembly should come off... Be Very Careful not to let anything fall in the exposed intake. Now 80% of the mass is out of the way, climb in, reach around the back and see if you can get to the knock sensor(slick has a pic) If not follow the procedure in the Manal for removing the lower intake. Before you put it all back together... Good time to change the plugs
-
Based on your description I have to ask, just cause Im warped... Inside??? Outside???? or both????
-
Sounds like you need some more practice....
-
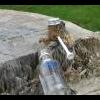
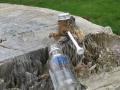
Look R50 Peeing on a flat Rock.... Sorry, but it kinda does look like a dog lifting its leg in that manner got more stretch then I do thats for sure.... How much Rubbing is there with that set up?