- Sign In Changes: You now need to sign in using the email address associated with your account, combined with your current password. Using your display name and password is no longer supported.
- If you are currently trying to register, are not receiving the validation email, and are using an Outlook, Hotmail or Yahoo domain email address, please change your email address to something other than those (or temporary email providers). These domains are known to have problems delivering emails from the community.
Leaderboard


Popular Content
Showing content with the highest reputation on 05/18/2020 in all areas
-
2 points
-
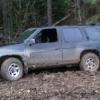
2002 4x4 Auto LE I've owned it for about a year and I'm behind on lifting. I had always wanted to build up something beyond stock for over a decade and now is that time. I had always assumed I'd start with the lift then make a build page, but I'm gonna start this now since I have about half the parts in my garage and the remaining parts are in the mail right now. This will give me some opportunity to take feedback and suggestions from you all more knowledgeable folk before I start turning wrenches in a week or two. About this vehicle, I picked it up last April when I needed something to replace my high mileage Altima with a slipping cvt. With my wife out of work at the time, I only had limited funds and for whatever reason vehicle prices were stupidly high at that time of year so I ended up with this 02 for $1500.00. The exterior is riddled with flaking paint, rust spots, dents, scuffs and scratches. The inside had grime, torn leather and lots of broken plastic. The death sway was very noticeable and I couldn't hear it's exhaust leak over the whiny pulley but there was no check engine light, water damage and the strut towers looked good. It was good enough to get around town for pizza deliveries by night and get me to my day job. Throughout 2019 I gradually spent dozens of hours and hundreds of dollars fixing it up. It and it's 2001 R50 companion can be found on Instagram as @dospaths where I document the endless repairs. So the fun stuff: Jeg's 16x8 steelies 555-681034 https://www.jegs.com/i/JEGS/555/681034/10002/-1?trk_msg=F4DEA4K0TBPKT67FKEGNHFHHLC&trk_contact=QLBQ2TEVQI0OU4FL6Q069HD5DS&trk_module=tra&trk_sid=HU0HF1BKBUHB8U969NPQKH3I9C&utm_source=listrak&utm_medium=email&utm_term=Product&utm_campaign=Transactional&utm_content=Shipping+Confirmation General Grabber AT2 265 70r 16 (used - but free) 100mm - 108mm hub centric rings https://www.amazon.com/gp/product/B07N97VFY8/ref=ppx_yo_dt_b_asin_title_o01_s00?ie=UTF8&psc=1 4x4 Parts Polyurethane split bushing kit for rear trailing arms https://www.4x4parts.com/i-18981266-complete-split-design-trailing-arm-bushing-kit.html Bilstein 5100 shocks https://www.amazon.com/gp/product/B00BYNJ7KG/ref=ppx_yo_dt_b_asin_title_o03_s00?ie=UTF8&psc=1 Camber Adjust bolts https://www.amazon.com/gp/product/B000CB2GOU/ref=ppx_yo_dt_b_asin_title_o02_s00?ie=UTF8&psc=1 NRC9449.c8 coils https://www.lrdirect.com/NRC9449-supplied-by-britpart-branded-britpart.html OME heavy duty coils https://www.bilsteinlifts.com/shop/nissan/nissan-pathfinder/front-5-inch-ome-heavy-duty-lift-coils-for-1996-2004-r50-nissan-pathfinder/ Strut bearings https://www.nissanpartsdeal.com/parts/nissan-bearing-strut~54325-5v000.html 1" SFcreation front spacers https://sfcreation.com/products/front-spacers Possibly Warn 29091 hubs Most of the above parts are in the garage. The rest (coils and shocks) are in the mail. The Warn hubs are from a salvage yard and were in rough grimey shape. They are diassembled and sitting in a jar of degreaser for the next couple of days. If they look ok when it's down to just the bare metal, I'll order a service kit from Warn to rebuild them. If not, I'll be checking out the Mile Marker hubs online. My tenative plans are to start with the trailing arm bushings. I've been tagging the bolts with WD-40 about every other day and I'm going to borrow a heavy duty 120v impact gun for that. I'll use the sawzall to remove the existing bushings and assuming the trailing arms are oem or oem equivalent, they split bushings will fit right in those diameters.\ After that, I'll pull the shocks and coils out then put in the 9449s (hopefully without spring compressor), then put in the Bilstein 5100s. Any tips or advice for coil and shock installation (orientation etc) is welcome. After getting warmed up on the rear, I'll do the struts next. I'll install the OME HD coils and the new strut bearings. Now, I know somebody on here will advise to not use a 1" spacer with those coils but I'm also open to the collective group opinion on that considering I'll be using manual hubs. So I'll either install the spacer with the struts or leave it out for a few months before revisiting the strut to put it in once the coils have worn in. Any installation advice is welcome too. Install manual hubs. I'll then put in camber adjust bolts and find a shop that understands what I've done and get an alignment.1 point
-
After years of chatting about our own Pathfinder projects—and often, grumblings about having to make our own parts or hack together something—it’s become clear that Jacob (@TowndawgR50) and I (Patrick) have a common passion for our trucks. We’re always bouncing ideas around and sanity-checking each other’s work, ultimately realizing we have highly complementary skill sets that extend beyond working on trucks. We’ve also grown tired of a serious lack of aftermarket support for our trucks, especially when there’s an obvious demand to keep them on the road and make them more capable than they already are. To counter that, we’re teaming up to fill that void. That’s right: it’s time to turn a hobby into a business! In the weeks to come, we will be making more announcements regarding the status of the company (still working on the name!) and our product offerings. We’re still in the early stages of the company formation, and have some challenges ahead of us (most notably the 1,400 miles that separate us!), but we’re ready and stoked to get the word out there. If any of our individual projects have piqued your interest, then our collaborative efforts won’t disappoint. Our initial focus will be on subframe drop (SFD) kits, as this is the most important component required to move beyond 2” of front suspension lift. Unlike prior versions of kits that have existed, we intend to offer complete kits and à la carte components in multiple heights—including strut spacers—to support various lift configurations. Our particular focus is to provide high-quality finished products that simplify installation for the average DIYer (hint: strut disassembly not required), and without having to replace aftermarket components you’ve already purchased. While we won’t go into detail about all the products (and services) we’ve been discussing, we will tease that trailing arms and panhard bars (both in static lengths with poly bushings, and adjustable lengths with rebuildable joints), skid plates, missing link, and bumper brackets are on the product roadmap. That said, we’re looking forward to a productive 2019, so stay tuned!1 point
-
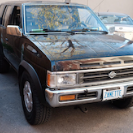
I got pacesetters last year, yes they are half the price of doug thorleys not being ceramic coated however there are a couple things you can do to mitigate the rusting and failure of those beautiful pipes, there’s a high heat paint called Por-20 that you can brush on , and eastwood makes a product that’s specifically for coating the inside pipes and other exhaust pieces like your y-pipe. Comes in a spray can with a long hose that’s perforated at the end so you get get coverage. I went a couple steps further with my pacesetters and gave them exhaust wrap and then sprayed on a high temp silicone spray to further protect the wrap, wrapping your headers will void the warranty but I think with the Por-20 on first you should get more longitivity. When they come shipped they are sprayed with a cheap thin layer of black gloss paint that immediately burns off as soon as you install them. Cut all that crap heat shielding out of there, I used a dremel and just grinded off the bolt heads. Take your time loosening those undersized 8mm exhaust studs. Spray them down with weasel piss every day for a few days before attempting to wrench them out, I have never had any fun drilling and tapping out busted exhaust studs. A good method its to crack them tighten it back up wrench it some more tighten back up taking small bites before spinning the stud all the way out. Yes it’s tedious but trust me the alternative is much more time consuming I don’t have my motor rebuilt yet however it’s been claimed headers will give you a 10% hp improvement being one of the cheapest upgrades you can do, Very Clean looking Pathfinder btw, somehow the paint has stood the test of time, I have the pin striping on mine as well I think it compliments the aggressive wheel well design of the body, I’m sorry if I hijacked your wheel thread lol, if it’s any consolation I have a cheap chrome exhaust tip on mine and it isn’t classy lol Sent from my iPhone using Tapatalk1 point
-
Thank you guys. I have to admit to having a senior moment when I installed an Android Auto head unit, put everything back together and forgot to plug in the flashers. I'm heavily suspecting the wheel bearings. I had a little extra money so I ordered new hubs. I'll install them when the arrive on Tuesday. It's hard to admit that I did something so foolish as forget to plug in the cord for the flashers.1 point
-
If you want to change it. Get Doug Thorley headers (or pacesetters if you're cheap), and build a custom 2.25" exhaust. I wouldn't say it turned it into a race car, but I did notice that it doesn't struggle as much on the highway with bigger tires.1 point
-
Just did this repair again tonight to another 98 Pathfinder SE. It had the stuck in first and would not shift to second while cold issue. It took about 10-15 minutes of idle time plus driving slow for about 5-10 minutes before it would shift properly. Even when warm it had a slight flare shifting from second to third. Went to Pick N Pull today, (40% off sale) I got a valve body and all 4 accumulator pistons and springs for $37.00 out of a 2004 front end wrecked Xterra. I know it was running when it was wrecked The pathfinder shifts like a new one, and the 2-3 shift flare is gone! This pathfinder had about 250 K miles on it. I didn't check the Xterra miles. So, a valve body, two gallons of fluid, a filter/gasket kit, and two hours of my time and this pathy is running like a champ. My question is...What the heck is in these valve bodies to cause this "morning Sickness" problem? I took the old valve body apart and did not see any issues or any O rings even. I re-used the solenoid pack from the pathfinder as it was less than a year old and they were like new clean. That eliminates them. No TCM codes either, and the trans fluid was like new clean. (only a year old with 4K miles on it.) Just to let you know, A transmission shop ( Insert name here) AGAIN quoted about 3 thousand dollars to rebuild this Transmission..."IF" the valve body was good. That was my hint! ( I told him it shifted normally when warm, no slippage) The man probably knew this cold shift issue with the RE4R01A transmissions and after my transmission was removed/torn apart, he would have soaked me for another $800.00 for a new valve body on top the $3K rebuild charge!!!!1 point