- Sign In Changes: You now need to sign in using the email address associated with your account, combined with your current password. Using your display name and password is no longer supported.
- If you are currently trying to register, are not receiving the validation email, and are using an Outlook, Hotmail or Yahoo domain email address, please change your email address to something other than those (or temporary email providers). These domains are known to have problems delivering emails from the community.
Leaderboard


Popular Content
Showing content with the highest reputation on 03/13/2020 in all areas
-
Yes sir, I’ve got the AC coils up front. I used the KYB struts as well, I’ve heard mixed reviews on everything else, so that was the safest bet. Definitely go for the OEM nissan strut mounts and bearings, nothing else has been recommended on this forum, and for good reason. It sucks to have to shell out a good amount of money on tiny parts, but you save yourself a mountain of headache and eventual replacement costs later on I only needed one set (two) of camber bolts to align my front end, but some guys end up needing two sets for whatever reason, so it’s worth keeping in mind.2 points
-
A few snaps of yesterday's track hunting here in South Australia2 points
-
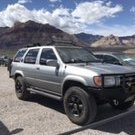
Not my rig but I was lucky enough to pilot this beast through AZ recently. HUGE thanks to @hawairish and his family for hosting us and letting the wifey and I use his vehicle to tour the Sonoran desert and the Colorado plateau. His rig is the most well sorted R50 I've seen. Everything is so well tuned and thought out. From the numerous mechanical upgrades and trick incognito pneumatic setup to the camping/fridge organizer in the back. It left me super inspired with a laundry list of things to improve on my own truck.2 points
-
I have replaced that seal before. I believe I got it from my local Nissan dealer, but that to have been at least 10 years ago, so it is possible that it has been discontinued.1 point
-
for the past month every free minute I've had has been spent on suspension or steering...exhausting//but WOW// what a difference1 point
-
Beautiful in East Tennessee today. Sent from my SM-S367VL using Tapatalk1 point
-
1 point
-
Do this while the the vehicle is on its tires on level ground:1 point
-
To remove the ball joint, you don't need a pickle fork, nor do you need to remove the brakes or unbolt the knuckle/spindle from the strut. However, you do need to partially remove the CV axle. PREPARATION 1. Jack up the front of the truck and support its weight using jackstands. 2. Remove the front left wheel. REMOVAL 1. Remove the safety pin (by straightening it with pliers) from the ball joint castle nut and remove the nut. 2. Put some hearing protection on. Seriously. What you're about to do is really REALLY loud and could cause hearing loss. 3. Using a BFH (such as a 2-lb sledgehammer; a regular hammer won't have enough impact), repeatedly whack the side of the knuckle really hard where the ball joint inserts. Don't be timid. If you don't have enough clearance to do this, rotate the steering wheel full left. Be careful not to whack your brake rotor! The repeated impacts will cause the ball joint to pop loose from the knuckle - without the use of a pickle fork. You can also try partially threading the castle nut back onto the ball joint and whacking the bottom of it, but that is sometimes not as effective, and if your new ball joint didn't come with a new castle nut, don't do this. 4. Using a 17mm socket, remove the 3 nuts securing the ball joint to the A-arm. 5. While applying downward force on the A-arm, wiggle the ball joint studs out of the A-arm. 6. At this point, the ball joint should be loose in the knuckle and free from the A-arm, but you'll note that you cannot pull it out because the CV axle is in the way. 7. Pry or twist off the outer hub cap (if you have stock hubs). You can use vise-grips to apply rotational force to the hub while you use a putty knife or large flathead screwdriver to pry off the cap. Insert a screwdriver through the brake caliper and rotor vents to keep the hub from rotating while you remove the cap. 8. Using snap-ring pliers, remove the snap ring securing the CV axle to the hub. 9. Tap the outer end of the CV axle with a hammer as you pull the knuckle/hub/brake assembly away from the vehicle. This will cause the CV axle to partially slide out of the hub and give you enough clearance to fully remove the ball joint. INSTALLATION 1. Place the new ball joint into the knuckle and hand-thread the castle nut onto it. 2. Re-insert the CV axle all the way into the drive flange, and reinstall the snap ring. 3. Place the ball joint bracket (the part with the three studs on it) into the ball joint and insert the ball joint into the A-arm. 4. Place the three 17mm nuts on ball joint and torque to 18-25 ft-lbs. 5. Tighten the castle nut to 45 ft lbs, then tighten a little more so as to allow the safety pin to be inserted. 6. Replace the hub cap. 7. Re-mount the wheel. 8. Lower the truck to the ground. You're done!1 point