- Sign In Changes: You now need to sign in using the email address associated with your account, combined with your current password. Using your display name and password is no longer supported.
- If you are currently trying to register, are not receiving the validation email, and are using an Outlook, Hotmail or Yahoo domain email address, please change your email address to something other than those (or temporary email providers). These domains are known to have problems delivering emails from the community.
Leaderboard



Popular Content
Showing content with the highest reputation on 03/10/2019 in all areas
-
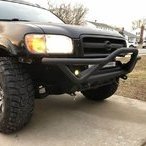
Wide open wheel wells! I wired up some LED driving lights to the factory fog light wiring, and also put my light bar back into the new bumper. Sent from my iPhone using Tapatalk5 points
-
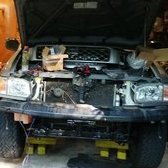
I sealed off the air intake hole in the fender, and opened up the front of the filter box so it now breathes air from the front of the box. With the original air intake hole in the fender sealed up it can’t kick up water from the wheel well into the filter box. The only way water is getting into the intake now is if I’m in water up to the bottom of the headlights, which I have no intentions of ever doing. Sent from my iPhone using Tapatalk3 points
-
And finally have it out of the garage! Sent from my iPhone using Tapatalk2 points
-
I am definitely interested in the instal process. I've had a set of these sitting in my garage for months now and haven't gotten around to figuring out how to wire them up yet2 points
-
Wow it looks great1 point
-
Those old commercials and that retro review are great! This is my personal favorite:1 point
-
Nice fab work! Certainly increased your approach angle!1 point
-
Also, found this gem a long time ago but just came across it again today. Definitely worth a watch!1 point
-
1/4-20 bolt on the left side of the license plate and self tapping metric sheet metal screw on the right side1 point
-
The Pathfinder emblem is in the wrong spot?1 point
-
Completed a pretty major maintenance milestone on Friday. timing belt water pump passenger camshaft seal crankshaft seal harmonic balancer (crankshaft pulley) thermostat passenger side valve cover gasket (I'd like to do driver's, but there's so much sh*t on top of it... on the to-do list) sparkplugs that hidden little 90* coolant bypass hose, and a few other misc coolant hoses fresh new coolant I basically followed this 1A Auto YouTube video for the timing belt, and referenced another one for the little water pump excursion. There were a couple other misc YouTube videos I referenced for the crank/cam seals. I labeled everything as I took it apart with masking tape/a number, and then wrote down the number and what it went to. That made reassembly at the end brainless and quick. Honestly, the timing belt looks fine. Who knows when it was last replaced, but at least now I know for sure. The sparkplugs were the worst as you'll see below. Started up fine and so far no leaks, seems to be running great! Took me about 10 hours to do all this including maybe 2hrs of parts runs and Googlin' things. Now on to more funsie projects. Everything off including camshaft sprokets and wanter pump- New timing belt and water pump- I've never seen sparkplugs so worn down, all six were like this. Honestly easy to replace, I used tape to hold my extensions together, just that last back sparkplug.....1 point
-
I decided to build my new coolant overflow tank out of PVC pipe. And it fits down in next to the air filter box. I had to move the hood open sensor over to make room for the coolant tank. It doesn’t line up with the hood anymore to compress the switch when the hood closes, so I just zip tied the switch down so it doesn’t always think the hood is open. Sent from my iPhone using Tapatalk1 point
-
Alright, well this turned into a bigger project today than planned! At first I was going to use some aluminum diamond plate to cover/protect the low hanging washer fluid and coolant over flow tanks, as well as the low hanging part of the air intake assembly. After messing with it for a while, I decided to change course and completely remove it all! This meant building my own reservoirs and modifying the air intake setup. This old Tide bottle is living a new life as my washer fluid reservoir. By turning the battery sideways I made room for the new washer tank. The battery fits pretty easily that way. I did have to lengthen the negative cable to reach the terminal. Also painted the Tide bottle black so it blends in. Sent from my iPhone using Tapatalk1 point
-
New stars of our web site for the next few months .... More and more R51 are coming through !! Don't hesitate if you have questions. (info @ sfcreation . com)1 point
-
Yep, right down by the latch receiver, you can’t miss it1 point
-
Stalled is the right word, but not forgotten. The collaboration between @TowndawgR50 and I is still underway, and I think once we've gotten off the ground, then we'll be exploring bumper and skid options. For now, we've tabled the bumper brackets, though. Next step in that regard is expanding my plasma table to get some larger stuff going. I'm really hoping we get there soon! Too true!1 point
-
The main bumper frame fits almost perfectly over the R50 frame horns with just a little tweaking, so I used that as a starting point by welding the bumper to those frame horns. I then got to work on fabricating brackets to tie the bumper in to the factory bumper mounts and the tow hook mounts. Sent from my iPhone using Tapatalk1 point
-
Got my HID'S in today now the long install process is just around the corner. #r50obsessed #96pathfinderse Sent from my SM-S737TL using Tapatalk1 point
-
Got me some factory HID's for my 96 Pathy on the way.. Having installed some on my 97 Quey these will be different for I wont be going in blind on how the wiring needs to be done the right way.1 point
-
Well, it's as done as it's gonna get before my CANVAZ trip this weekend. I will eventually put some plate up top and some additional brackets under the quarter panel for support. I've been pretty pleased with the cuts. My AZ flag apparently had some hidden lines that got cut, but I went with it. Cheapo MicTuning lights off Amazon are wired to the reverse lights...and make the OE bulbs look like garbage. I also made a new missing link and mid skid... Super pleased with the results. It slides on/off just like the front skid, and now all the hardware is matched for a single socket. ... I know this thread started off for front bumper brackets, but I've come a lot farther than expected. I'm still planning to go through with the front brackets for those interested, but still need another week or so to finalize a few things and put some numbers to things. I'm absolutely exploring options to make skids and missing link available, too. Stay tuned!1 point
-
The underhood light's one of the most useful mods I've done to my truck. Really nice to have when you're working under the hood.1 point