- Sign In Changes: You now need to sign in using the email address associated with your account, combined with your current password. Using your display name and password is no longer supported.
- If you are currently trying to register, are not receiving the validation email, and are using an Outlook, Hotmail or Yahoo domain email address, please change your email address to something other than those (or temporary email providers). These domains are known to have problems delivering emails from the community.
Leaderboard



Popular Content
Showing content with the highest reputation on 03/06/2019 in Posts
-
Project swingate was a success with the PNW crew (@stpickens,@RainGoat,@ferrariowner123 and especially@TowndawgR50 for making it happen. Back in January I found a swingate off a ‘96 and got it for $19, took it home and cleaned it up. Then after our “Snowmageddon” which delayed us for a couple weeks we finally got them installed.@TowndawgR50 provided aluminum reinforcements and a simple yet effective plate relocator that contours the R50 hatch and makes it look stock. Now you don’t have to zip tie your plate to the spare tire and it allows you to run stuff on the spare tire such as a Trasharoo for those who run them. Next thing I have to do is run lights to the plate and weld a jerry can holder to the swingate but other than that another project done and huge thanks to the PNW crew especially@TowndawgR50 for his expertise and time. Sent from my SM-G960U using Tapatalk5 points
-
Sent from my iPhone using Tapatalk5 points
-
Whats up ya tweakers. I've been gone for quite sometime, I know. In that time I have acquired a new skill. Getting sound tickets in the Walmart parking lot. How? Well, I now have a Sundown Audio U-15, Soundqubed 2250 amp, Cheap ass Rockford 4 channel amp running to the door speakers and rear speakers.. 4 Gauge wire running to both amps. This thing slaps like Chris Brown on Rihanna ok. This thing will induce bowel movements. I've set off alarms with this thing. It is no joke. Ladies like it too ? if ya know what I mean.3 points
-
I made my missing link out of square tubing, this was the first "mod" that I did and I did notice a difference in terms of rigidness of the vehicle. Especially in the area I live in with tons of hills and turns I could tell immediately after it went on. Again not super dramatic but could tell the difference. Sent from my SM-G960U using Tapatalk3 points
-
Also had to search for a new gas door a few weeks ago, the old one was jammed and very beat up. Ordered a junkyard piece and had our local body shop color match it with my truck. Sent from my iPhone using Tapatalk3 points
-
This is going to be where i try to document my modifications and things to my lovely 2003 SE R50. Some info on the truck, they’ve got 138,XXX miles on it now, sunroof, all leather interior, regular old 4x4 shift stick (nO all mode), and came with brand new cat back exhaust and completely new brakes. The Spicy only had minor rust visible when i bought it (really is only minor still even though i can see it all now). here it is stock when i bought. notice that rearend on the ground. also tire size on is the 245/75r16. nothing in the back of the truck in this pick. first thing i did was take off the running boards and fender flares. oh and order the 2.5-2” spacer kit from sfcreations.com along with new rear springs because that sagging was ATROCIOUS. Ordered a new knock sensor, front sway bar links, and set of 4 camber bolts as i read nearly everyone needed them. checking the flex in stock form next was time to remove the rear bumper (sad that this was only pic that came out nice of that) LIFT COMES IN THE MAIL EARLY and rock auto lies on their shipping being next day PUTTING THE LIFT ON: was honestly cake in the rear once you figure out how to wedge the spacers under and get it all in there. the right rear old spring was actually broken off at the top of its perch. all i have of that is this one blurry photo of the left sides spring compressor configuration. wouldn’t work any other way i tried it would hit everything. FINALLY FINISH THE LIFT AND GOT ALIGNMENT. test-o-flex Sent from my iPhone using Tapatalk2 points
-
32's, and not quite. It's settled quite a bit and idk exactly how many inches its at. LR 9447's in the back and ome hd's up front. The bumpers make it look taller than it actually is2 points
-
Well.. Turns out the lockout plate was installed UPSIDE DOWN. The previous owner had the clutch done and whatever shop did it reinstalled the plate upside down. The guy at the nissan dealership was nice enough to send me a diagram, at first glance that confirmed my find. Reinstalled the right way up and the transfer case shifts like new... I find it truly unbelieveable that people who work on cars/transmissions every day can mess somthing up as simple as this. I'm a refrigeration mechanic and only work on cars when mine breaks down. Not rocket science. But anyways, this is the EXACT same issue that the OP described and I'm willing to bet the same thing was wrong with the pathfinder he was looking at buying...Should've went for it lol.2 points
-
Man these tires will throw some snow! In seriousness though, I am really impressed with the traction on snow and ice. Officially feels like a tank2 points
-
Here’s my variation on the missing link. I enlarged the unused holes already on the inside edges of the controlling arm brackets and bolted it on that way instead of putting it under the control arm bolt itself. This was really just because it is what easily worked with what I happened to have on hand. I’m in the camp of people who felt like I could tell a noticeable difference. I was actually a bit surprised. It’s such a cheap and simple mod it doesn’t make sense not to do it in my opinion. Sent from my iPhone using Tapatalk2 points
-
new lift 2.5” front 2” rear with new springs Sent from my iPhone using Tapatalk1 point
-
So how is it to get in your truck with it jacked up 2 inches but no running boards? I would have to really heave myself up with the door to get in without stepping on the runners. Sent from my SM-N950U using Tapatalk1 point
-
Looking good! Keep us posted on the progress. For getting the rear springs out, if you ever have to do it again it can be done without spring compressors. I figured this out the hard way after going through a few different lift set ups. Lift the whole back of the truck up with a floor jack under the pumpkin. Then put a jack stand under the frame, I use the lower trailing arm mounting points for stand placement. With the body on the stands, take off both rear wheels, disconnect the shocks and sway bar links, unbolt the rear brake line distribution block from the top of the axle, and then you can use the jack under the pumpkin to raise and lower the rear end to get the springs in and out. It will drop enough this way that you can pull the springs out without compressing them. Just go slow and watch the rear brake lines to be sure they’re not getting overextended. I hate fighting with spring compressors and find it much easier this way.1 point
-
Sent from my iPhone using Tapatalk1 point
-
This is why oil spraying works wonders...1 point
-
I like the glossy paint on your tire carrier up against tour rig. Looks good. Sent from my iPhone using Tapatalk1 point
-
Well I went ahead and removed the crank sensor and cleaned it off. Quite a bit of small metal shavings magnetized to it. Got it all wiped down and reinserted. I’m sure all that crud had to be doing something1 point
-
1 point
-
Got my full size spare tire mounted Sent from my SM-G960U using Tapatalk1 point
-
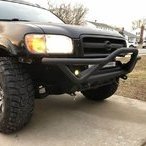
Cardboard assisted design I will be switching to quarter inch plate for the frame bracket for the winch plate. Sent from my SAMSUNG-SM-N920A using Tapatalk1 point
-
Quick update on the rig, got a swing gate installed with the help of the PNW crew. I'll do a formal write up about this later this week with pics of the install. Sent from my SM-G960U using Tapatalk1 point
-
Another thing to check when trying to track down a front end clunk is the front differential mount bushings. I went through this recently having replaced just about everything in the front suspension and still getting an occasional clunk. I finally checked the diff mounts and found the bushings were worn out and allowing significant play. I could move the whole diff up/down and side to side with just a screwdriver as a pry bar. The diff bumping around in its’ mounts was the clunk I was feeling. This isn’t a great pic, but the circled area shows where one of the bushings is on the drivers side. Try prying in this spot to check for the excessive movement. Sent from my iPhone using Tapatalk1 point