- Sign In Changes: You now need to sign in using the email address associated with your account, combined with your current password. Using your display name and password is no longer supported.
- If you are currently trying to register, are not receiving the validation email, and are using an Outlook, Hotmail or Yahoo domain email address, please change your email address to something other than those (or temporary email providers). These domains are known to have problems delivering emails from the community.
Leaderboard

(1)_opt.thumb.jpg.035a5eb628baefe0934fbb6e70f9b39e.jpg)

Popular Content
Showing content with the highest reputation on 01/06/2019 in Posts
-
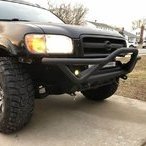
UPDATE: I was finally able to get the billet on to the new grille. After a few coats of plasti dip, drilling and bending metal, it has finally been installed lol. I’m disappointed that I wasn’t able to find any color match paint but I might just paint the next sections to the side of the grille and under the lights black so they don’t contrast as much. Overall I’m happy with it. Sent from my iPhone using Tapatalk2 points
-
Christchurch New Zealand (although I can be found between Queenstown, Dunedin & Chch usually). If you're ever over here be prepared to see a LOT of R50s - because they're basically all diesels and as such are practically unkillable. The TD/QD series engines are some of the most reliable ever made IMO. Known for doing half a million+ kms on basic maintenance alone. The rest of the R50 usually falls to bits before the engine haha. I've even seen numerous late-model R50s with blown ZD30s that have been QD32 swapped. Fuse box cover Fuse box insides HID relay box cover HID relay And a shot of the factory twin-battery HID-equipped QD32ETI engine bay... It's very busy and actually quite cramped to work on. Changing the HID bulb - nightmarish.2 points
-
Just some before and afters with year 1 in the books. I'm really pleased with the way the drivers side rear quarter turned out since never having done body work before looks fairly good for my first time. New tires, timing belt, water pump, tailights, radio, speedometer, fuel & temp gauges, rear shocks, clutch fan, harmonic balancer, coolant reservoir, hood and front facia,fuel filter, plugs, wires, distributor, LED fogs replacing factory ones and installed new LED'S in the grill. Added woodgrain radio bezel plus installed digital clock/security light. Put LED'S in gauges and all switches. Still not done with her, but the first year was a blast from purchasing for $500 to the wife rear ending someone till now Thanks NPORA and all of you for putting up with the guy who doesn't go 4 wheelin and has the cleanest R50's in the group. I'm OCD and can't help it. You guys are my forum family #my96R50Pathy #96fixerupper Mr Cox 96R50-97JR502 points
-
Next step was drilling the air fill hole into the body of the housing. Once the hole was drilled and threaded we placed in the arb unit Sent from my iPhone using Tapatalk1 point
-
We put all the pieces back in place and torqued the bolts using a floor press as a mount. I cant seem to find pictures of the bearings we installed. Those were installed however using some lube and a floorpress. We had to purchase Timken bearings however and arb also by chance explains that in their manual. ****Part number**** Timken Bearing #32010X As far as the install, we began by throwing the car up on jack stands and removed the diff from the housing, @hawaiirish made a custom bracket that aligned with the housing holes and aided in keeping the diff in place from rocking left or right during the install. Sent from my iPhone using Tapatalk1 point
-
I was pleased with quality of the ARB unit and accessories. I'll always have my concerns about the ARB actuation method, but I do still regard it as reliable. The new units are very stout, and similar in quality internally to the TJM. I chuckled at the cable ties, too, but then again, it's a useful accessory that no one provides (it would be better if they included the required bearings, though). My initial concerns when we were talking about TJM vs ARB was whether ARB was still using a plastic internal cradle from their previous design, which was used to push the locking gear over the side gear. No plastic on the newer design. Once he's got more details, I'll share some of my pros/cons/notes about it and the install. I may even do a separate review/install thread to mirror the TJM review I've got out there.1 point
-
Looks good! Now you just need to upgrade whatever those lights on the front are to LED so you don't have yellow puddles on the ground'!1 point
-
Its finally here! Sorry for the wait but here we go. Christmas Weekend we did a four day run from Friday-Sunday (Monday to wheel) and covered an RD135 ARB locker, AR32 ARB Intensity Spot lights, adjusted a radio fitment for a double Din media display, light bar pre-wiring, and custom fabricated Static Poly Trailing arms and panhard bar done by [user/]TowndawgR50[user] Beginning with the locker, I intended to purchase a TJM Airlocker during Black Friday. They were priced around 770 and I've read nothing but amazing reviews on them. Literally not a single forum review I read had anything negative to say about the TJM brand locker. I was set on what I wanted and placed my order on JustDifferentials.com only to get a message a few days later that they did not have that locker in-stock or in the country and gave me a blackfriday offer for a fullpriced ARB locker (so not really a deal then). I ended up getting them to match 4wheelparts.com and I ended up with a -ARBRD135 Nissan H233B 33 Spl Air Locker $846.45 /shipped picked up again blackfriday weekend, most sites were surprisingly sold out and had to take orders for shipments to come from the factory. fortunately mine was in warehouse and got delivered in about 4-5 days I heard some concerns on the first gen ARB lockers which made me consider the tjm, however, looking at the second gen locker it seems as if they created a redesign that tackled any of the faulty issues they had in the past. starting with the packaging Now for the actual inner assembly of the locker...1 point
-
That looks great man! Mr Cox 96R50-97JR501 point
-
I snagged one today at a junkyard for $19 bucks, I couldn't pass that one up. Now time to clean it on up Sent from my SM-G960U using Tapatalk1 point
-
Finished up another set of lowers1 point
-
Parts companies to avoid: Dorman, mevotech, cardone, moog (used to be good but now is crap). If I have to get aftermarket I try and use beck/arnley as half the time it’s an oem looking part in the box. Or ACDelco as their parts are usually okay. Ive never had a bad oem part from Nissan, or VW for my golf. The way I look at it is, if it’s something that will leave me stranded, I’m willing to pay the extra cost for the part that lasted 20+ years. Just been my experience working on cars for 15 years and owing a pathfinder for 14 of those.1 point
-
Got them all installed.1 point
-
Looks great! I think that space in the bumper is a perfect place for a light bar. My install isn’t quite as clean as yours, but here is what it looks like with a slightly shorter bar in the same spot with side mounted brackets. Sent from my iPhone using Tapatalk1 point
-
JDM. Also on my truck (which is entirely JDM with a diesel ?)1 point
-
OEM for R50's w HID's. @onespiritbrain @ferrariowner123 has a few sets for both his 96 and 03 and I think @XPLORx4 also has a set on his rig as well.1 point
-
The underhood light's one of the most useful mods I've done to my truck. Really nice to have when you're working under the hood.1 point
-
I have had this 1441 code keep showing up on my 97 pathfinder no matter what I try. So far I have spent about 6 months and hundreds of dollars trying to get rid of that "service engine soon" light. The code translates to a small evap leak. So far I have replaced the following. 1. Evap canister 2. Evap canister vent valve 3. OEM gas cap 4. Bypass cut valve 5. Bypass cut valve relay and associated hoses 6. Purge volume control valve. 7. Fuel tank pressure sensor 8. Blew out all evap hoses front to back. 9. Replaced All evap hoses that I can reach, both under the car and under the hood. I even took it to my local Nissan stealership who said they could not find anything, yet still charged me for a diagnosis. They even said they did a smoke test and found nothing. I highly doubt they ever did that test. After extensive searches on the web, some have said there is a slight chance that the gas tank could be leaking around the sending unit past an O-ring, but I never smell any gas vapors inside the car so I highly doubt that. I have also heard that my ECM could need to be re-programmed, but I do not know how to do that, and since the last fiasco, I do not trust my Nissan service center. I could try getting a used ECM from a junk yard, but I am not sure what year(s) or exact part would fit mine. I have pretty much decided to give up and live with it since we do not have emission tests here. If anyone has any insights please let me know. I hate it when a problem like this beats me. I feel I did put forth a good fight though.1 point
-
Mrelcocko, Hey nice job on the fixing up, If you want another one to fix up, I will sell you my 97 SE 4x4. It is in great shape and needs very little. It only has 70,000 orginal miles and has been a southern truck its whole life. Looking to get about $2500 out of it.1 point
-
Wow, an R50 with no holes in the towers! Undercoat looks good.1 point