- Sign In Changes: You now need to sign in using the email address associated with your account, combined with your current password. Using your display name and password is no longer supported.
- If you are currently trying to register, are not receiving the validation email, and are using an Outlook, Hotmail or Yahoo domain email address, please change your email address to something other than those (or temporary email providers). These domains are known to have problems delivering emails from the community.
Leaderboard


Popular Content
Showing content with the highest reputation on 12/23/2018 in all areas
-
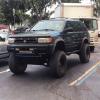
Hello, My name is Johann and here is what I've been up to lately (SAS). I've been collecting parts for the swap for close to two years now. Mostly waiting on good deals on parts and tools. Recently I was gifted a motor picker, and that was one of the last tools I needed to start the swap. So about 4 days ago, it began. A few months ago I bought a 97 pathfinder for 300$US. It had shot wheel bearings up front, and as expected, very worn down suspension components up front. The ad had no pictures so I had no idea what i was going to go look at... As soon as I saw that is had a steel bumper, I knew I was buying it. Its a manual, and runs fine, other than suspension issues up front, which made it the perfect candidate for the SAS I've wanted to do for years. So soon after i acquired a hilux snorkel for free and mounted it to the r50 A few days ago I moved the big pathy (my green one) out of the shed, laid down some wood, and backed up the white one to be stripped down. It took about 5 hours, but I got the car way up on jacks (the jacks are welded to the rims and tires are flat) and removed the entire subframe. That subframe is WAY heavier than I thought! So the subframe is what holds the motor up, so to remove the subframe, I put a thick strap around the motor, and a jack under it (to hold it in place). Next I got the motor mounts I made and temporarily installed them to make sure they fit. I then decided that the frame was going to get reinforced anywhere that something was getting added. so I added a piece of steel behind it. These motor mounts were then welded in. I then did the same exact thing on the other side Once they were welded in, the motor was now being held up with no subframe! This was the hardest part so far because there was barely any space under the car with the jack in the way. Now with the jack out from under the car and with more space, I started cutting and removing all the old steering stuff. everything from the firewall up was removed. there are two little brackets holding the original steering bend box (90*, not sure the specific name for it). I cut those out with a reciprocating saw. once all the old was out of the way, I ground the "frame" down to raw metal (where the new jeep steering box would go) when I went to mom up the steering box, it wouldn't fit because the wheel well was blocking the back end from sitting on the rail, so I eyeballed it and cut a slot into the well to allow the box to sit. Once up, I mocked up some steel reinforcement plates to the frame, drilled them & the frame, and temporarily bolted up the box to make sure everything fit. Tomorrow the box will come back out so I can trim the reinforcement plates up to size better. Once they are trimmed up, the box will be mounted, plates tacked in, box removed and the rest of the plate will be welded in. I started tinkering with the shaft connecting the wheel to the steering box and am debating on how I am going to splice them together. Probably will cut to length, weld, sleeve, then weld the sleeve to both ends. Any better ideas? the left one is the jeep one, the right is the stock one. I need to connect the top piece from the left one (goes onto the steering box) with the bottom of the right one (goes into end of steering on r50)3 points
-
It’s not always terrible. I once tuned into a truckers’ convo while stuck in traffic on the freeway in eastern AZ, and one trucker was adamant that people get fecal matter in their ears because they use their phones in the restroom. That was worth its weight in gold, and all thanks to having a CB.2 points
-
Nearest Radio shack for me 2-3 hours. Ordering online is a mess too. I wanted minimum 5A diodes, ended up finding 10A 100V ones on ebay. Took me a couple days though.1 point
-
No doubt wiring is the greatest joy just love it. Radio Shack's around where I live are few and far between they closed every one of them besides one that is located in the mall. I went there because I figured the guy at Radio Shack would be able to help me and tell me what type of diodes I needed for my application but he didn't know anything about diodes so strike 73 Lol! Mr Cox 96R50-97JR501 point
-
I know exactly what you mean when it comes to finding diodes..... they're difficult to sort out. Wiring is a joy, isn't it? Cool project though!1 point
-
Alright. I've been ordering parts this weekend (I'm realizing that tubing, wire, switches, relays, and diodes add up... *sigh*), and hopefully I'll put together a high resolution diagram for you all.1 point
-
Thanks for the info. Looks great!1 point
-
Looks Good! I’ll be interested to see how your drawers go. When you get firmer on your scouting trip, post it. Myself or some of the other locals might join you.1 point
-
Add one more to the successful Land Rover Defender spring install, here's my numbers: Rear: Spring - Land Rover NRC9446 from LRDirect for $77.27 shipped to WA Shock - KYB OEM replacement P/N 343379 from RockAuto Front: Strut - KYB OEM replacement P/N 335031 and 335030 from RockAuto Strut mount/bearing/boot - KYB OEM replacement P/N SM5329 from RockAuto Spring - ARB 2928 Old Man Emu Coil Spring P/N 2928 from Amazon Sagging suspension: RR: 31.25" (FSM spec: 33.31") RL: 30.5" FR: 32" (FSM spec: 32.09") FL: 31.25" Rake: -0.75" (FSM spec: 1.22") New suspension: RR: 34.875" RL: 34.5" FR: 33.25" FL: 33.25" Rake: 1.44" Note: I had a shop assemble the front struts with the OME HD springs due to the increased compression required and subsequent sketchiness factor.1 point
-
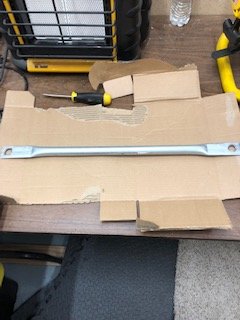
As a follow up, I went through on this approach to the missing link. Definitely added some sturdiness to my ride, and I’m very pleased with it for what it cost
 1 point
 -
I was thinking the same thing.1 point
-
You could turn it into a side camping floodlight1 point
-
Here is the summary I have to date. (BTW, I have the 9448s as I'm headed towards a 3-4" SFD - not put on yet. I'm pairing them with an ARB OME Heavy Duty Front setup-also not put on yet. I'll post when it's done. I re researched purchase options & LR Direct was still the best. I paid $85 on Fri 10/12 & got them in Eastside Seattle Mon 10/15.) Land Rover Defender 90 Spring Summary http://www.red90.ca/rovers/springinfo.html 5” Inner Diameter NRC9446 +2.5-3” (15Spring Ht) 0.5-1" rake c 2 front spacers 175# Spring Rate LR 90 Defender-Front Driver (0.5" longer than passenger) NRC9447 +2-2.5" (Micah got 4") 175# Spring Rate LR 90 Defender-Front Passenger NRC9448 +4(Perfect c 4"SFD), cut one coil=3" 225# Spring Rate Blue”/Red LR 90 Defender-RearRH 110 & 130 Heavy Duty-Front RH $80 Delivered from UK $84.49($32.92+$51.57) from NRC9449 +2-2.5" (same Height as NRC9447) 225# Spring Rate (heavier Load than NRC9447) 1badqx4 9446: neilca(35"F/36"R c 31"tireMid Fender Ht) 9447: 19pathfinder99, MichaelAndrews, micahfelker(37-37.5" c 31"tire, MD OME Springs, F=HD OME), thehillboys (Bilstein 1525 shocks) LR - 34 1/4" to 38 1/2" settled to 37.5" net 3 1/4" RR-33 3/4" to 38" settled to 37.5" net 3 3/4" Front 35” c Moog OEM Springs, KYB Struts & 1 1/2" spacer LF - 32 1/2" to 35 net 2 1/2" (slightly uneven shop floor) LR- 32" to 35 net 3" Rake 2.5” 9448: hawairish, TowndawgR50, Bax03SE(37"F/38"R c 33"tire Mid Fender Ht-1 coil cut), drewp29 9449: 03Troutfinder (36.5" from 34", same ht as OEM Spring+2”spacer) Order from LRdirect Brands-few reviews on LR forums say Brit Part (c8) springs held up better than OEM Land Rover against sagging Please let me know if there are any corrections that need to be made & take mid fender measurements at wheel center & fender as well as supply your wheel & tire size. Thanks!1 point
-
So I decided to give it a whirl without the roof racks and it has worked amazing so far. All I had to do was rotate the tent rails 90'. I did put some foam in between the mounts and the vehicle rails to protect to try protect the finish. As you can see it obviously sits much lower which is nothing but a good thing!1 point
-
Nothing wrong with being cheap. Right now the 12,000 pounders are 300. I do keep my eye on them. Harbor Freight is 3 min from my house, I'm in there all too often. If they go down to 200 or less I'm gonna pounce on it, then go home to face my wife's wrath.1 point