- Sign In Changes: You now need to sign in using the email address associated with your account, combined with your current password. Using your display name and password is no longer supported.
- If you are currently trying to register, are not receiving the validation email, and are using an Outlook, Hotmail or Yahoo domain email address, please change your email address to something other than those (or temporary email providers). These domains are known to have problems delivering emails from the community.
Leaderboard




Popular Content
Showing content with the highest reputation on 10/08/2018 in all areas
-
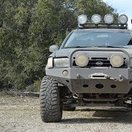
Doing some snowheeling this morning near Banff.6 points
-
I’m in between the Harbor Freight bediner and Monstaliner. I don’t think they’re in the same class, but it’s come down to budget (HF) vs. wanting to get something not in black (ML). If I can find Herculiner in gray for a reasonable price, I might go that route. Regardless of the flavor, I’m planning to use a schutz/undercoating spray gun to apply it, since rolling it on won’t be an option with all the crevices. Not sure what my primer options will be quite yet.3 points
-
I know! Still have some other metal-work to do on things, then I’ll take everything off and coat it. Though, rust could make for a nice patina...2 points
-
I was given a very good suggestion by andreus009 about starting a category of "Tips and Tricks" that we know/use in mechanics, electrical, hydraulic, etc. I can see this becomming its own category, but to get it rolling lets just use posts for now. Please just submit on topic and keep commentary constructive, parallel or expansive. Details, photos, etc much appreciated. I'll start with removing broken bolts/studs. 1) Soak the offender with penetrating oil; This never hurts ! Give it a sharp rap or two with a hammer for good luck (it can actually help). 2) If possible, grind, mill, file, etc the top flat. This makes starting MUCH easier. 3) Use a spot drill or center drill to start the hole you are about to drill in the CENTER of the broken bolt. Make sure you are on center and parallel to the bolt. THIS IS IMPORTANT !! Rig up a guide with a piece of wood and C clamps or something if it helps. (if the item is removable, this is much easier to do on a mill or drill press !) Make the spot hole is slightly larger than the drill size. 4) Selecting drills: this has many nuances so bear with me. Always use quality drills: they work better, last longer and are less prone to breaking. Use left hand (counter clockwise) drills when ever possible. Sometimes due to heat and vibration they will break the bolt loose and unscrew it mid process !! You can use standard right hand (clockwise) drills but they can actually torque the bolt in tighter sometimes. Cobalt drills are harder and may be required for high grade bolts, but dont flex as well as HSS (High Speed Steel) drills so are less forgiving and more likely to break. Standard 118 degree web drills work fine if you spot the hole although they take a little more force and drill hotter. 135 degree split points start and cut much better with little or no spot hole. I make my own 140 degree carbide ccw spade drills that work wonders. I won't explain as if you don't know what this is, you wont have access to them. 5) Drill size is important ! OK, you are trying to remove a 1/4-20 bolt. Minor thread diameter is .196-.207". I like to keep .02" clearance incase you drilling crooked or off center. This means a good drill size for a 1/4-20 bolt would be about .16". It's well worth doing a little homework before you dive in. If you are reading this, you can find the info on the web EASILY. 6) Drilling the hole. USE OIL ! Thicker the better. If you don't have actual 'cutting oil' use gear oil, motor oil, household oil in that order. WD-40 or silicone spray is better than dry, but not much. Hand held drill speed should be 250-700 RPM, the bigger the drill, the slower you go. Pressure should be firm, but 'feel' it. Often you can tell there is a problem before the drill breaks. Dont drill too deep ! If you dont know how deep you can go, play it safe ! You can always drill a little more later. There may be a an oil channel or water jacket nearby ! If you are drilling deeper than 3x the drill diameter, 'clear' the chips by taking the drill out and restarting. The chips can load up the flutes and sieze the drill which=broken drill if you are not used to it. Ok, you have drilled the hole and the bolt did not break free or back out. You have 2 basic options now. 7) Bolt extractors. EZ-out (spiral ccw bolt extractors) is popular with some, but I dont like them. Too brittle and weak; I have broken a lot of them and I do this stuff for a living. I like the square style, much more durable and if you bell mouth the hole and it doesn't bite any longer, you still have options. You insert them into the hole, tap them in with moderate force then put a wrench on (recommend tap wrench) and unscrew. Hopefully this works. Use feel and sounds to tell whats going on; when in doubt, back off a bit. DO NOT SNAP IT OFF IN THE HOLE !! This means starting over with a x10 dificulty level. Makes for a bad day folks ! Ok, the bolt extractor wont get the bolt out, feels like it will break or bell mouthed the hole and wont grab any longer. 8) Redrilling: If the hole is well centered and you have the #'s for the bolt diameters and a good drill selection, pick a drill much closer to the thread minor diameter and redrill the hole. Repeat if necessary. I have literally drilled out the entire core of bolts and all thats left is just the thread its self. This comes out easy like a helicoil, or you just grab it with needle nose pliers and unwind it out of the hole. Good luck, and just be patient. Odds are, you wont need to get to the last step. In case everything fails, my next write up will be tapping and thread chasing. Enough for today. mws, there was a specific request for your grease/piston blind hole bushing removal method writeup. Feel free to cut and paste or elaborate if you wish. B1 point
-
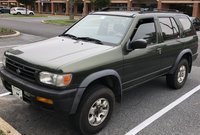
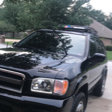
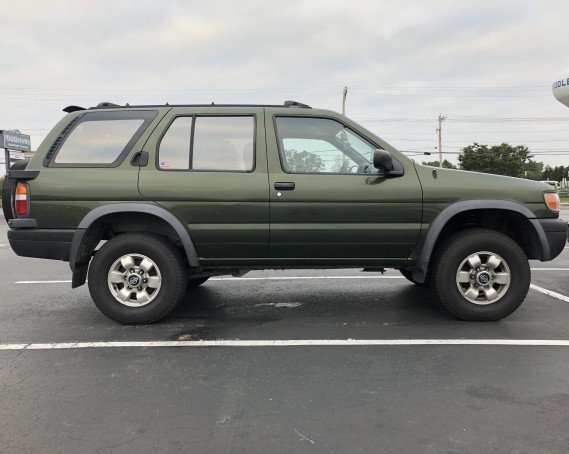
Sadly don’t have before pictures I seem to have lost them. But if anyone is trying to find out what a 2.5 inch strut lift will look like on their pathy, I hope this helps. Also to note if you do use 2.5 inch strut spacers, you’re going to have to use camber bolts. Something I haven’t don’t yet but will get around to. Hope this helps!
 1 point
 -
I’ve done it already! I read over it a couple months ago, and did it immediately. Thank you for the help on the O2 Sensors as well!1 point
-
bank 1 is passenger, bank 2 driver. sensor 1 is before cat, sensor 2 after. I recently did both sensor 1 on my 2003. The driver side one is easy to do as you can easily see and touch it from the engine bay. The passenger side is simply a matter of luck in my opinion... I was unable to touch it with my hands so much it was down there... I got myself a set of o2 sensor sockets, and was able to reach it with 2 extensions and a lot of patience... Once the sensor was broke loose, I used the wire to unscrew it... Installation was reverse... Since I could not reach by hand the o2 sensor hole, I had to drop it from the extensions in the hole, then use the wire to start the threads and eventually torque it with the socket... it is very sketchy to do on the passenger side.. It helps to do it while the truck is still warm. Good luck1 point
-
Yeah yeah, enjoy the confidence that it won't rot through in a couple months...ya darn Arizona people! How do you plan to coat it? Just some kind of paint, or powdercoat, or? When I painted my bumper I grinded all the rust off, then used Rustoleum etching primer and several coats of Rustoleum enamel. Looked awesome and was tough (abused it a lot, barely scuffed it), until one unusually warm day mid-winter (raining and 35ish) when most of it just fell off while driving home from class. Just something to consider.1 point
-
Looks like hawairish desperately needs to paint that bumper!1 point
-
To my knowledge nobody is still producing an SFD kit, and as much as I love Steve's products, I don't think his spacers are designed to give that much lift and maintain the correct geometry. Search "sfd" and you'll find a ton of info, once you sift through all the "does anyone still make SFD kits" posts. Lol1 point
-
Sent from my iPhone using Tapatalk1 point
-
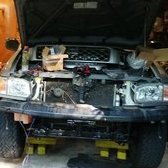
Well, it's as done as it's gonna get before my CANVAZ trip this weekend. I will eventually put some plate up top and some additional brackets under the quarter panel for support. I've been pretty pleased with the cuts. My AZ flag apparently had some hidden lines that got cut, but I went with it. Cheapo MicTuning lights off Amazon are wired to the reverse lights...and make the OE bulbs look like garbage. I also made a new missing link and mid skid... Super pleased with the results. It slides on/off just like the front skid, and now all the hardware is matched for a single socket. ... I know this thread started off for front bumper brackets, but I've come a lot farther than expected. I'm still planning to go through with the front brackets for those interested, but still need another week or so to finalize a few things and put some numbers to things. I'm absolutely exploring options to make skids and missing link available, too. Stay tuned!1 point
-
1 point
-
• When removing an oil filter, enclose it in a ziplock sandwich bag so that when it starts to leak, the bag catches most of the oil. • Remove tie rod ends or ball joints without having to use a pickle-fork by whacking the knuckle with a large hammer (such as a 2-lb sledge). The impact will pop the TRE or BJ loose. • Always loosen or remove the fill plug on differentials and/or transfer cases before removing the drain plug. • Use a safety pin or a needle to clean/aim the windshield washer nozzles.1 point
-
Took me a while to find this again. When I did my oil relo kit I needed to get the nuts into a small space. So I used insulation tape to hold it in the spanner. Worked great BTW I telescopic magnets1 point