- Sign In Changes: You now need to sign in using the email address associated with your account, combined with your current password. Using your display name and password is no longer supported.
- If you are currently trying to register, are not receiving the validation email, and are using an Outlook, Hotmail or Yahoo domain email address, please change your email address to something other than those (or temporary email providers). These domains are known to have problems delivering emails from the community.

MrEviLDeD
-
Posts
296 -
Joined
-
Last visited
Content Type
Profiles
Forums
Calendar
Everything posted by MrEviLDeD
-
I understood what you meant no problem. There is a bit more play in the bearing (the image you posted) than I personally would like but I am not sure if that is simply because the bearing is clean and out of the assembly not packed with grease. I do not have a video camera to get a better idea of the play. I think it is most likely a better idea to replace the bearings and races. Just not sure I have the equipment required to pop the races out of the assembly. I do not want to just repack the bearing to put it back in only to have it still show the same problems. Knowing the way my luck runs it would prove to be catastrophic.
-
Which one is this? Does this come with the inner bearing set? Should I be ordering an additional part?
-
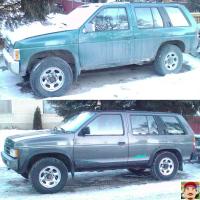
I am afraid to add up all the new bits put into her I know the end result will be well worth the effort but she has drastically gone up from her 1400$ initial price tag....
-
I do not have a press to get the races out. I will buy them in sets then, thanks adamzan. The inner bearings come as a set (race/bearing), the outers come separately. I am starting to think at this rate might as well just pull the engine and throw a rebuild kit at it.... <-- morbid lol
-
Yes sir I did. However I didn't see any play at all. It wasn't until I had things apart that the lower ball joint looseness became apparent. With the wheel off I tried to manually move the rotor and didn't notice any real play except in the steering direction (tie-rod?) Ok, I won't fret over it. I will just get new ones. Note I do not have the races out, just the front outer wheel bearing on the right side. If the races appear smooth still then should I just buy the bearings (not sure if my edit of the post above sends a notification or not) As always thanks ahardb0dy.
-
Cracked my ankle with the rotor as it slid off trying to hammer on the edge of the lower ball joint.. OWCH! Little mark, Huge pain! At first I had a difficulty getting the rotor off as it just didn't want to give and it was impossible to fish the outer wheel bearing out. Well once it came out and I soaked it in some industrial purple to clean it I wanted to ask what the best method to determine if it is bad? This was one of the things the inspector mentioned. There is a bit of play in the bearing once it was cleaned, well even so when it was still packed with grease. Should there be any play in the bearing at all? As I recall there shouldn't be but wanted to ask for some reassurance.. Looks like i need to possibly order new bearings. Oh almost forgot, how do you properly check the bearing races. They should just be smooth correct? Not sure if I should replace as a set or just replace the wheel bearings (inner and outer)
-
 Couldn't get the lower ball joint out before it got dark. Nor could I get the inner tie-rod end out either.. Will get on those tomorrow morning. I should be able to do the drivers side much faster now that I kind of know what I am doing. =)
 -
Thank you very much.
-
22mm isn't large enough. I have a 1" and this is too small.. I do not have anything larger... can anyone tell me what size of a nut this is? Please?
-
Are Pathfinders 0-Toe? Do I need to be overly concerned with Cambre and caster?
-
MrEviLDeD's Count Down to Inspection (Cheeky Grin)
MrEviLDeD replied to MrEviLDeD's topic in 90-95 WD21 Pathfinders
That is an understatement. The three places I was quoted all wanted between 480 (glass only) through 600 (installed). For the effort I will just have it installed and save me some labour and mucking around doing the windshield correctly. I am going to give it an honest effort today replacing the fuel lines and getting them secured down. Then tomorrow hopefully get the time to drop out and replace all the front end bits I have... All that will be left after that will be the headcover gaskets(thinking a gasket sealant here maybe(Grey)), and the rear seal repair. Then just an alignment. Someone mentioned that the shaft may be scratched. Can anyone recommend to me a fix for that? At least the name of what I am looking for so I can nab it too just in case. Additionally, if I put one on even if the shaft isn't scratched would it make any difference? Would it give that extra level of protection with future leaks? Thanks for hanging in there with me, I appreciate it.. Still gets me down that I missed the deadline.. <Shakes fist at Canadian weather> -
MrEviLDeD's Count Down to Inspection (Cheeky Grin)
MrEviLDeD replied to MrEviLDeD's topic in 90-95 WD21 Pathfinders
Never mind on the "Flaring" question. Took the end covers off of the fuel lines and they are pre-flared! Thank you Nissan! -
MrEviLDeD's Count Down to Inspection (Cheeky Grin)
MrEviLDeD replied to MrEviLDeD's topic in 90-95 WD21 Pathfinders
Additionally would I require a bubble flare, a normal flare or a double flare? The FSM is quite vague when it comes to the fuel system really imo. There are some basic diagrams of the sender and pump. There is a basic diagram showing roughly where the lines go in terms of other frame and body parts but does not drill down into any kind of detail. -
MrEviLDeD's Count Down to Inspection (Cheeky Grin)
MrEviLDeD replied to MrEviLDeD's topic in 90-95 WD21 Pathfinders
Regarding the new fuel lines. Are there anything I need to do to them before installing them? Do the ends need to be flared? Are they as-is and I just need to systematically remove each line at a time? Just asking just in case I need some tools I do not have before I begin the project today. -
MrEviLDeD's Count Down to Inspection (Cheeky Grin)
MrEviLDeD replied to MrEviLDeD's topic in 90-95 WD21 Pathfinders
Yes sir. they came in yesterday. People must have thought I was retarded as I grinned ear to ear with three long steel tubes This weekend I will do my best at getting everything installed. As fate would have it. Guess yesterday driving I took a stone to the windshield on the edge. So between that and the weather dropping below -20 last night I awoke to a 500$ crack in the windshield.. At least you know when I am done, give or take a few things. She will last the remainder of my life so I will get the value back out of her -
MrEviLDeD's Count Down to Inspection (Cheeky Grin)
MrEviLDeD replied to MrEviLDeD's topic in 90-95 WD21 Pathfinders
There is no way for me to make the deadline of tomorrow. I gave it a full on try. The weather beat me. Good news though the new fuel lines came in fast. So had I been able to get out to clean off the engine and get those axles and front end parts in. I would have made it Will keep updating though. Might as well stick with it through to passing inspection. -
MrEviLDeD's Count Down to Inspection (Cheeky Grin)
MrEviLDeD replied to MrEviLDeD's topic in 90-95 WD21 Pathfinders
Tranny mount. One a few of the Ford and GM cars I have worked on there was a slot in the mount that allowed the tranny to slide back and forth about 3" or 4" if I recall without having to completely remove the transmission mounting bolt. Ahh. Ok so there is enough up there to hold the tranny in place slid back. Got ya. -
MrEviLDeD's Count Down to Inspection (Cheeky Grin)
MrEviLDeD replied to MrEviLDeD's topic in 90-95 WD21 Pathfinders
That is indeed what I meant. Do I remove the mount bolt completely or is there room to slide. I am wondering if it wouldn't just be as easy to take the transmission out. Would certainly give a greater amount of room to work on the rear seal. As well get a good look at the complete backside of the motor for any other leaks. Thanks again ahardbody. -
MrEviLDeD's Count Down to Inspection (Cheeky Grin)
MrEviLDeD replied to MrEviLDeD's topic in 90-95 WD21 Pathfinders
Just to make sure. When I do the rear main seal I need to pull the axle shaft and slide the tranny towards the back 4 or 5 inches (more?). Doing this will I have to re-align and center the clutch to put it back when I am done with the seal? Sorry for the dumb question. -
MrEviLDeD's Count Down to Inspection (Cheeky Grin)
MrEviLDeD replied to MrEviLDeD's topic in 90-95 WD21 Pathfinders
Day 5 of 10 Way to cold to get anything done today. I did however locate and order the tie-rod ends and adjusters. So will be able to pick those up tomorrow (today.) I also picked up the ball-joints. So almost all of the steering parts are in hand ready to go in. Also finally located a container of that RiSlone Rear Main Seal Repair treatment so also have that too. Day 6 of 10 Picked up the tie-rod ends today and put an order in for the rear main seal kit (seal and gasket kit). So all that is technically left now is finding the oil leak and putting an end to it, and the accessories drive belts. I have all the parts needed except wheel bearings (didn't order any because was told that they can be repacked and adjusted). I also wasn't able to buy a center link, or torsion rod bushings kits. So hope that there is nothing wrong with the remaining parts. Also installed the battery hold-down. I am not very happy with the product and will need a 10" j hook opposed to the two 7" jhooks I have. Crappy planning and nothing universal about it. It is in though! A note about the oil leaking. I was under the hood today checking the oil and I noticed that it was considerably wet in terms of oil around the right valve cover gasket. It looks like there is a stain on the exhaust plate under it running down, and on the tranny as well. However it isn't wet *dried from normal engine heat maybe". This may be one source of the oil leak. The gasket portions that stick out from under the valve cover looks quite wet so it is obviously leaking from there as well. I could not get a good look on the left side as there was not enough light. Maybe it has been infact been leaking from the valve covers. Cross your fingers This would be a very easy fix.. Current day 6 score: Wheel Bearings (Front) - Status: Needs Adjustment or Repair Oil Leaks (Unsure where, think rear seal) - Status: Needs Repair or Replacement Valve Cover Gaskets (Left/Right) - Status: Needs Replacement Left/Right CV Boots Torn - Status: Purchased, Needs Replacement Tie-Rod Ends (Left/Right) - Status: Purchased, Needs Replacement Ball Joints (Upper-Left/Right, Lower-Left/Right)- Status: Purchased, Needs Replacement Fuel System (See Previous Notes) - Status: Purchased(awaiting shipment), Needs Replacement Daylight Running Lamps - Status: FIXED Battery Hold Down - Status: FIXED Rear Bumper (Full Bumper) - Status: FIXED Tire Condition (Front Set) - Status: FIXED -
MrEviLDeD's Count Down to Inspection (Cheeky Grin)
MrEviLDeD replied to MrEviLDeD's topic in 90-95 WD21 Pathfinders
Ok, official word is that any factory steel fuel lines cannot be replaced with rubber they have to be steel. So that is the end of that. Off to pick a part. hope the lines come out easy.. -20c the penetrating sprays comes out more like a gel He couldn't really give me a proper means to fasten the lines down but this guy would fail zip ties I am pretty sure. Best I could do is use the existing hold downs (which doesn't look to possible). I must be boring everyone already, but more to come. Maybe I can STILL make the deadline.... -
MrEviLDeD's Count Down to Inspection (Cheeky Grin)
MrEviLDeD replied to MrEviLDeD's topic in 90-95 WD21 Pathfinders
The mechanic that did the inspection told me that the lines cannot be rubber to the back. He never said the clamps weren't right so not sure how to interpret what he said so just to be safe I want to make sure they are not rubber. I am going to hassle the guy and get a better insight to what will work opposed to just that it is generally broken. Thanks adamzan -
MrEviLDeD's Count Down to Inspection (Cheeky Grin)
MrEviLDeD replied to MrEviLDeD's topic in 90-95 WD21 Pathfinders
What kind of mounting fasteners and connections do I need? I suspect I will need a tube bender tool as well to do this? Do I just wrap some rubber over the pipe and self-tap screw clamps to the underbody? Time to hit youtube -
MrEviLDeD's Count Down to Inspection (Cheeky Grin)
MrEviLDeD replied to MrEviLDeD's topic in 90-95 WD21 Pathfinders
Ok guess it is a no go for new fuel lines. Two different dealer ships said that it would have to come from the factory and that the factory doesn't make them anymore. I tried to explain that in the USA they are still being made as was indicated to me by Alkorahil. They responded that might be the case in the USA but not in Canada. So guess it is the wreckers or run my own lines. -
MrEviLDeD's Count Down to Inspection (Cheeky Grin)
MrEviLDeD replied to MrEviLDeD's topic in 90-95 WD21 Pathfinders
Yea the trick with the fuel lines is that they cannot be shipped over the border, or at least most places will not ship them. The nissan dealership(s) here I have reached out to have not gotten back to me. So hopefully next week they will. It is blistering cold here. Just went out, figured what the hell get the battery hold down installed.. Got the packages open, figured out reasonably about where it will go, threw it all into a large zip lock and busted ass back inside. -21c, feels like -31c. Tomorrow will be a little warmer hopefully and Tuesday should be back up to like -3c. Well get a bunch done then. For now I will just spray all the bolts and such in the steering parts to hopefully loosen the bolts. There are junk yards, and a couple of Pick N Pulls. The junk yards I came up dry. There are I think three pathfinders I should be able to pull the lines from. Just need to get there. Again WAY WAY to cold to be out in a wreckers yard At least not without a spare TaunTaun with me I suspect Hoth was warmer than it is here and I am thankful I am not in Saskachewan or Manitoba. Reports of like -57c and crap with wind chill... Right now I wish I was in FL, kicking back. Buy you a beer You know, Pathfinder stuff...