- Sign In Changes: You now need to sign in using the email address associated with your account, combined with your current password. Using your display name and password is no longer supported.
- If you are currently trying to register, are not receiving the validation email, and are using an Outlook, Hotmail or Yahoo domain email address, please change your email address to something other than those (or temporary email providers). These domains are known to have problems delivering emails from the community.

MrEviLDeD
-
Posts
296 -
Joined
-
Last visited
Content Type
Profiles
Forums
Calendar
Everything posted by MrEviLDeD
-
MrEviLDeD's Count Down to Inspection (Cheeky Grin)
MrEviLDeD replied to MrEviLDeD's topic in 90-95 WD21 Pathfinders
I will check into that. I am putting glass off until very last just in case something happens before getting into the inspection... At least try to narrow down the potential for something to go wrong I know the area pretty well around the two PnP's we have here to see who has the best deal. Appreciate the suggestion thank you. -
Hey everyone, I was searching around here on the forums for a thread that dealt with special tools required to work on Nissan, and of course Pathfinders. I by no means have any kind of list built up yet but got to thinking that maybe a thread that gave links and or information on how to customize tools to do the job might benefit others. If not then the thread will die or can be killed. I will start this list with the Wheel Bearing Lock Ring tool. After lots of searching and consideration of the modification of an existing axle spindle nut or lock ring tool I went to task to locate something more appropriate. Please note that this is a limited sale and while I have purchased one of these I lay no claim to the merchant in anyway so you need to use your own personal judgement when deciding if you will buy one.. There are 8 left. I am looking for a more common place for the tool but for right now here it is: Wheel Bearing Lock Ring Tool/Axle Spindle nut tool As I locate sources for the varying specialty tools used to work on the Pathfinder I will list those links here. I also encourage others if you find a place for a special tool please post a link here for others to find too.. Cheers everyone.
-
MrEviLDeD's Count Down to Inspection (Cheeky Grin)
MrEviLDeD replied to MrEviLDeD's topic in 90-95 WD21 Pathfinders
I have noticed a couple places offering sales so I am about to scope all those out to see if I can not get a better deal. I know I personally cannot change glass I do not even want to nor want to take the risk of screwing it up. I called Speedy first, they wanted 475$ due to the windshield having an antenna or something she said. The other two names wanted about the same amount, but also wanted more for the installation. Speedy sign I passed yesterday said I could call "Scott" for a great deal So I will call Scott sometime today -
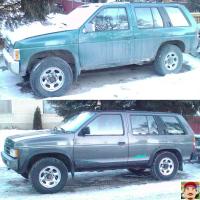
In that picture the XE was completely stock. I had all my tools and such in the SE. So no load in the XE in that picture. So my rear springs need to re placed too.. lol...
-
How do I know if it is "lifted" I will say it seems higher than my other pathfinder, but that could be caused by a number of things. I know I haven't done anything and the fellow I bought it front never mentioned it. I will be under there tomorrow the good part of all day so if you tell me what to look for I can answer that more specifically.
-
That is what I did. However I believe that I may have hand tightened it a couple of turns (at least one) to tights for 0-foot pounds. I assumed that was what it was Even looked them up at CT to see how much. WIth that said I located a tool for the lock ring, have ordered one so either way I will have the proper tool for the job and can revisit the bearing seat etc again right before going in for the inspection just to make sure.. Well at least right before taking the truck in for a proper wheel alignment.. Question. Will they know the toe in and such for the pathfinder? Will they just do a 0-toe? I would like for the pathy to not wander and just wanted to make sure that I do not have to ask before hand for proper toe-in.
-
MrEviLDeD's Count Down to Inspection (Cheeky Grin)
MrEviLDeD replied to MrEviLDeD's topic in 90-95 WD21 Pathfinders
Day 16 of 10 As suggested I may start another thread dealing with the next countdown but for now I will post a little update as I have made some progress. Finally was able to get all the time together to do the right side axle, upper/lower ball joints and completely new inner/outer/adjuster for the tie-rod ends. Also replaced was the inner wheel bearing and race, as well as the outer wheel bearing and race. Was able to hand torque the wheel bearing lock ring however I do not think I loosened it off properly. Good news was that I located a proper tool to do the torquing for that lock ring. Tomorrow I hope to make the 4-day process it took me to do the right side into one and hope to get in and out tomorrow for the left steering/suspension parts. Sunday is hopefully reserved for replacing the fuel lines. I have been leaving this one for last as I feel it will take the greatest amount of fineness. If anyone has any hints of suggestions regarding the steer fuel lines I am always open. Note I have the three new steel lines from Nissan I was just hoping for some insight from someone that has replaces these lines before. With those two major things out of the way this leave just one last issue. The oil leak. Right now I am starting to think that the oil is coming maybe from the left-side valve cover. I am hoping to just tighten it as suggestion in another thread. I am also hinging on just breaking down and buying new gaskets and replacing them both. This looks like it would be quite the ordeal for the left side as I would have to remove the intake manifold to get to it meaning another gasket. Hope it is a simple fix for the oil leak. I have the rear seal and replacement gasket so if it comes to it and the rear seal is indeed also leaking at least I have the fix for that.. Just have to set aside a whole separate day for that. Current day 16 score: Valve Cover Gaskets (Left/Right) - Status: May Require Replacement Rear Oil Seal (May Leak) - Status: Purchased, May Require Replacement Accessory Belts (Alt/Water Pump) - Status: Purchased, Needs Replacement Accessory Belts (Power Steering Pump) - Status: Purchased, Needs Replacement Accessory Belts (Air Conditioning) - Status: Needs Replacement Fuel Lines (Fuel #1) - Status: Purchased, Needs Replacement Fuel Lines (Fuel #2) - Status: Purchased, Needs Replacement Fuel Lines (Fuel Return) - Status: Purchased, Needs Replacement Left CV Axle - Status: Purchased, Needs Replacement Tie-Rod Ends (Left-Inner/Outer/Adjuster) - Status: Purchased, Needs Replacement Ball Joints (Upper-Left, Lower-Left)- Status: Purchased, Needs Replacement Wheel Bearings (Front-Left-Inner+Races) - Status: Purchased, Needs Replacement Wheel Bearings (Front-Left-Outer+Races) - Status: Purchased, Needs Replacement Right CV Axle - Status: FIXED Tie-Rod Ends (Right-Inner/Outer/Adjuster) - Status: FIXED Ball Joints (Upper-Right, Lower-Right)- Status: FIXED Wheel Bearings (Front-Right-Inner+Races) - Status: FIXED Wheel Bearings (Front-Right-Outer+Races) - Status: FIXED Daylight Running Lamps - Status: FIXED Battery Hold Down - Status: FIXED Rear Bumper (Full Bumper) - Status: FIXED Tire Condition (Front Set) - Status: FIXED As you can tell I expanded the list a little as some of the items were not listed (belts, gaskets, etc) but also wanted the list to reflect all the work that has been accomplished to-date. I am hoping to get everything taken care of at the worst case end of the following week. At this point I should be able to take her in for reinspection. I am crossing my fingers. There is a friend that offered to lover over everything before taking it in, call it kind of a pre-inspection inspection. Will not cost me too much but I guess be better than going in and failing again. I have had fun with this and I am very close to the goal line. Problem is the cost of the trust has or will come close to doubling the price I put into it narrowing the money I was going to put towards the other pathy's restoration. I haven't given up and things will come full circle. Things are very close.. I can almost see the checkered flag.. Couldn't have done it without all of your encouragement. Cheers! -
MrEviLDeD's Count Down to Inspection (Cheeky Grin)
MrEviLDeD replied to MrEviLDeD's topic in 90-95 WD21 Pathfinders
It looks like there is a bit of oil leaking from the left side valve cover. The right side looks dry. I will get a picture tomorrow from the top. I wonder if it is possible to catch a break and it be just the valve cover leaking. I know i missed the deadline. With that said I am almost there to get it re-inspected. Not having to do the rear oil seal would save me a load of extra work. More updates coming as I knock off the last few things on the list. -
Thanks. When I get the other side done and retorqued I will have someone do a wheel alignment, I am not sure I am ready for the wheel alignment bit myself. Should take care of it. I located the wheel bearing socket so have one of those on order as well. will be able to make sure to torque it down properly. I appreciate all the help, thank you.
-
Now I am pretty sure that I have the tie-rod out a number of threads but could the wheel bearing lock nut being to tight also cause the front end to pull to the right? Maybe I still have it slightly tight ant not exactly 0 foot pounds.
-
Ok, well I wasn't able to find a tool so what I did by hand was tighten the lock ring up as tight as I could, tried to pull on the rotor. Turned the rotor a couple times, Loosened off the lock ring. turned the rotor, pulled on it to see if there was any play.. repeated until when I tightened it there was no longer any play and once it was loosened there was still no play any longer. I do not have the gauge tool to pull on the lug nut to see how many pounds it takes to turn.90 degrees. I also am not sure if I have the bolts torqued correctly for the ball joints. Seemed like I was starting to crush the rubber on the outside of the ball joint as I tightened so I wasn't sure how far I was supposed to tighten.. Pardon the stupid question but do I tighten until it no longer turns and then torque it? If so then I have to get back out there and tighten those back up some more. Hopefully this will be 1/4 completed now. Just have to do the drivers side, and replace the fuel lines and locate the oil leak. =)
-
1993 Pathfinder 24mm tie-rod end lock bolt.
MrEviLDeD replied to MrEviLDeD's topic in 90-95 WD21 Pathfinders
Replacing inner, outer and adjuster on both sides. Just got finished passenger side.. I am out on the windings of the tie-rod ends as it pulls to the right pretty good now. I was unable to get the bolts apart. I made the mistake of trying to loosen them after I removed it instead of trying to loosen them while still on the vehicle. I will remember that for the drivers side. -
I think I am going to have to try this one by hand. I just have no idea when I would hit that 0mm axle end-play.
-
I will give them a call. Maybe they have it for loan. Thanks adamzan!
-
What would I be looking for in terms of a "name" for this tool so I can search around for one.Hopefully can get it from CT, or PartSource, or something..
-
Seems that it would be important for the pre-loading. I am just at my wall. So will look around maybe I can fabricate something temp. Not like I could guess or do it by hand and have any idea if am close to the torque spec.
-
1993 Pathfinder 24mm tie-rod end lock bolt.
MrEviLDeD replied to MrEviLDeD's topic in 90-95 WD21 Pathfinders
Something didn't feel right about using the pipe wrench so scrounged just enough to pick up a 24mm and a 27mm (lower ball joint crown nut) I think the center adjuster is 23mm and they didn't have one, so I am hoping the slightly loose 15/16" will suffice. Thanks again Negarious. -
When to grease ball-joints and tie-rods?
MrEviLDeD replied to MrEviLDeD's topic in 90-95 WD21 Pathfinders
Ok thank you. -
Hey everyone, Again sorry for the barrage of questions. Weather has been nice and finally getting to the dirt of the re-installation. I had read someplace that I am to install the rubber parts in an unladen (normal) condition. Does this include the ball-joints? Also when do I grease pack the ball joints and tie-rod ends? Do I do this with everything together, wheels on and on the ground?
-
Ok I think I have them in, greased up and ready to go back on the pathfinder. I am a little concerned with this pre-loading thing. The processes (found it finally) in the FSM uses some kind of gauge I do not have. What am I torquing specifically? The lock ring? If so then I am going to need yet another specialized tool. I am starting to think I am over my head here.
-
I have no way to get a new wrench for this @ 24mm could I get away with using a pipe wrench for this if I was careful?
-
1993 Pathfinder Inner wheel bearing grease seal.
MrEviLDeD replied to MrEviLDeD's topic in 90-95 WD21 Pathfinders
Nevermind. Worked it out myself. I pushed it out by pushing out the race. Sorry for the silly questions Safer than stupid is my motto -
1993 Pathfinder Inner wheel bearing grease seal.
MrEviLDeD replied to MrEviLDeD's topic in 90-95 WD21 Pathfinders
Also, the FSM says that after installing the hub and wheel bearings that I need to adjust wheel bearing pre-load? Meant to ask a few topics ago. -
Before I start digging around. Is there any special thing I need to do to remove the grease seal to get access to the inner wheel bearing? Is it just rubber and pushed into place, do I need to turn it? I do not want to ruin it. I have to reuse it no other option.. Also good note to self, take the whole hub assembly apart while the rotor is still on the truck Or at least make sure you have a bench vice.
-
Do I have to measure it so it goes back in at the same location? I still need to figure out how to release the inner bearing first so I could even use a punch and remove the race. I will be honest I haven't medled with the bracket (where the inner bearing is) I have only cleaned and inspected the outer/rotor side of things. Got the lower ball joint out this morning as well as a finicky tie rod end. Between needing the bearings and forgetting which of the tie-rod arms was the inner/outer I just called it a day. I probably should just get a shock absorber too since its there. Thanks for the help guys.
