- Sign In Changes: You now need to sign in using the email address associated with your account, combined with your current password. Using your display name and password is no longer supported.
- If you are currently trying to register, are not receiving the validation email, and are using an Outlook, Hotmail or Yahoo domain email address, please change your email address to something other than those (or temporary email providers). These domains are known to have problems delivering emails from the community.
Leaderboard



.thumb.jpg.3351162271e2c1bf86fe7c0c7e657df0.jpg)
Popular Content
Showing content with the highest reputation on 10/25/2020 in Posts
-
First snow2 points
-
I posted a teaser pic about this on the 'What did you do...' thread the other day, but time to shed more light on the project. Long story short, I'm making a winch bumper for myself, but that idea has evolved into making a builder kit for others to build their own custom bumper around. This is the progress... I'm still iterating through some small tweaks, but here are the general features: Uses an off-the-shelf winch channel, such as the Badlands (Harbor Freight) or GoPlus (Amazon)—inexpensive, universal, and the 36" width is perfect. Weld-together kit, but entirely bolt-on to truck; no cutting, no drilling. (Well...maybe a little trimming on the windshield washer bottle's plastic lower mount, but that's it so far.) 3/4" shackle mount (eyelet is 1-1/8" thick, or 3 layers of 3/8") Retains factory tow hooks Attachment plates for building any bumper style By itself, a winch mount Uses 3/8" steel for the bracket, and 3/16" for all attachment pieces. Uses all existing tow hook and bumper attachment points, plus three existing unthreaded chassis holes (blue piece in sketch is a nut-strip that inserts into the chassis); 18 total chassis attachment points using M10 and 1/2" hardware. 8" of vertical winch clearance. A side plate (red piece in sketch) provides mounting surfaces for the control box. Slotted channel on the main bracket that allows for attaching things. Currently, working on a bracket that allows the 00-04 OE fog lights to be attached. The bumper attachment plates (green and purple pieces) are what the rest of the bumper is built around. This allows the bumper to be completely removable. The upper plate's shape allows for using up to 1/4" plate on the top and front edges. Of course, the plate can be cut, notched, or bored to use tubing, but is basically intended to be a blank canvas. The lower plates (one inside, one outside the bracket) allow for additional mounting points. The inner plates, in particular, can be used to build a receiver tube attachment, or mounting a skid plate (00-04 models have a power steering return line that is exposed). I may incorporate use of carriage bolts (think single-tool tightening) and make it so the bumper can be rotated up for easy installation, or rotated down for service, winch access, even a step for engine bay access, by pivoting on the lowest attachment bolt. I'm also designing new skid plates, and once that's done, I will be getting everything plasma cut. Hoping to do all that very soon. I guess the real question at this point is if anyone would be interested in something like this? We obviously have very little aftermarket options between ARB (is this still even available?) and TAG (I can't stand the mounting setup). There's been a bit more chat about using XJ bumpers lately, but I'm not convinced that's a better option. While this isn't a complete bumper, I think this tackles the toughest problems about starting one. Down the line, I might make some weld-it-yourself kits that use this as the backbone. Even if you can't weld, this would grossly simplify the process for a local shop that could make you one. Questions and feedback welcome!1 point
-
The bracket we did for R50JR’s truck won’t work in yours because of all the cruise control stuff. As he mentioned, I built two additional brackets to relocate the cruise control pump closer to the fuse block and also move then vacuum bulb closer to the firewall in order to get the compressor in at an angle. But, I think of modified version of his bracket plus the additional relocation brackets might turn out better that the previous effort.1 point
-
I’ve had good luck with my smittybilt Kenentic strap. I used it last winter to pull a Suburban out of a snowy ditch, and less impressively to flip a RAZR back onto its wheels. Slightly lower weight rating than the ARB, but not too bad Link: https://www.amazon.com/Smittybilt-CC120-Snatch-Strap-Rating/dp/B003EP2XIU/ref=mp_s_a_1_5?dchild=1&keywords=smittybilt+kinetic+rope&qid=1603379060&sr=8-51 point
-
You need this kit to self-winch with a HiLift (I carried one for decades for the exact reason given). https://www.amazon.com/Hi-Lift-Jack-ORK-Off-Road-Kit/dp/B00042KQ58 These are also handy https://www.amazon.com/Hi-Lift-LM100-Jack-LM-100-Lift-Mate/dp/B00042KGWG There are off-brand ones that are probably fine too. You don’t need ARB strap, just a decent one. I’d probably go 30’ if you have the $ & space. You definitely need a full size spare. The roof’s a bitch. While they’re nice on back, you’re probably fine with it in it’s OEM location - I’ve done that for 18yrs. I tried the roof a bit but it was just too much of a PITA. I have a swingate but haven’t bothered to mount it yet - I really want it most for the Trasheroo.1 point
-
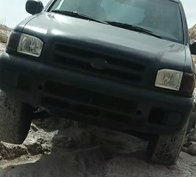
Here's a few pics from a quick trail run today. Really loving these tires!1 point
-
this weekend with friends1 point
-
The real ones will remember this spot [emoji41] Sent from my iPhone using Tapatalk1 point
-
Sent from my iPhone using Tapatalk1 point
-
mine hiding in the bushes....1 point