- Sign In Changes: You now need to sign in using the email address associated with your account, combined with your current password. Using your display name and password is no longer supported.
- If you are currently trying to register, are not receiving the validation email, and are using an Outlook, Hotmail or Yahoo domain email address, please change your email address to something other than those (or temporary email providers). These domains are known to have problems delivering emails from the community.
Leaderboard



Popular Content
Showing content with the highest reputation on 01/08/2020 in all areas
-
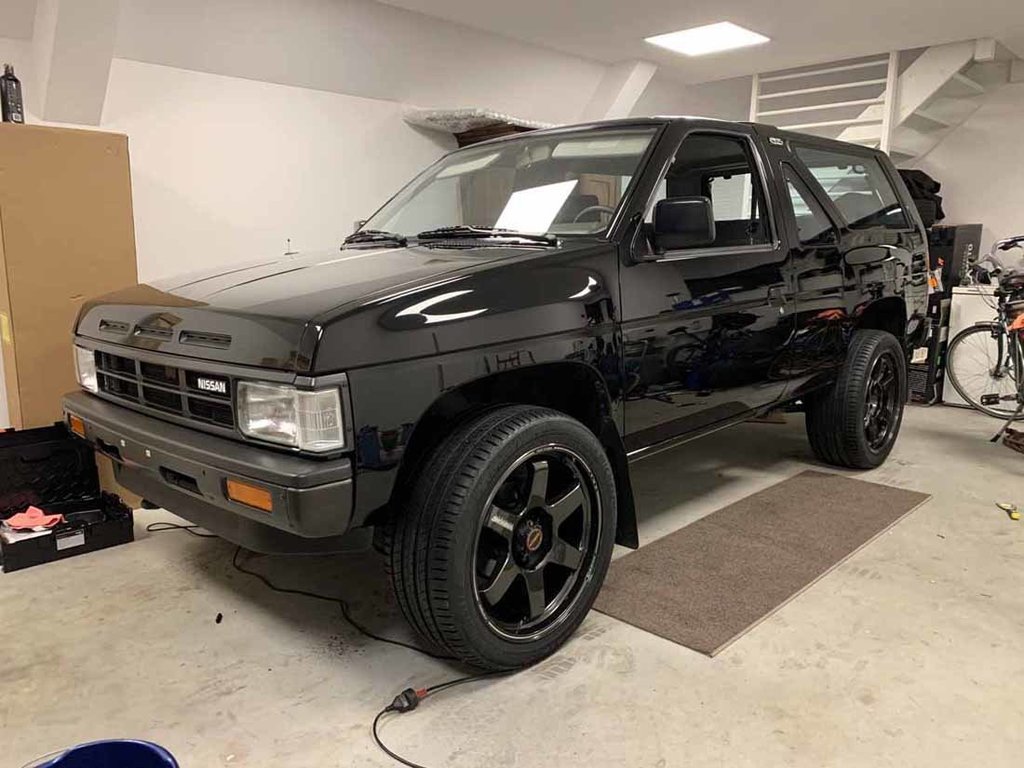
This is my '87 , it has only 22k miles on it. Picture doesn't do the car justice..
 3 points
 -
Hello everyone. Just wanted to share my headlight retrofit with you guys. This is my 6th set of lights that I have retrofitted so far and and by far the easiest. The factory lights were super easy to separate and has plenty of room inside. I ended up the morimoto d2s 4.0 since I had those lying around. There are definately more projector choices out there but will require more custom work. The 4.0’s work well with our lights and use oem d2s bulbs which is a plus. Sent from my iPhone using Tapatalk1 point
-
Yeah I did have to make some mounts for it and about 10-15% of the radiator is unshrouded and that did suck because all I had was some kind of special stainless steel that was hard to work but if you had some scrap aluminum it wouldn’t be bad at all. I literally took the whole fan and shroud right off the Volvo and slapped it on mine. This is the guide I followed: https://therangerstation.com/tech_library/volvo_electric_fan.shtml Sent from my iPhone using Tapatalk Pro1 point
-
Quick write up of the retrofit process. This is for the facelift r50 with plastic lens headlights. Parts list (I get most of my stuff from theretrofitsource.com) D2S 4.0 (replaced by the 5.0 now) Morimoto HID kit with relay harness Apollo 1.0 shrouds I don’t have pictures of some of the steps but it’s pretty self explanatory. First remove headlights and bake in the oven for 10 minutes at 200-205 degrees (wife gave me a funny look here). I set mine on a baking sheet with foil so the plastic doesn’t melt. Take them out of the oven and separate the lens from the housing. Start by prying from the top of headlights and work your way around. It shouldn’t take much effort at all. If it’s a struggle then bake a few minutes longer. Once you have the lens separated u will want to remove the headlight bulb lens thing in the middle. next step is to remove the 2 adjusting screws all the way out and pop off the ball mount for the reflector Once everything is separated you will need to grind down the back of the reflector so that the projector will sit flat and also have enough thread protruding to put the lock ring on. A belt sander makes quick work and keeps it nice and flat. Make sure you try and keep the surfaces flat (same amount removed all around). Next install the projector, centering ring, and locknut. The centering ring helps align the projectors so that they are horizontal (benefits of our h4 lights). The Apollo shroud will be a tad too big to fit our reflector so this gets trimmed on the bottom. The shrouds can be glued in with silicone. I used some window butyl rubber to hold mine on and never had problems falling off. The projectors are also dual beam so don’t forget to plug in the high beam solenoid wire. With the new projectors mounted go ahead and bolt the reflectors back into the housing. Place the lens on top and set in the oven to reheat the glue. Press everything back together and enjoy your new headlights. Sent from my iPhone using Tapatalk1 point
-
Nissan oil pumps are very durable. Drop the pan to see if the screen is plugged and check the oil filter. I have had after market oil filters plug up even brand new. I would take off the oil filter and crank the engine over. If you are getting oil out of the block its not the pump.1 point