
- Sign In Changes: You now need to sign in using the email address associated with your account, combined with your current password. Using your display name and password is no longer supported.
- If you are currently trying to register, are not receiving the validation email, and are using an Outlook, Hotmail or Yahoo domain email address, please change your email address to something other than those (or temporary email providers). These domains are known to have problems delivering emails from the community.
Leaderboard
Popular Content
Showing content with the highest reputation on 05/19/2019 in all areas
-
Sent from my iPhone using Tapatalk1 point
-
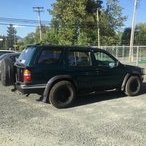
i have yet to take pictures but have managed to blow my struts completely finally. at least driverside left. so it’s time to change them out and after consulting[mention=40517]Bax03SE[/mention] on their front setup i’ve decided to do the same and net my lift from the springs instead of spacers. i think i’m taking both one inch spacers out because the spring set up i’m going with should give me 2.5” lift just as i do now but on fresh struts and much heavier duty springs. speedywaymotors.com for the non amazon order Sent from my iPhone using Tapatalk edit to remind that his set up utilized the top spacers as well and he needed a sfd to counter the angles. i’m keeping my spacers off the top until the rear is worn and i want to go higher and do the sfd. bc of-course gotta do that at some point- just not yet. i want to see how happy i am after i get not blown struts and coils up front. would also appreciate input on bracket designs for front and rear bumpers. sometime around my birthday in june i’m trading stick welder for my fathers mig that i’m better at using as he is better with the stick. lol1 point
-
TrailMaster TM5-5883 Here's the link: https://www.4wheelparts.ca/Wheels/Trail-Master-TM5-15x8-Wheel-with-6-on-5-5-Bolt-Pattern-Gloss-Black-TM5-5883.aspx?t_c=11&t_s=535&t_pt=101508&t_pn=T%2fMTM5-58831 point
-
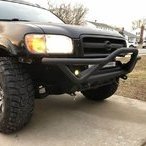
I know it’s not the same as the stresses from a winch pulling, but for a basic strength test I’m happy to see the bumper has no problem supporting the weight of the truck (at least the front of it). This is just lifting from the round tube on the front of the bumper. I took it slow, but it lifted both wheels with no complaints. It’s hard to tell in the picture, but the drivers wheel was off the ground just enough to spin it by hand. Sent from my iPhone using Tapatalk1 point
-
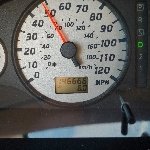
Update. I’ve put about 300 miles on it since cleaning the throttle body and so far not one single problem with start up! Lesson learned, if you have a VQ with the drive by wire throttle, they really don’t like being dirty.1 point
-
You have a keen eye for detail I’ll give you that!! The holes are not threaded, it’s just the way it looks from marks left by the step bit that was used to bore out the holes. But, my dad and I said the same thing....we both looked at it and said it almost looked like a threaded hole, lol. It’s bolted on with grade 8 bolts/nuts/lock washers.1 point
-
Thanks for heeding the suggestions. I think that's improved...still some concerns, but improved. Only other thing off the top of my head is about the bolt holes on the tube...looks like they're threaded? Tapping holes is a noble solution for many things, but if it's just a bolt going into it, I'd devise a way to get a bolt and washer on the backside instead of relying only on the threads for a winching situation like that.1 point
