- Sign In Changes: You now need to sign in using the email address associated with your account, combined with your current password. Using your display name and password is no longer supported.
- If you are currently trying to register, are not receiving the validation email, and are using an Outlook, Hotmail or Yahoo domain email address, please change your email address to something other than those (or temporary email providers). These domains are known to have problems delivering emails from the community.
Leaderboard


Popular Content
Showing content with the highest reputation on 03/08/2019 in Posts
-
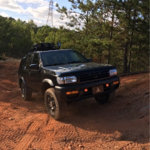
first off road trip after the full maintenance carnegie svra in livermore,california dec 6, 20144 points
-
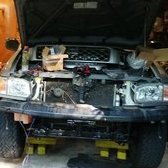
may 2015 front lift installation engine support block is in. subframe dropped ready strut spacer and nx 1 inch spacer installed3 points
-
Yesterday, received my repaired ECU, slapped it in, completed the idle relearn, got my baby back on the road! With the fresh tune up, new IACV, repaired computer, new belts, recent tires & brakes, she's running like new again! Next up, suspension overhaul...3 points
-
Can't wait to see this build thread progress! I've seen what your rig looks like now on Facebook, so I look forward to seeing the story of how it got where it is.2 points
-
may 2015 front struts removed 14mm x 3 on the tower. then 2x 21mm nuts for the spindle side placed jack stands on the transmission to hold the engine not falling off when the subframe is being unbolted. dropped the diff.bolted with 8x 17mm on the diff mount while the cv is bolted on the diff with 6x 12mm each side. its must easier to move the subframe without the differential bolted in. also gives you room to remove the engine mount nuts 14mm nuts steering link removed.2 points
-
Honestly I thought about going silver but I worried about it matching. I played it safe with satin black to kind of go with the rolla rack. Sent from my iPhone using Tapatalk2 points
-
may 2015 few months ago i got lucky that i found someone local that sell his sfd kr fab kit. i think its one of the last production run at the time. i think i paid $600 for everything at the time. 5100 bilstein shock wj coil spring 1 inche rear wj coil spring adapter steering extension strut spacers kr fab pan hard drop bucket sway bar links2 points
-
other pics2 points
-
first drive after the full maintenance done. USS hornet august 20142 points
-
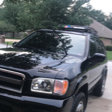
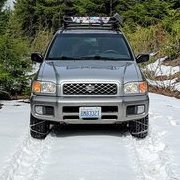
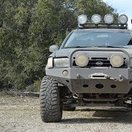
hello guys. i just wanted to say Hi again. ive been a member here for a while now. go here and there once in a while. ive been building this truck for 4 yrs now and i just never had the time to create a separate build for this truck. will post pics and vid. stay tune! truck specs. 96 Se3.4 vg34e euro camsKr fab Sfd+aluminum 1 inch spacer front 5” rear 6” rear wj coilsKyb front struts5100 bilstein shocks rearCustom front bumper Smittybilt 9500 winchJeep fogsWelded frontNavara snorkel d21Spectre 4 inches inline intake33x12.50x15 cooper discoverer sttWarn manual hubs6k led headlamp bulbsAdditional aux fuse box Arb air on board compressor15x10 steeliesGas canCb radio2x 7 inches Rear led lights4x 7 inches front spotlights2x 7 inches front bumper lightsRock slidersGround kitTrasharoo lolfull catback exhaust new piped 2.5 with Flowmaster 40 Tow hitchNissan oem diff plateRola vortex roof rack with custom mounts for flush and low profile1 point
-
The "titanium tint" trim was exclusive on the 99.5-01 SE. Just fyi.1 point
-
may 2015 rear removal of shocks and rear coils drill out the hole to fit the bolt for the 1 inch wj coil spring adapter. new vs old coil spring and rear shocks 5100 bilstein coil spring, rear shocks, extended sway bar links, kr fab pan hard drop bucket and 1 inch wj coil spring adapter installed1 point
-
SFD install may 2015 before install rears front1 point
-
@02_Pathy1 point
-
buy a new pcv valve hose, pcv valve insulatro, and pcv breather hose. theyll all shatter when you remove them. might wanna do the upper water control valve while the manifold is off too. you can service the spark plug tube seals only if your manifolds are aluminum, if theyre plastic...you have to replace the whole manifold. do the powervalves while youre in there also. i wouldnt order new coils if you dont need them...but id probably replace the boots. severeal of mine were cracked and brittle. theyre like 2 dollars from rock auto. cylinder 1 is longer on the 01 so make sure you get the right ones1 point
-
yea. its in carnegie. years back. ive been also to modesto area. stay tuned. ive got @!*%load of pictures to post.1 point
-
Ok, I’ll give it a go tomorrow (my brother is using my car for a dance tonight), and ya next thing I’m looking at is fenders. Something on the hood could be fun too1 point
-
I approve of the license plate!!1 point
-
Definitely consider trialing it with plasti-dip. You might consider center striping the hood.@stpickens is planning to wrap it & I’m going to give a plasti-dip trial to the center hump & fenders.1 point
-
I agree, I think with the bug guard above it it’ll make it look real nice1 point
-
If all your vac lines area accounted for, and the replacement plenum just has an extra nipple for something yours doesn't have, then yeah, just cap it.1 point
-
Sounds like a hell of a trip! From the responses above, it looks like you're on the right track, unless you've got the plastic valve covers. Loctite your power valve screws while you're in there (also make sure there aren't any other parts/gaskets listed in that writeup). I haven't worked on a VQ myself, but IIRC there's some kind of coolant pipe between the heads at the back of the engine that likes to leak, might be good to have a look at that while it's apart just to make sure everything's good back there. Also IIRC the PCV valve is a pain to get to unless it's already torn apart, so it wouldn't be a bad idea to swap out while you're in there. Having extra coils on hand sounds like a great idea. Oil weight shouldn't have much to do with the leakage, I'm running 5W30 in my '93 with 240k+ miles and it only leaks a little.1 point
-
Wish I could find a carrier around here, should've took it off my 96 before I sold it! Lol1 point
-
******june-july 2014****** since i planned to build this one i decided to do a major tune up. so when i start building it for other uprgades i dont have to worry about its reliability. parts replaced were timing belt waterpump oe thermostat camshaft seals oil pump seals sparkplugs sparkplug wires valve cover gasket valve cover screw and gromets intake manifold gasket intake manifold allen bolts (oe were rusted and falling apartt) heater hoses knock sensor painted rust protection for the heater pipes under the intake manifold cleaned egr new egr gasket new power steering. alternator and ac belts new radiator hoses new starter since im putting a new knock sensor. i pulled the intake plenum and manifold. heater hoses and knock sensor are pretty accesible while the intake mani is out. installed new gaskets and valve cover ones did the timing belt and waterpump gave me access to this might as well change it while im at it more work new valve cover bolts old place. where i learned how to wrench1 point
-
just checking local craigslist. no intentions of buying another pathfinder since i already have one. found this as a mechanic special. it doenst start. listed at $600. checked it out the bought it. towed it home. just turns out bad starter. 178k may 8 20141 point
-
Looking good! All the little repairs/replacements definitely add up. RockAuto has cheap hatch/glass struts if you need those too.1 point
-
do the missing link. less than ten dollars in parts at home depot1 point
-
It’s funny, I think we have four shades of black between us. @‘02_Pathy is glossy to match his paint, I think[mention=37543]TowndawgR50[/mention] is next with a worn gloss then your satin & then my nearly matte Chassis Black. I note the SW crew is all different shades of silver.1 point
-
Sent from my iPhone using Tapatalk1 point
-
Well.. Turns out the lockout plate was installed UPSIDE DOWN. The previous owner had the clutch done and whatever shop did it reinstalled the plate upside down. The guy at the nissan dealership was nice enough to send me a diagram, at first glance that confirmed my find. Reinstalled the right way up and the transfer case shifts like new... I find it truly unbelieveable that people who work on cars/transmissions every day can mess somthing up as simple as this. I'm a refrigeration mechanic and only work on cars when mine breaks down. Not rocket science. But anyways, this is the EXACT same issue that the OP described and I'm willing to bet the same thing was wrong with the pathfinder he was looking at buying...Should've went for it lol.1 point
-
I made my missing link out of square tubing, this was the first "mod" that I did and I did notice a difference in terms of rigidness of the vehicle. Especially in the area I live in with tons of hills and turns I could tell immediately after it went on. Again not super dramatic but could tell the difference. Sent from my SM-G960U using Tapatalk1 point
-
Got my full size spare tire mounted Sent from my SM-G960U using Tapatalk1 point
-
March and still going strong. I haven't swapped my fronts from the old design to the new design but will do so when the weather turns good. Not an issue for daily driver and light conditions but at full flex and load, the bolts could strip out of the spacer (old style only). I discussed this with Steve and he redesigned the front spacers to correct that issue before placing the kits for sale so you won't have to worry about my issue. As an engineer, I reviewed his solution and approve of it so even though I have not run the new design for the front, I am very confident that they will work fine.1 point