- Sign In Changes: You now need to sign in using the email address associated with your account, combined with your current password. Using your display name and password is no longer supported.
- If you are currently trying to register, are not receiving the validation email, and are using an Outlook, Hotmail or Yahoo domain email address, please change your email address to something other than those (or temporary email providers). These domains are known to have problems delivering emails from the community.
Leaderboard



Popular Content
Showing content with the highest reputation on 01/23/2019 in Posts
-
---> Slartibartfast You are correct. After disconnecting the hot side of the resistor to a few of the random groups of 4 LED's... None showed signs of improved brightness. I figure they are shot, old age.... I replace a few groups with some high output thru-hole LED's (I had some extra lying around) and the lit up bright as normal, ready for inspection. So, I've ordered another 50 or so to finish the job later. Yes, it's tedious, but it is also fun. I'll update with some final thoughts after I get the parts and get it working back to normal stock operation. Thank you all for your help, much gratitude.2 points
-
Sent from my iPhone using Tapatalk2 points
-
AC springs vs stock2 points
-
Got my new license plate.2 points
-
The third brake light on my '93 sucked when I got it. Some of the LEDs were trying harder than the others, but they were all pretty dim. I too took it apart expecting a smoking gun (moisture, corrosion, something burned up inside) and didn't find anything obvious. LEDs have a life span like anything else, and I figured mine had just worn out over twenty-odd years and 230-odd thousand miles of urban driving. I had a good one in my parts car, so I didn't spend too much time troubleshooting the bad one before swapping it out for one I knew worked. I doubt the issue is one string drawing excessive current. I think you'd see evidence of heat or blown fuses if that was the case. I'd verify that the voltage across each string is the same as the supply voltage (to rule out high resistance in a joint or trace or something), maybe test an individual LED on 3v to see if it lights up properly, and if both of those come up negative, order a bag of red 5mm LEDs and get ready to do a whole lot of soldering. If that doesn't sound like fun, there are aftermarket ones on Fleabay. They've got red ones, they've got black-tinted ones if you like painting your lights so they work less, and they've got clear ones because Altezza, yo. I didn't check to see if Nissan still sells them, but yeah, I wouldn't be surprised.2 points
-
Replaced the battery. The single digit weather in the northeast finally did it in and starting was a no-go. When I pulled the old battery out, I saw the date code on it.... C9. Damned near lasted 10 years!1 point
-
Thanks for the confirmation! Happy soldering.1 point
-
No snow in Knoxville. Mr Cox 96R50-97JR501 point
-
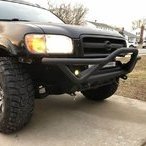
New wheels and tires. Really happy with how it turned out. 32x11.5r15 Falken Wildpeaks on DX4 Gear wheels (15x8 -19mm)1 point
-
I'm late to the party, but I'll echo @TowndawgR50's comment in principle, noting that my 04 doesn't have an LSV. But yes, by lifting the truck, the LSV be allowing the minimum rear proportioning available. The valve is meant to increase rear proportion when a load is detected, but the lift basically does the opposite to an extent. To restore the function, you'd likely have to move the spring arm up a few inches like Slart mentioned, but I agree that it might not matter much. I'd just as well suggest disconnecting the spring and calling it a day, or otherwise finding a way to put the lever in a static position that simulates stock-height (or a loaded position if more rear bias is desired).1 point
-
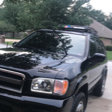
Quick pic of the R50 getting some work done! It’s dirty, but honestly that’s how it lives most of it’s life...she’s more function than form! Sent from my iPhone using Tapatalk1 point
-
Today the title arrived in the mail. It's nice to know that after all this work it is legally mine. In Texas, at least major cities, we have to get vehicles inspected (even trailers over 4k GVWR which is a freaking pain in the a$$) before we can register them. When I was doing the title work I asked the clerk how I am supposed to drive my vehicle to get the OBDII monitors to a ready state so I can pass inspection when it is not road legal? She said I would have to get insurance on the vehicle and get a 30 day temp tag without registration. So tomorrow I start paying for insurance and I hope to get a temp tag so I can legally drive the thing if I am lucky enough to get it road worthy this weekend. Getting closer, but it is going to be a BUSY weekend. I had to pull the passenger cat after having the exhaust completed because I installed the manifold to cat gasket incorrectly. I wish junkyards could be more sneaky with the paint markings. All that's left under the hood is: -Intake manifold upper sections -computer harness from dash -belts -throttle and cruise cables -connect vacuum hoses -A/C idler -install battery -drain any existing oil and take a sample <- maybe I should have done this before installing the engine -cut open existing filter and examine <- maybe I should have done this before installing the engine -new oil and filter -pull plugs , vacuum cylinders, crank engine to build oil pressure -complete cooling system installation/radiator/fan -vacuum and charge A/C -fill all other fluids Installed new rack poly bushings. Shinny driveshafts new ujoints and balanced AND thanks my favorite junkyard for writing, in paint on the front face of the rims I purchased I have to figure out how to get that paint off without damaging the machined wheel surface. The bag of goodies...like I said, busy weekend. Oh, and I know all 8 of those rear link bolts are seized and are going to require cutting out with an angle grinder Not pictured: wheel spacers (shipped today), rear brake shoes and hardware kit, plugs...and OH I forgot an air filter1 point