- Sign In Changes: You now need to sign in using the email address associated with your account, combined with your current password. Using your display name and password is no longer supported.
- If you are currently trying to register, are not receiving the validation email, and are using an Outlook, Hotmail or Yahoo domain email address, please change your email address to something other than those (or temporary email providers). These domains are known to have problems delivering emails from the community.
Leaderboard



Popular Content
Showing content with the highest reputation on 09/09/2018 in all areas
-
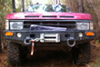
Hello, a lot of you may have already seen this but I designed a fold and weld bumper kit. There are still some little adjustments that need to be addressed and I won't be able to test it with a winch for quite some time. Anyway, I wanted to see if there was any interest in the kit being sold, the price would likely be near the $500 mark. Side Note: It has been quite some time since I have been on here. The new layout is much more user-friendly, so props to those of you that worked to make that happen.4 points
-
^ This. I ran a bunch of circuits to my battery with individual fuse holders flapping in the breeze until I got tired of it and redid it with a blade fuse box. Easier to get to, doesn't look like a rat's nest, easy to disconnect something if I need to. The box I got even has little indicators that light up if a fuse pops. Check the combined amp rating of the fuse box to be sure it can take all the circuits you're routing through it, and size its wire to the battery appropriately. I've got three factory Nissan fog light rocker switches for the aux lights on mine (factory fogs, driving lights, aux reverse lights). I've got them set so they only come on if the circuit they're tied to (low beam, high beam, reverse lights, respectively) is hot and the switch is on. This way they're locked out when the switch is off, and automatic when the switch is on. The wiring on mine is laid out like this: + wire from whatever circuit enables that light (low beams for fogs, high beams for driving lights, reverse signal from the trans for reverse lights) to the rocker switch, rocker switch to the relay coil, relay coil to ground. Battery + to the fuse, fuse to the relay contacts, relay contacts to the lights, ground the lights to the body. (Because my switches have indicator lights built in, each switch needs a ground as well.) So for, let's say, the fogs, if the low beams are on, and the switch is on, current flows through the relay coil, closing the contacts, allowing power to flow through the lights via the heavier-gauge fused circuit. Turn off the switch, or turn off the the low beams, and the relay coil loses power and the contacts open.3 points
-
For brackets, I'm also looking into making a small metal brake or finger press brake for my floor press to make some bends. Hood hinge mounts are something on my list of things to make. Yeah, the spots vs flood vs clear vs color also boil down to usage...a "what do you need to see, and how soon?" assessment comes to mind. If you're speeding through desert trails at dusk, spots. Crawling, floods. Forested fire roads, maybe spots for straight-ahead, and floods for forest line/periphery. Some brands also support clip-on color lenses. The wiring is actually pretty simple. Although the wiring kits simplify the installation, they're not usually the path I take because they're too universal...you usually have to plan for the inline fuse to be accessible, a certain location to mount the relay, hiding excess cable length (or worse, insufficient cable length). But, the electrical connection itself is very simple. The best advice I can give with it comes to electrical connections is to consider ALL of the future (and even current) devices in the truck, then build a solution that makes connecting and adding circuits easier, safer, and cleaner. I personally can't stand rats nests of wiring, which is essentially what you get when you add something here, then something there, then something something something. Particularly in the case of adding external lighting, planning ahead is a must if you need to drill into any part of the vehicle. For a single light bar, you might be able to snake a cable along the windshield under the seal, but if you're adding multiple lights, drilling a hole in the roof might be the best/only approach...plan accordingly! Blue Sea makes some nice fused distribution blocks, great for relay and non-relay applications, but there are some simpler/cheaper fuse blocks out there. If you plan to add multiple LED lighting circuits, take a look at some multi-relay circuit boards meant for Arduino/RPi stuff (some support 12V/10A applications, . Nice, clean, and cheap (not that standalone relays aren't dirt cheap). Even if you only plan to add one lightbar, make your own relay distribution hub to support extra relays. Keep in mind that some low-wattage lights can be supported by relay-less circuits, so long as the switch supports the amperage (watts/voltage=amps), which can simplify circuits even further. Bottom line is that it's easier and better to run a single power lead from the battery to a distribution point, than it is to run a bunch of wire directly off the battery.3 points
-
I’d skip on a JY fuse block. It’ll probably have way more circuits than you’ll need, and getting them apart to undo circuits is like doing the job twice. There are numerous aftermarket options that allow you to start with a cleaner slate, and take up minimal space. I’ll post some ideas up in the morning.2 points
-
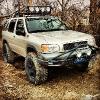
Thanks, MY Pathfinder is a work in progress. Next is lockers, suspension, bumper,winch then lights. I have everything but the bumper and the winch. Now just need time to put the rest on. I Really want to see "Really Not Jordan" do the 3" stainless steel snorkel.2 points
-
Finally put mine on, was a little harder than I thought it was going to be. It does have a bracket on the pillar. Also it does not sit flush with the pillar.
 2 points
 -
And...she passed inspection, all of I monitors checked. I only had to put in a bank 1 sensor 2 o2 sensor. The only other major bug to work out is rear driveshaft vibration above 50mph. Once I figure that out I am calling the recovery portion done and will move on to building it for overland.2 points
-
Yep, anything connected straight to the battery is always hot. If your fuse block hooks straight to the battery, anything connected to it will remain live at all times unless otherwise switched. If you want what you're hooking up to only work if the ignition is on, you have two options. One is to tap into the factory ignition circuit. The other is to switch your separate fused line with a relay (with the coil connected to ground on one side and ignition-switched power on the other). That's how I set up my center console. I wanted it switched with the key, but I didn't want to saddle the ignition circuit with what could be a pretty substantial load (I've got a small inverter and two 12v outlets in there). If I overload it, or something shorts, I'd much rather pop one fuse and lose my cell phone charger than pop a fusible link and lose everything switched by the key!1 point
-
There aren't many mini-ATC (mATC) fuse blocks available. You have to look to the motorcycle industry to find more/better mATC options, but they can get expensive. Fortunately, carrying spare fuses for both sizes isn't too cumbersome. The little containers they come in can hold about 10 fuses and take up less space than a Zippo. It's the glass fuses I wouldn't bother carrying. Any wires coming from the battery are always hot, even with the key off. You'll find these hot leads going to each fuse panel, plus the ignition switch. Another lead will come from the ignition switch and back into the fuse panels for any ACC (accessory) devices. The leads are attached to power rails for distributing to relays or fuses. On that note, I wouldn't tamper with any OE leads, unless you're installing a distribution block directly to the battery and need to modify the OE terminal to fit (pretty common when installing a proper audio setup). It's trivial to add a new hot lead from the battery with ring terminal. So, let's talk options (noting this is generic for most electrical upgrades)... These are some fused distribution blocks. The first one uses mATC fuses...you can find it at Aerostitch, a motorcycle outfitter. The 2nd one is from Blue Sea, a marine outfitter. The 3rd is similar to the 1st, but uses ATC fuses. The 4th (Dorman 85668) also uses ATC, but is also modular allowing you to slide multiple blocks together, and even relay mounts (5th image). The 6th option, also from Blue Sea, connects directly to the battery terminals. There are numerous options like these from the car audio world, but many of them use glass fuses...which I avoid. I've used a few of those. The 4th one I had installed under the radio in my Frontier to provide power to several accessories (additional 12V socket, aftermarket alarm, door locks), and I've got a Blue Sea box hanging in the shadows for when I get around to installing a power inverter, 12V socket (always on), and possibly a water pump and water heater in the cargo area of the Pathfinder. One perk of the Blue Sea blocks is that they also have a distribution (consolidation point) for a ground, which may save you the trouble of finding/drilling other ground points. As far as relays go, they're pretty standard. You can get harnesses that provide some wiring leads (as shown), or you can use slide connectors. They also have relays with fuse slots. Because most relays have mounting tabs, you can mount them somewhere on the chassis very easily, or with a strip of steel or ABS, create a mount for holding multiple fuses. If using the fused relays, you can get a distribution block and some jumpers (3rd pic) to distribute power, or just splice together a low gauge wire with higher gauge wires. Normally, I'm not a fan of terminal blocks because I try to make sure all power leads (aside from those on the battery) are not exposed...it doesn't take much effort to short something when using a screwdriver or wrench around them. Plus, the plastic on those styles can get brittle, causing the separate terminals to loosen over time. Putting it all together, I usually put a relay on just about anything drawing more than 10A but it depends (stereo amplifiers have built-in relays). If it's just a single accessory in an isolated area, I keep it simple. One example is my air compressor: it's close enough to the battery to warrant a direct connection, and because of its proximity to the inner fender wall (which has a few M6-threaded holes), it was easy to find mounting and ground locations: If you plan to run multiple devices, making a custom panel makes connections very easy: You connect the main lead to the fuse block on the left, the switch leads on the terminal block in the bottom-middle, and the devices to the larger terminal block on the bottom-right. (By the way, this guy sells this board for $300!...probably has maybe $50 in parts. The use of different terminal jacket types drives me nuts, but at least it's a clean solution). These Bussman modular fuse/relay boxes are probably my favorite, but require a fair amount of effort to wire up: Long long story short...if you're just planning to install the light bar only, a single lead, fuse, and relay (like what's sold in the wiring kit), is sufficient. If you plan on adding any other lights, or anything under the hood, plan on supporting those with some distribution point. Since you'll need to run at least one wire into the cab for the switch, if you plan on installing any other accessories inside the cab, minimize the numbers of wires going through the firewall. This is may mean having the distribution block inside the cab, but in doing so, all of the wires for switches will all be accessible.1 point
-
Well, certainly looks good from a distance!1 point
-
Watching. I doubt I'll ever "need" a snorkel, but they look so cool! If your thinking of getting one for the functional purposes, then I think there are a lot of other things you need to do. I think there are breather hoses on the differentials, transmission, etc. that will all need to be extended up high. I know Jeep XJ builds did at least and I recall a guy running lots of breather hoses up to and into his air box.1 point
-
You painted that frog in the picture too?1 point
-
She moved under her own power. Still more work to do, but a couple of quarts of tranny fluid, replace the diff fluid, and I may drive her to work.1 point
-
Alright! I got the AC installed the other weekend, and it is GREAT! Fired up the plasma cutter to do some by-hand cuts last week, and tonight I cut my very first pieces on the plasma table! Nothing special, just some mounting tabs for a bracket to hold up a massive ventilation fan that @TowndawgR50 hooked me up with. Getting the rest of the ventilation pieces tomorrow, and will hopefully weld up the fan bracket and get things installed over the weekend. I think that's the last item on my list to complete the garage-to-workshop conversion...well, could use a TV in here, maybe move my mini-fridge from the other garage, some more lighting....anyway, details. Over the weekend, I also got around to converting all my original parts and some V2 modifications into the CAD/CAM application I was hoping to use for both my CNC router and plasma table. The application (Autodesk Fusion 360) is very frustrating, to say the least. Some issues are surely learning curve induced, and it might get me where I need to be in time, but I'm going to explore some other options first. Notably, it allowed me to cut my parts tonight, so at least I know we're heading in the right direction.1 point
-
Throwback Tuesday........1 point