Tungsten Posted July 6, 2010 Share Posted July 6, 2010 its Water Displacer number 40 Link to comment Share on other sites More sharing options...
Terrano757 Posted July 6, 2010 Author Share Posted July 6, 2010 Thanks Daniel, The main issue I'm having is when we are out in the mud I dont have the clearance to get through a lot of the muddier ruts on the tracks we have over here (usually rear diff bottoms out, resulting in snatch straps being employed). I also find myself struggling over bigger step ups, mainly because I cant get the belly up. The end goal is for 31" or 32"x10.5 I'm still undecided as to what will be the best option to get the clearance I need. All input is greatly recieved. Also, not sure if you (or anyone else) is interested, but I recently bought a lock-rite diff locker for the rear end. During the install however, I discovered I had a poorly adjusted LSD. Tightened it up and made a huge difference. If your interested I have it (Lock-Rite) for sale in the "Parts For Sale" Forum. (Sorry dont know how to link). No worries, but really the only way ur gonna raise your diff is with bigger wheels, and as the guys said, 31's should fit (dont know how tightly though) im getting my 31x10.5 tomorrow should be a big step up from my 29x7 crap tyres that are on now. also, just a thought, maybe a cheap body lift+31's will give you enough? ps: will check out ur diff locker and definitely interested Sorry, but no. It's a pet peave of mine, but no, do not use WD-40 as it is mainly a Water Disbursement agent. It will clean and shine plastic and help with sticker removal also. Spray the bolts with a quality penetrating oil suck as Kroil, PB-Blaster, Liquid Wrench, etc. If you only have WD-40, save it for the stickers and just spit on the bolts... Dont shoot the messenger hahaha, just what the boys at the shop told me Link to comment Share on other sites More sharing options...
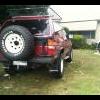
Terrano757 Posted July 9, 2010 Author Share Posted July 9, 2010 (edited) got new tyres guys; 31" Coopers ATRs heres some low res photos haha; picked up a spare off ebay (different tyre) Pretty keen to get them off road!! Edited February 6, 2011 by Terrano757 Link to comment Share on other sites More sharing options...
180sx Posted July 9, 2010 Share Posted July 9, 2010 Looking good!! Link to comment Share on other sites More sharing options...
Terrano757 Posted July 13, 2010 Author Share Posted July 13, 2010 (edited) umm im having a few battery issues; i had a 700amp bosche batt, and the other day it was struggling to start a bit, then died completely, i then charged it up and it worked again for another 2-3 starts before dying again, since then iv been, -Charging, -Jump Starting -and deep cycle charging it lives then dies again continuously, Yesterday i purchased a Brand new (only 460amp) battery wholesale price from work, the engine started fine last night, however after listening to 5 minutes of music this morning (running Duel Amps) it went completely flat (just before it died my sterio and CB were flashing on and off, on and off before fully off) so ive taken the battery out and am getting a 730 amp heavy4x4/commercial battery tomorrow hopefully, but is there anything i should be worried about?? Thanks, Edited February 6, 2011 by Terrano757 Link to comment Share on other sites More sharing options...
Tungsten Posted July 13, 2010 Share Posted July 13, 2010 get an AGM style battery, its worth it Link to comment Share on other sites More sharing options...
Terrano757 Posted July 14, 2010 Author Share Posted July 14, 2010 Had the problem sorted out today by taking the car into the auto elec, heres a little diagnosis/pricing sheet for everyones future reference; Symptoms: The symptoms mine showed were; Struggling more and more each time to start Eventually not starting at all Once the battery was charged started fine again (Problem not with battery) I then replaced the battery thinking the problem was there, only to have a repeat of events. Diagnosis: effectively whats happening is something in the alternator is 'draining' the battery while the engine is turned OFF However the alternator, whilst driving is still charging (but not at a good rate) Meaning once the car is stopped it is only a matter of time before the battery dies. Solutions: One cost free, although irritating way you could get around this if it happens to you isby disconnecting one of the battery terminals every time you turn the car off, this way the alternatorcharges whilst the car is on, but does not drain when the car is off. The Solution i used was simply to get a brand new, identical alternator. costly, but provides peice of mindand 2 years warranty. Cost: Obviosly for disconnecting a battery terminal the cost is nill. However the cost for a new alternator for a 91 Terrano/Pathy for me was$300 and labour was $150 (hence the warranty) Prevention: Take care of your altinator!! Be carefull through mud & water as either spell trouble for alternators 1 Link to comment Share on other sites More sharing options...
DavefromOZ Posted July 17, 2010 Share Posted July 17, 2010 That sucks mate, if I had have known I have a spare alty here. Link to comment Share on other sites More sharing options...
Precise1 Posted July 17, 2010 Share Posted July 17, 2010 Yep, glad you got it worked out, but I wish I had seen this sooner. I would have guessed it was the alternator, and I could have sent you a used one for 1/3-1/2 the cost. As for labour, we could just have Steve Dave install it, it's not like it is difficult... B Link to comment Share on other sites More sharing options...
DavefromOZ Posted July 18, 2010 Share Posted July 18, 2010 Yep, glad you got it worked out, but I wish I had seen this sooner. I would have guessed it was the alternator, and I could have sent you a used one for 1/3-1/2 the cost. As for labour, we could just have Steve Dave install it, it's not like it is difficult... B The terrano alty is different to yours B, its the same as the TD42 patrol Link to comment Share on other sites More sharing options...
teixeira Posted July 18, 2010 Share Posted July 18, 2010 Because it's a Diesel engine? or something else? Link to comment Share on other sites More sharing options...
Terrano757 Posted July 26, 2010 Author Share Posted July 26, 2010 (edited) sorry guys iv been away for the last week, @Precise; thanks, yeah it was a bit expensive, but needed it pretty quick as i was going away that same weekend :S @dave; haha thanks, but yeah, needed it done pretty asap, just got back from a trip to coral bay the car ran very nicely Edited February 6, 2011 by Terrano757 Link to comment Share on other sites More sharing options...
Terrano757 Posted February 4, 2011 Author Share Posted February 4, 2011 (edited) im back guys!!! and definately wanna get spending on the terrano again! SINCE IVE BEEN GONE: - Got a 2.5" Turbo Back exhaust fitted with 2.5" Dump Pipe, - Built a Storage Box for the back.. (hard to explain the pictures will come - sort of like 4x4 drawers except not drawers...) - Redone the sound system (for any audio geeks out there) - Installed a 12V socket in the back storage (picssss) CURRENTLY WORKING ON: - Finally building up my center console, sorry i didn't get many pics during the build process, just finishing it off now! (carpet, screw holes ect..) - Hoping for a top mount intercooler + snorkel soon! Edited February 6, 2011 by Terrano757 Link to comment Share on other sites More sharing options...
Islandpath Posted February 4, 2011 Share Posted February 4, 2011 Hello and welcome... Nice Path!! Link to comment Share on other sites More sharing options...
teixeira Posted February 4, 2011 Share Posted February 4, 2011 I want to see the pics. Link to comment Share on other sites More sharing options...
flyinwall Posted February 5, 2011 Share Posted February 5, 2011 so do i Link to comment Share on other sites More sharing options...
Terrano757 Posted February 5, 2011 Author Share Posted February 5, 2011 (edited) Just finished up the new console just now, VERY happy with it, god its an improvement on the stock... heres a few picks; btw, it also has a lid as well but i only just finished it now and its too dark to take a good picture so you will have to wait till morning Basic Wooden Frame: Top View of my Internals.... My Handy Carpeting Skills... Comparison Between The Old vs The New Console Here it is in the car with the lid on Shot of all the new storage inside Made to fit my iPhone+wallet+camera I thought the hinges would look better on the outside ;D Now all i have left to do is wack some switches in there oh and another feature with using the marine grade carpet is i am gonna go buy some plastic drink holders, put Velcro on the bottom and then i have instant cup holders whenever i need them!, stored of course in my rear storage unit Edited February 6, 2011 by Terrano757 Link to comment Share on other sites More sharing options...
teixeira Posted February 5, 2011 Share Posted February 5, 2011 Looks really good. Aren't you going to get the switches there as well? Link to comment Share on other sites More sharing options...
Terrano757 Posted February 5, 2011 Author Share Posted February 5, 2011 oh yes, the switches will come need something to fill that space next to the handbrake lever haha Link to comment Share on other sites More sharing options...
Terrano757 Posted February 5, 2011 Author Share Posted February 5, 2011 (edited) Novembers Project: OK so back in November i was going to go and get some professional storage built up for the back of my car, but with a $1100 quote from a leading 4x4 shop i decided i would give it a go myself. My needs were as follows; - Must be made out of 100% MDF (my metal work skills are not as up to scratch as my carpentry!) - Must Have Top Access (either as well as or instead of drawers - This is to access it from the back window) - Must be built AROUND my 12" sub woofer Box in the back. So pretty simple yeah? So i put 2 long beams of wood (800x180 if i remember correct) on the inside of the wheel arches (where they intrude into the boot area) and this provided for the "Frame", i then measured the large piece for the top (1200x800 - again a guess!) I fixed the top to the main support beams with L brackets, (4 on each side - 16 in total) i then measured where the cut out for the sub woofer needed to be, which i decided the center was the best position. i then cut this piece out. I added a horizontal support with L brackets to the 2 main support beams, to hold the main board up (seeing as i had just cut a large hole in it) The main frame now looked like a H with the main board sitting on top; although the horizontal did not go all the way to the ground. To be safe i added another identical horizontal beam to the front of the box. This no meant the top was strong enough to cut the trap door out without the wood snapping. obviously the next step was to cut the trap door out. while i was marking the trap door out i made sure it overlapped where the support beam was hidden underneath, this way when it was shut, it could rest upon the support beam. (i then removed the support beam to cut the trap door out) Once that was done i realized that, although it was the perfect fit for the car, i could not get it into the car (the boot opening is smaller than the internal width) so what i did was cut a piece off from the left support beam, all the way to the edge. i then attached a piece underneath the main board on the left hand side (where i had removed the edge from) for the edge piece to screw back onto once it was in the car. This photo shows you the unit in its current stage (as per the description) Notice that the piece on the left i was talking about has been removed in this picture. With Lables; Without Lables; After all that i installed it in the car, then measured up a front piece and screwed that on. I then bought some marine carpet (more expensive than everything else put together!!) i then covered the whole unit in carpet and screwed the trap door in place! Heres the finished product: Photos with the trap door open So let me know what you think! Edited May 2, 2011 by Terrano757 Link to comment Share on other sites More sharing options...
Westy Posted February 6, 2011 Share Posted February 6, 2011 Great thread... lots to learn here Link to comment Share on other sites More sharing options...
Terrano757 Posted February 6, 2011 Author Share Posted February 6, 2011 Heres a few pics i just took of the 2.5" Turbo back exhaust i had done a month or so ago, its not in as pristine condition as it was when new ofcourse haha.. The whole system made a huge difference in the performance, around 20% id say, definitely worth getting for anyone out there who is looking for some more power (Diesels like mine especially!) Link to comment Share on other sites More sharing options...
teixeira Posted February 6, 2011 Share Posted February 6, 2011 You got skills with wood, very nice work. Care to explain the Turbo back exhaust, please? I have a Diesel but that is new to me. The intercoler is also on my list for the future. Link to comment Share on other sites More sharing options...
Terrano757 Posted February 6, 2011 Author Share Posted February 6, 2011 You got skills with wood, very nice work. Care to explain the Turbo back exhaust, please? I have a Diesel but that is new to me. The intercoler is also on my list for the future. Basically the turbo back just means the entire exhaust system was replaced from the "turbo, back" so everything from the outlet of the turbo was replaced. Sorry i cant tell you too much bout the install because i had the boys at the shop fit it Link to comment Share on other sites More sharing options...
teixeira Posted February 6, 2011 Share Posted February 6, 2011 mmm, I see so you had relaced your exhaust with a wider tube? is that it, basicly? Link to comment Share on other sites More sharing options...
Recommended Posts
Create an account or sign in to comment
You need to be a member in order to leave a comment
Create an account
Sign up for a new account in our community. It's easy!
Register a new accountSign in
Already have an account? Sign in here.
Sign In Now