- Sign In Changes: You now need to sign in using the email address associated with your account, combined with your current password. Using your display name and password is no longer supported.
- If you are currently trying to register, are not receiving the validation email, and are using an Outlook, Hotmail or Yahoo domain email address, please change your email address to something other than those (or temporary email providers). These domains are known to have problems delivering emails from the community.
zakzackzachary
-
Posts
126 -
Joined
-
Last visited
-
Days Won
10
Content Type
Profiles
Forums
Calendar
Everything posted by zakzackzachary
-
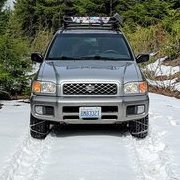
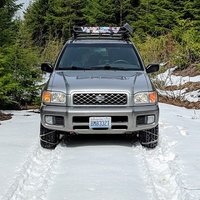
zakzackzachary's 2000 R50 new to PNW from AK
zakzackzachary replied to zakzackzachary's topic in 96-2004 R50 Pathfinders
Thanks Micah! I got the thread moved over from the New People Start Here! section, might get a few fresh eyes! It would be cool to get together, I'm going to be out goofin' around all summer so PM me if you're ever in the area, there's quite a few Seattle-area NPORA members. Been a while since I've posted an update- After the little smoking tire incident I pulled apart the wheel hub and inspected the inner/outer bearings. They seemed alright so I re-greased them and re-assembled. Next up was brake caliper. I ended up ordering two new calipers and replaced the fronts. I bled the brake system per FSM (5 bleeders including LSV) and so far everything seems to be running well! I pulled a 3rd OEM crossbar to help support my rack in the middle along with another set of the ROLA clamps to go with it. I also picked up a ROLA roof bag which should work fantastic to hold a bunch of misc gear! I'm looking forward to testing this thing out. Bonus, I finally bit the bullet and picked up some Kayaks from Costco. Got some cheap antlers mounts, but they'll probably go on our other vehicle since the Pathfinder's basket doesn't have crossbars as easily accessible. Makes for a fun photo though! -
zakzackzachary's 2000 R50 new to PNW from AK
zakzackzachary replied to zakzackzachary's topic in 96-2004 R50 Pathfinders
TheSmokingTire- new development, after driving approximately 40 minutes at 50-60 mph a melting plastic sound was smelled and then it was noticed that the front passenger wheel was smoking pretty good. Pulled over, removed the wheel, and inspected. I hit it with a laser thermometer and compared different parts to the driver's side, it was definitely reading hotter by about 30%. I thought maybe bearing or sticking caliper. Got it home, tore the wheel hub and pulled the inner/outer bearings. They seemed alright, no burnt grease, cleaned it out and put in new grease, then closed it up (easy to access btw). The caliper itself is acting slower when compared to the driver's side and the piston boot looks a little questionable. I ordered a new caliper and am going to throw some new pads on. We'll see if that fixes the issue... -
I don't think it matters all too much, but my "New People Start Here!" post evolved into my Member's Ride/build thread... Is there a mod who can move it maybe?
-
If you put in halogen bulbs, did you happen to try turning them around? I don't think they're bidirectional like LE-Diodes are.
-
To answer this question, checking the bulb should be pretty easy. I just did it. 1) Untwist your 4x4 lever and remove. 2) Use something that wont mar plastic (trim tools are great) and gently, but firmly, pry the overall plastic trim piece up from the seam just to the side of the 4x4 shifter. It'll all pop up. 3) Remove the big plastic panel by maneuvering it over the trans shifter, turn it sideways. 4) From here the PRNDL and it's surrounding plastic still remains. At the forward portion of that you'll see (2) wires running into the PRNDL area, those go to the bulb. Where the wires go in you should be able to pinch the base of the bulb connection and twist to remove the bulb. Note: The wiring is a little tight, but there should be enough slack to pull the bulb out. It'll have a blue covering on it. Easy to replace, just get a replacement.
-
I snagged one for cheap this way. They're held onto the R50 via (8) big bolts, (4) on each side of the receiver fixture. The driver's side requires you to remove what I think is the evap canister(?) in order to get to the upper bolts, but it isn't hard. I assume all R50's come with threaded bolt holes, I saw mine has the holes, but I haven't confirmed their pre-threaded. Can anyone confirm that?
-
I recently messed around with my OD since I had removed my shifter. Two screws to remove the shifter, then just pull up and it'll disengage and pop off. Your shifter thumb button is spring loaded and might pop apart, but it's easy to put back together. At the base of the shifter there's a plastic plug that is supposed to disengage from the shifter. There are two wires that go up to the OD button. On mine those just broke off and killed my OD. To "fix" it, I jammed some wire in the holes, enough to bridge the connection between the now gone pins and it works. Your issue could be unrelated to your braking event. If you pulled apart your shifter and took a look you might see that those wires leading to the OD button are loose or messed up.
-
Also check the hatch/hatch door sensor! My hatch needs to be slammed pretty good to ensure it latches full, if not it'll be loose and can set off the alarm.
-
-
zakzackzachary's 2000 R50 new to PNW from AK
zakzackzachary replied to zakzackzachary's topic in 96-2004 R50 Pathfinders
Every time you go out you learn a little more to make your trips better! It's part of the fun of it -
zakzackzachary's 2000 R50 new to PNW from AK
zakzackzachary replied to zakzackzachary's topic in 96-2004 R50 Pathfinders
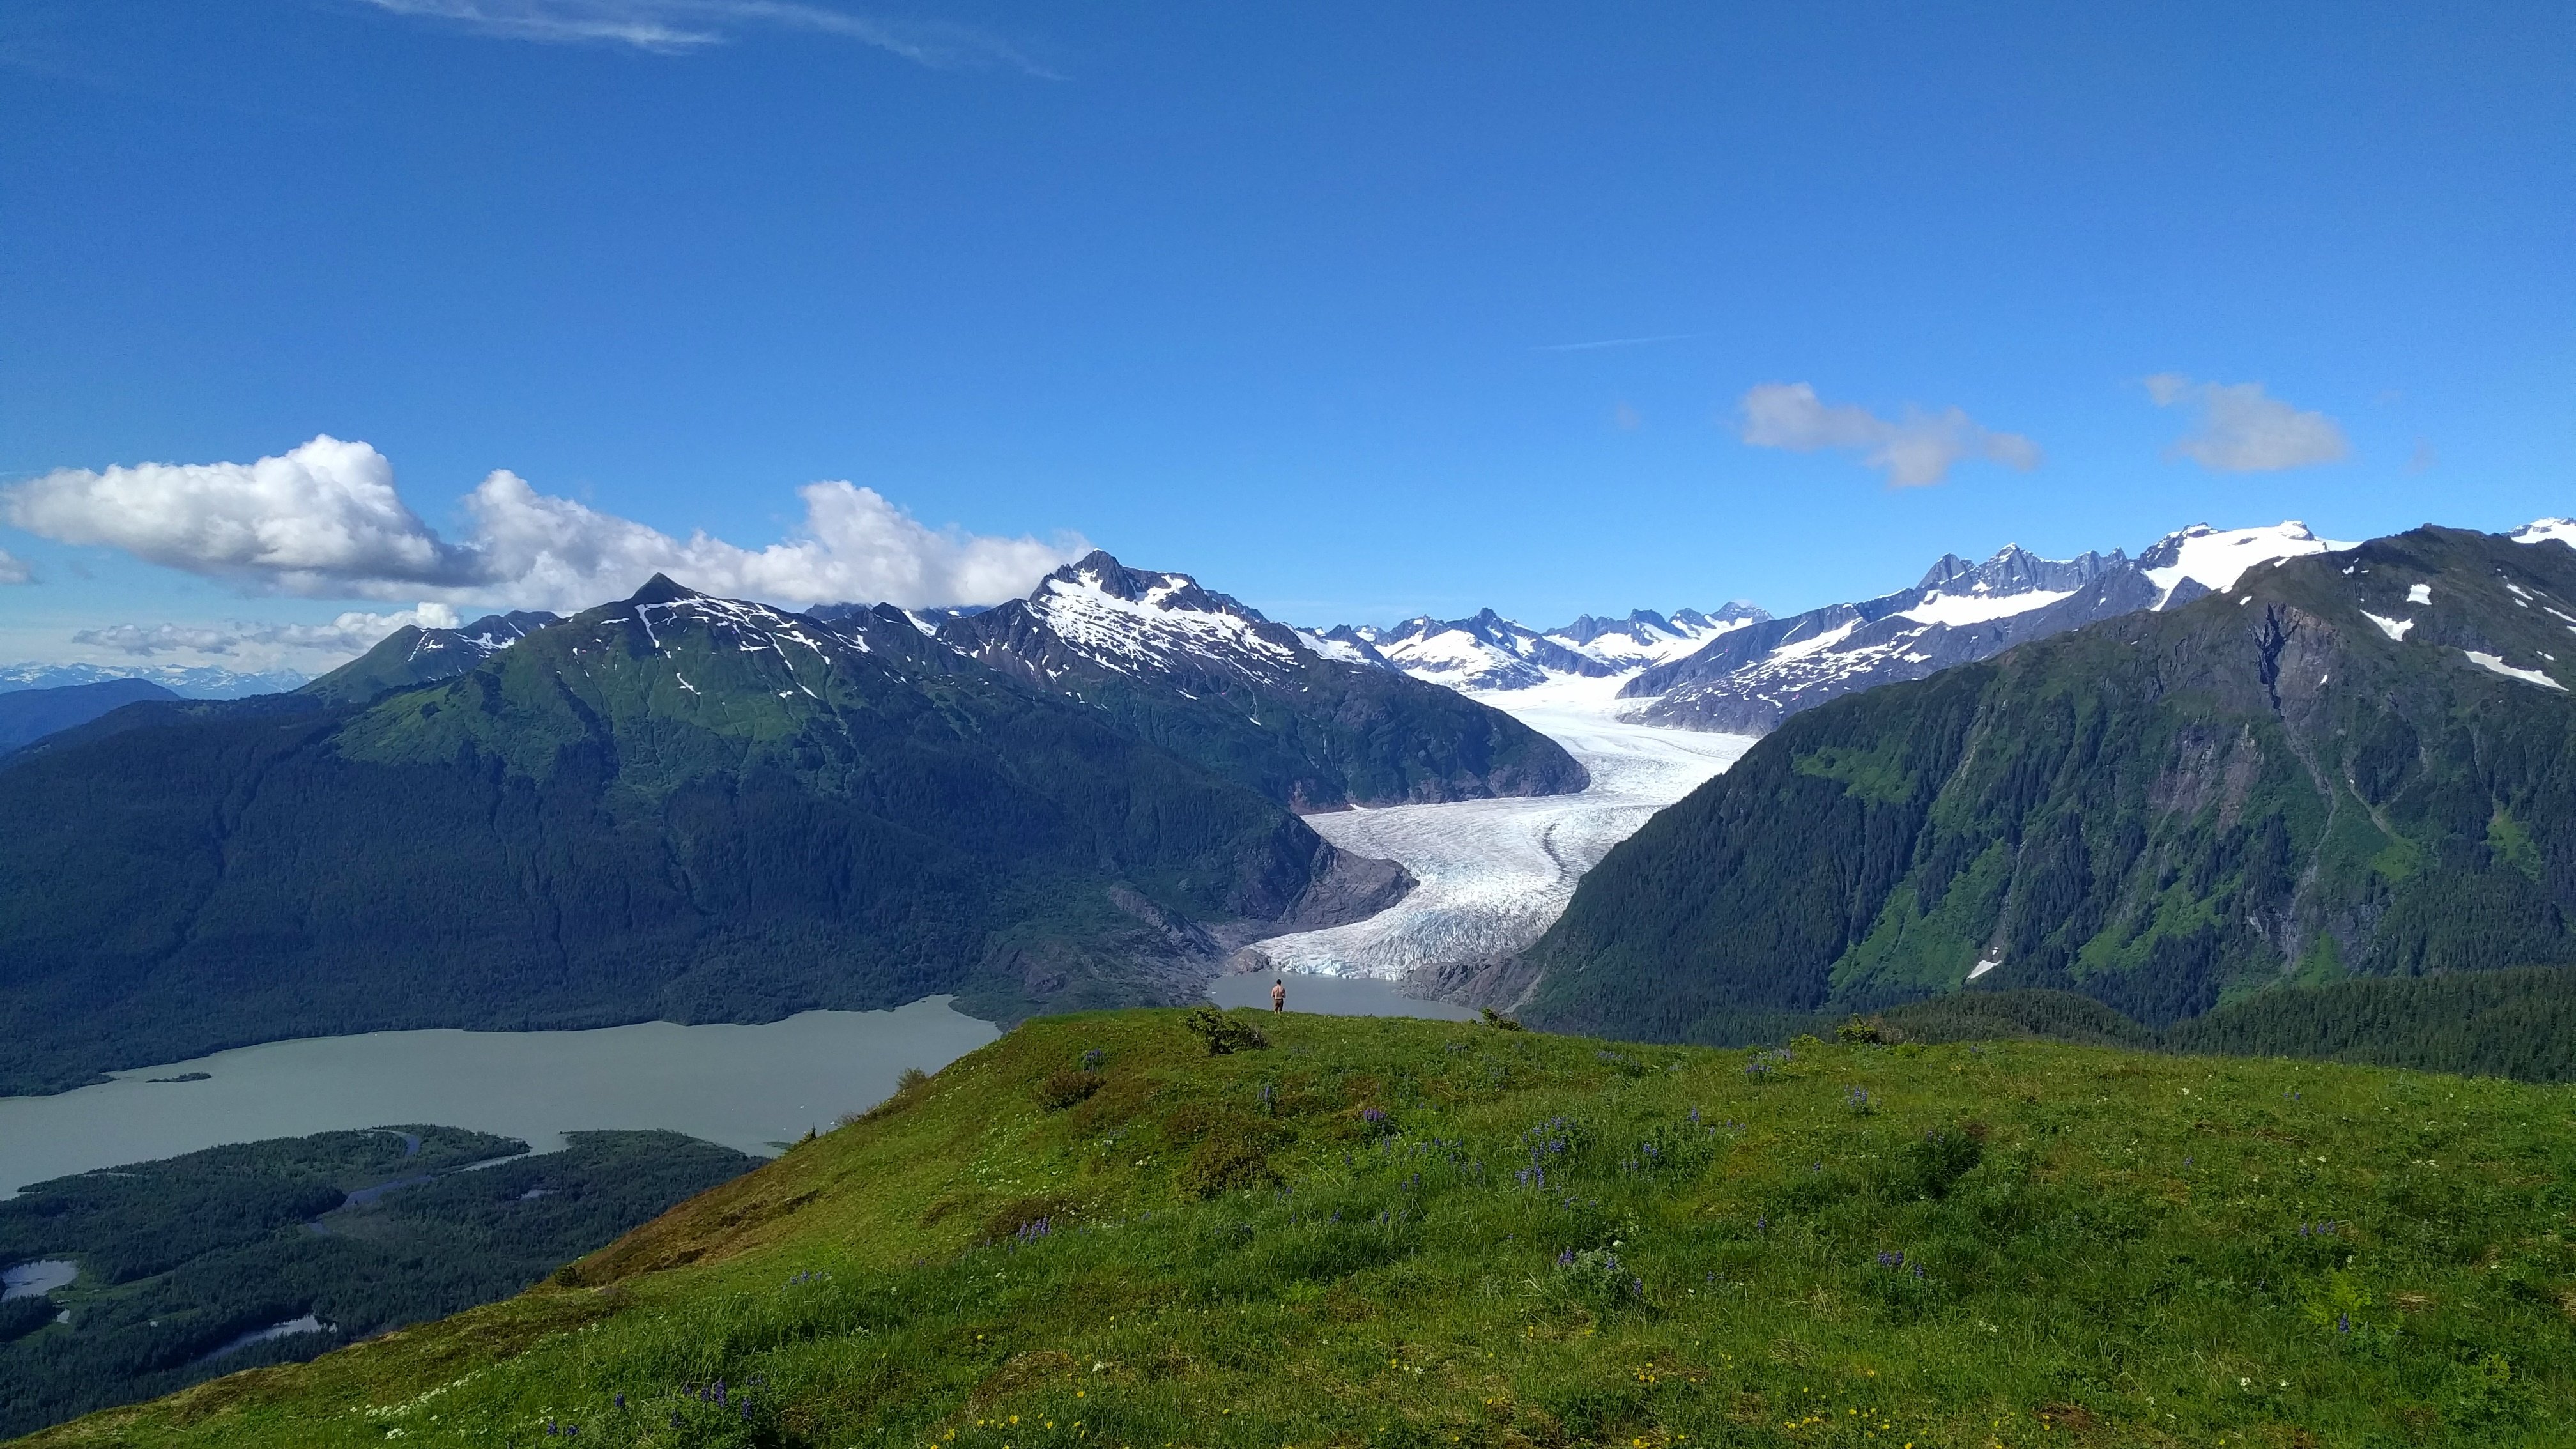
Trip Report - Quilcene Went on a quick little spring exploration mission. Didn't have high hopes of any elevation since we had a pretty heavy snowfall recently so I planned some lowland stuff. Ended up being much drier than I anticipated so I made a run for an old firewatch location out near Quilcene. Towards the top I had to cable-up to get through some deeper snow in the shadows, but honestly it wasn't anything too nasty. Minimal to no snow (other than ~6-12" in shadows) all the way to the top at about 3200' of elevation. Overall I found a couple decent campsites, cruised some easy backroads, and checked some gates/dead-ends off my list so I know not to waste my time in the future! I use GaiaGPS to plan and track all my trips. I'm definitely getting my rhythm down. Work gloves with latex gloves inside help keep my hands happy while chaining. A pad to kneel on helps a lot as well. -
Snorkels made in China for R50 Pathfinder
zakzackzachary replied to cgriff's topic in 96-2004 R50 Pathfinders
Seems like a good alternative. Does anyone know if a Grand Cherokee snorkel would fit on an R50 very well? -
Looks good. TBH I've seen headlights much worse than that clean up great with polishing. Something to consider if you haven't already.
-
zakzackzachary's 2000 R50 new to PNW from AK
zakzackzachary replied to zakzackzachary's topic in 96-2004 R50 Pathfinders
I see, seems easy enough. Looks like this is the one you have, but there are many other options out there as well. The high-lift is a future thing so I'll plan to leave room for mounting one and in the mean time keep an eye out for a pre-built vertical carrier. Today I'm going to disassemble, clean, and then lightly sand down and clean up the new pieces and then maybe hit them with a coat of matte black to seal them in. -
zakzackzachary's 2000 R50 new to PNW from AK
zakzackzachary replied to zakzackzachary's topic in 96-2004 R50 Pathfinders
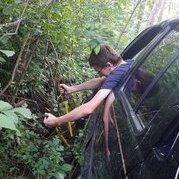
Alright boys, it's happening! I scored the tire carrier off a 97 along with what might be an aftermarket trailer receiver hitch. Everything came off super easy other than one of the receiver bolts. Man was that difficult... Anyway, I grabbed all the associated rear tire carrier hardware and bolts. One thing I forgot to do was take a template of the existing holes, but I'll figure it out. Definitely excited, not much rust at all once I scrubbed it down. I'll be painting it and then step 1 of the install will be to fab up a reinforced latch area on the bumper a la Hawarish style. I'll probably go rivnuts to mount everything unless my machinist buddy doesn't let me. I'll also be fabbing up a jerrycan holder and of course something to mount the license plate to. Has anyone mounted a high-lift? We'll be building sliders soon so a high-lift will be doable. -
Are you sure it's the RMS? I thought I might have one, but I replaced the passenger side valve cover gasket (and passenger camshaft seal) and so far my leak has been gone! It was puddling up on the bottom of the bell housing as well.
-
zakzackzachary's 2000 R50 new to PNW from AK
zakzackzachary replied to zakzackzachary's topic in 96-2004 R50 Pathfinders
Went out for a little drive today and explored some new little hideouts. I'm now experiencing a new little problem (see below). When attempting to accelerate, uphill (under load), the RPMs will stall out around 2000rpm and either not increase, or struggle to increase. Depressing the accelerator pedal more can cause the RPMs to then jump to around 3000 and increase/drive like normal. The symptoms are a rough/intermittent stutter that pops every few seconds as it struggles to increase in RPM. No CEL (MIL), but I pulled the codes- P0302 (cyl 2 misfire) and P0325 (knock sensor). I cleared them and now need to go for another little drive to see if they throw again. They could be old... Well I fixed it. My new #2 spark plug had a gnarly crack going down two sides. Bought a new plug and it works great now. Glad it was a $2 fix! -
zakzackzachary's 2000 R50 new to PNW from AK
zakzackzachary replied to zakzackzachary's topic in 96-2004 R50 Pathfinders
Completed a pretty major maintenance milestone on Friday. timing belt water pump passenger camshaft seal crankshaft seal harmonic balancer (crankshaft pulley) thermostat passenger side valve cover gasket (I'd like to do driver's, but there's so much sh*t on top of it... on the to-do list) sparkplugs that hidden little 90* coolant bypass hose, and a few other misc coolant hoses fresh new coolant I basically followed this 1A Auto YouTube video for the timing belt, and referenced another one for the little water pump excursion. There were a couple other misc YouTube videos I referenced for the crank/cam seals. I labeled everything as I took it apart with masking tape/a number, and then wrote down the number and what it went to. That made reassembly at the end brainless and quick. Honestly, the timing belt looks fine. Who knows when it was last replaced, but at least now I know for sure. The sparkplugs were the worst as you'll see below. Started up fine and so far no leaks, seems to be running great! Took me about 10 hours to do all this including maybe 2hrs of parts runs and Googlin' things. Now on to more funsie projects. Everything off including camshaft sprokets and wanter pump- New timing belt and water pump- I've never seen sparkplugs so worn down, all six were like this. Honestly easy to replace, I used tape to hold my extensions together, just that last back sparkplug..... -
Looking good! All the little repairs/replacements definitely add up. RockAuto has cheap hatch/glass struts if you need those too.
-
zakzackzachary's 2000 R50 new to PNW from AK
zakzackzachary replied to zakzackzachary's topic in 96-2004 R50 Pathfinders
They're just some z-chain cables that I got for free from a coworker. They're maxed out at this 29" tire size so if/when I go with larger tires I'll probably just go for some real chain link chains. They make a huge difference! Since the mountains around here hold onto their snow for so long I'll probably keep at least a set in the trunk for a good portion of summer, you never know! I ordered cam and crank seals so we'll see! I'll be getting started in evenings this week with the big push being on my Friday off. Yeah it's the same way where I'm from. The snow in Juneau is very wet and difficult to drive in. Further up in Anchorage it might be more like CO/NM/UT where it's crisp and cold, more fluffy. Oh yeah and @RainGoat, after the TB change I'm going to be moving forward with a tire carrier build. I'm thinking something along the lines of this built in one, but if that falls through then it'll be a hitch mounted style. I don't know if I'm ready for a DIY bumper yet, but this wouldn't be too bad. OEM mounts are unicorn parts these days it seems. -
zakzackzachary's 2000 R50 new to PNW from AK
zakzackzachary replied to zakzackzachary's topic in 96-2004 R50 Pathfinders
Aimed for a trail up near 3000 ft, got stuck at around 500 ft this weekend. Ultimately the 4Runner turned us around, but I wasn't going to get much further. The cables I had helped a TON though. The snow was wet and about 18+ inches deep, that combined with the incline was just too much for me. At least with minimal recovery gear! Next weekend is timing belt, cam/crankshaft seals (maybe), water pump, and valve cover gasket day. Wish me luck. -
 with 241k miles and unknown history the time has come to do the timing belt. I'm preparing resources, collecting P/N, and will be ordering parts soon.
-
zakzackzachary's 2000 R50 new to PNW from AK
zakzackzachary replied to zakzackzachary's topic in 96-2004 R50 Pathfinders
No Pathfinder work this weekend, just a snowmageddon report. It's been coming down heavily all weekend, but that's made for some great explorin'! My Alaskan instincts kicked in and I spent the weekend driving around the Kitsap and eastern Olympic Peninsulas, just lookin' to get lost Put down about 300 miles in two days o_O Snow-driving video. More than a couple of these sightings... Silly dog tax- -
zakzackzachary's 2000 R50 new to PNW from AK
zakzackzachary replied to zakzackzachary's topic in 96-2004 R50 Pathfinders
I can definitely understand that, I'm thinking I like their utility a lot. Mine may go back on, but they have a smidge of corrosion on the bottom (not visible) that may have let in a bunch of dirt and rocks so the tube is full of debris! Ideally I'd cut the mounts off and DIY my own sliders/steps with tubing. I need a welding day with my shop buddy! -
zakzackzachary's 2000 R50 new to PNW from AK
zakzackzachary replied to zakzackzachary's topic in 96-2004 R50 Pathfinders
I'm currently sitting at the Nissan dealership, not gonna lie, I don't really like being at dealerships. I'm looking to see if I can get the seat belts warrantied, and while I'm here they're also gonna look at the two recalls. Apparently one has to do with a filler or dipstick tube? The other I think might be the strut tower. After their multi-point I'm sure they'll tell me about my rear seal oil leak, probably some bad sway/track bar bushings, who knows what else. Normally I'd turn down a scratch-tastic wash, but the Nissan is my trail rig so why not!