- Sign In Changes: You now need to sign in using the email address associated with your account, combined with your current password. Using your display name and password is no longer supported.
- If you are currently trying to register, are not receiving the validation email, and are using an Outlook, Hotmail or Yahoo domain email address, please change your email address to something other than those (or temporary email providers). These domains are known to have problems delivering emails from the community.
zakzackzachary
-
Posts
126 -
Joined
-
Last visited
-
Days Won
10
Content Type
Profiles
Forums
Calendar
Everything posted by zakzackzachary
-
zakzackzachary's 2000 R50 new to PNW from AK
zakzackzachary replied to zakzackzachary's topic in 96-2004 R50 Pathfinders
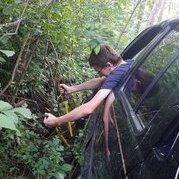
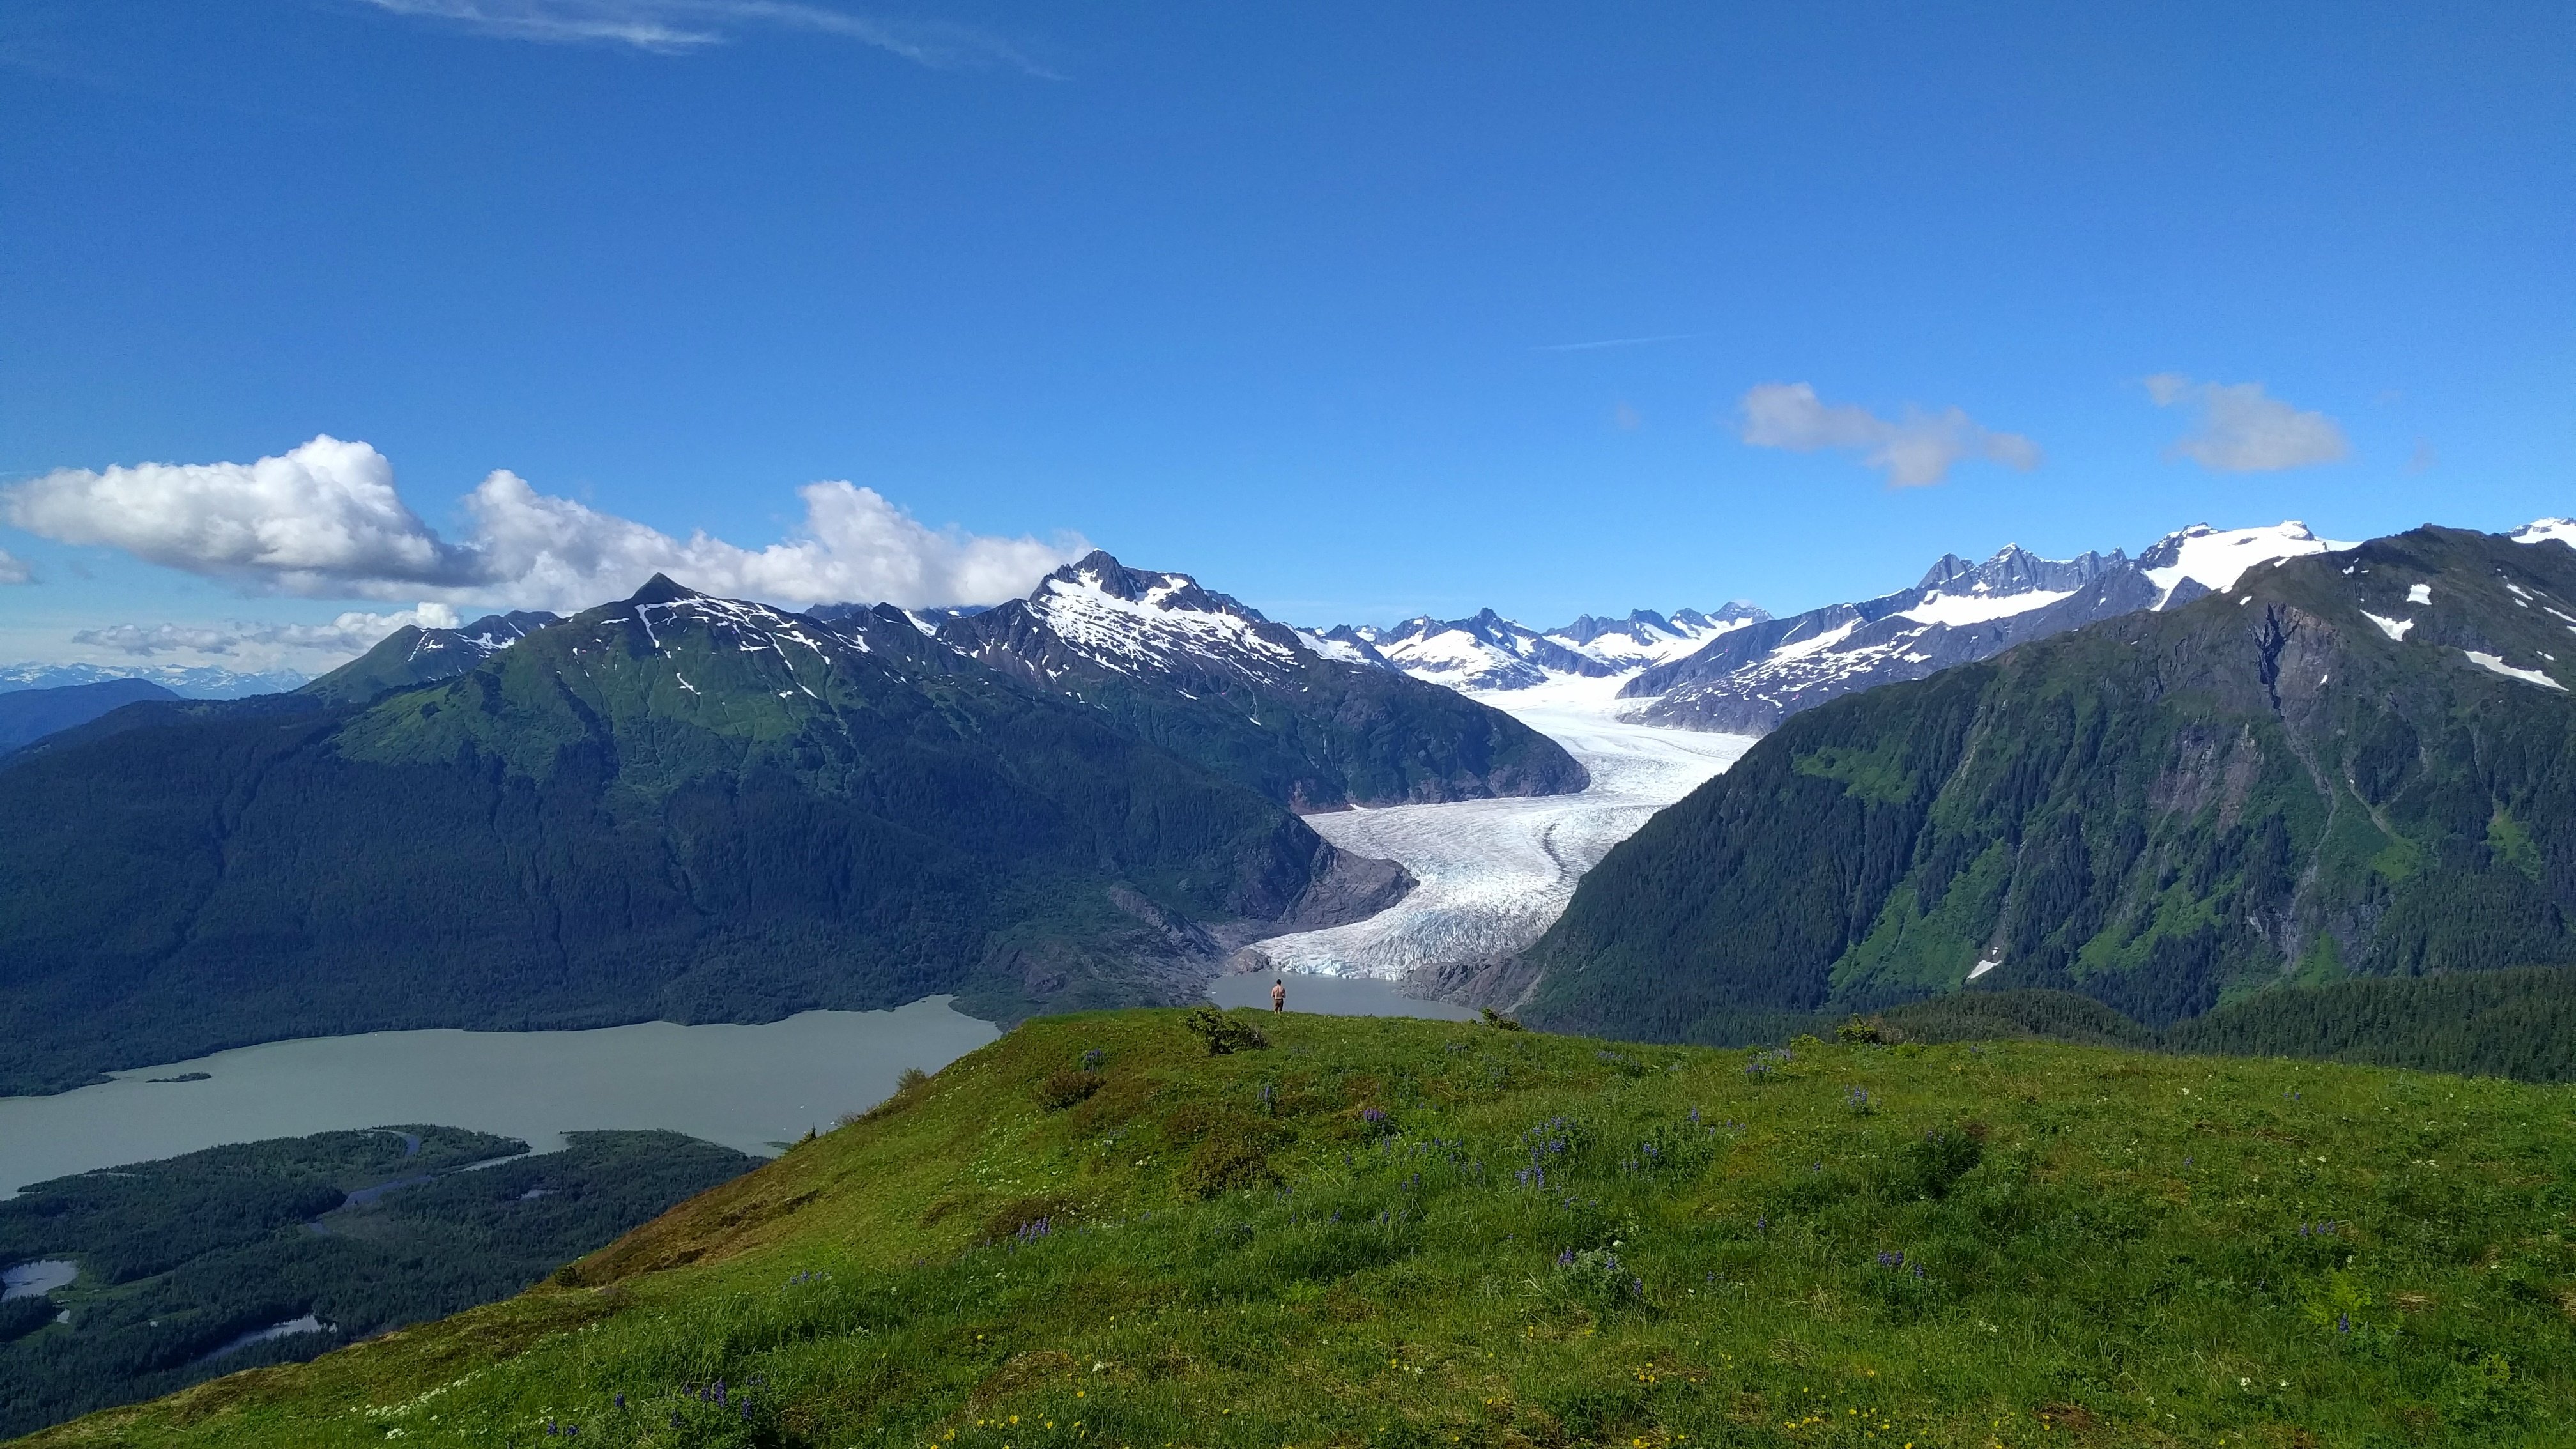
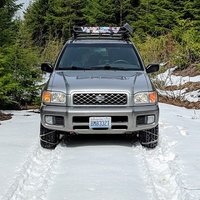
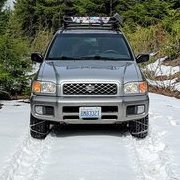
Threw in a new cabin HVAC fan, the old one worked fine, but clicked annoyingly. Nothing was broken, but something within the unit clicked when at even the slightest angle. Next up the good stuff. Had a long day out exploring the southern Olympics, out in the Wynoochee area if you're familiar. Just cruising some super easy forest roads, doin' a bit of snow hunting. I had my eye on some potential spots and after making it up into the snowline I found a fun path up to a lookout. Blazing fresh tracks in the snow and gaining some fresh pinstrips, the little turnout at the end provided some beautiful mountain views and fresh air. (if video isn't loaded yet, give it a bit, it gives me the URL before it's even finished uploading) Funny enough when we got home we had snow coming down pretty good! Ended up getting around 6" at our house which was a nice surprise. Here's a random neat picture from out at Point Defiance in Tacoma. And of course, totally fitting- -
What method did you go for mounting low-profile? I'm just curious since there's a couple. I've used the conduit clamp method in the past, but it was a bit too low for me.
-
zakzackzachary's 2000 R50 new to PNW from AK
zakzackzachary replied to zakzackzachary's topic in 96-2004 R50 Pathfinders
Installed new hatch struts, such a nice upgrade and now I get around +1.5" of height to help reduce forehead damage! Decided to do the mud flap trim and removed the side steps. If I regret it I'll get some Rally Armor blanks and throw 'em on, but for now I kinda like the look. Truck is a trail rig so a little dirt damage'll be okay. Side steps might end up going back on since they're handy, I just wanted to see what they'd look like. Looks like it'd be easy to fab up some DIY sliders one day. Got handy with some wire brushes and a pressure washer, then hit a bunch of the rear with some Rustoleum style paint. Didn't really have any rust tbh, but with the new LR Defender springs in the rear I was tired of looking at a dirty axle! I've got my mind on tires now as the ones on it are kinda old. Based on my research and OEM rim style I'm thinking of going with 260/70R16 (30.3x10.2R16) as that seems to have worked for user erathge. Sound good? -
I need to plan a trip into the city (Seattle/Tacoma) to go junkyard exploring for stuff...
-
zakzackzachary's 2000 R50 new to PNW from AK
zakzackzachary replied to zakzackzachary's topic in 96-2004 R50 Pathfinders
Awesome, yeah that's what I'm thinking, just a bit larger than the OEM 29's(??). I have some spare blank cheapo Rally Armor mud flaps I might see how they look, I'm thinking of doing something similar to Karmann and trim the OEM ones down a smidge. I'll be sure to do a through digging around on the forum for info. The current tires aren't fully worn down, but they're older from the previous owner so they're starting to crack. I'd like to get some new ones sometime this spring prior to longer summer trips. -
zakzackzachary's 2000 R50 new to PNW from AK
zakzackzachary replied to zakzackzachary's topic in 96-2004 R50 Pathfinders
Thanks! There isn't any hood glare, since the lights are mounted further back and kinda low, they do a great job flood lighting ahead and my favorite is the side lights! Super cool for dark trails. Next up I need to figure out new tires... I'd like to go slightly larger than stock, but don't need anything that requires trimming. Anyone have any size suggestions for my stock 16" rims? -
zakzackzachary's 2000 R50 new to PNW from AK
zakzackzachary replied to zakzackzachary's topic in 96-2004 R50 Pathfinders
End of January update! I've got my drawers about 90% complete. I decided to experiment with a heavy duty drawer style using skateboard bearings and 1" square bar. Would be great for a long truck bed to hold serious weight. In the future I'll save up more pennies for actual drawer slides when I do v2.0- Next up I tackled the lighting. I decided to not lower my basket and instead mount the lighting kind of low. It works great so far! Fronts, sides (both together), and rear are independent with three rocker switches. Links: switches, fog lights, waterproof 6-pin disconnect, zip-tie anchors, wiring kit, wire loom And I've had a chance to get out and do some camp spot scouting in the Olympics... And today I replaced the rear hatch glass struts (RockAuto)... So what's next- Finish cleaning up undercarriage Install new hatch struts Install new cabin blower fan (current one CLICKS annoyingly) -
Aftermarket Projector headlights
zakzackzachary replied to Ole_Rosie_R50's topic in 96-2004 R50 Pathfinders
If you go the DIY route I've had good experience with theretrofitsource. -
zakzackzachary's 2000 R50 new to PNW from AK
zakzackzachary replied to zakzackzachary's topic in 96-2004 R50 Pathfinders
I need to finish up a few things, but I do have some updates. Both good and ugly- Nearing completion: Rear storage drawers for the hatch, just need to clean it up and fix my latching system. Pretty much everything other than the handles were DIY. Roof basket fog lighting, all 7" "bars", four facing front, one on each side, and two facing rear. Wiring is 80% complete, just need to clean it up a bit and wire in the switches. The ugly: After the installation of my new front struts I forgot to re-tighten down the top nut once the vehicle weight had re-loaded the springs (holds the plunger in the hat). This allowed the strut plunger to push up and down inside the hat freely about 1". After finally looking into the clunk, it has mooshed up the threads pretty good and now I can't get the nut down or off. I'm going to cut the nut off and then run a M12x1.25 die down the threads to see if I can clean it up enough that it looks safe. If that fails I can look into dieing down to a smaller M, but the strut steel looks pretty hard. In order for the die to fit fully down the top hat without disassembling the strut we're going to get creative with the die handle tool and go custom. Maybe even shave down the die itself a smidge. Luckily my buddy has a lathe and workshop. Chalking it up to one of those things. Probably top 2 worst mistakes I've ever made. Worst case scenario I have to get new struts and rebuild, I'll update my thread later with pics and updates on all my projects. -
zakzackzachary's 2000 R50 new to PNW from AK
zakzackzachary replied to zakzackzachary's topic in 96-2004 R50 Pathfinders
Also I'm thinking of doing a little forest road scout trip out from Union, WA to the Wynoochee Lake area sometime in Jan/Feb if anyone's interested in teaming up. -
Land Rover rear lift spring install
zakzackzachary replied to Bax03SE's topic in 96-2004 R50 Pathfinders
Add one more to the successful Land Rover Defender spring install, here's my numbers: Rear: Spring - Land Rover NRC9446 from LRDirect for $77.27 shipped to WA Shock - KYB OEM replacement P/N 343379 from RockAuto Front: Strut - KYB OEM replacement P/N 335031 and 335030 from RockAuto Strut mount/bearing/boot - KYB OEM replacement P/N SM5329 from RockAuto Spring - ARB 2928 Old Man Emu Coil Spring P/N 2928 from Amazon Sagging suspension: RR: 31.25" (FSM spec: 33.31") RL: 30.5" FR: 32" (FSM spec: 32.09") FL: 31.25" Rake: -0.75" (FSM spec: 1.22") New suspension: RR: 34.875" RL: 34.5" FR: 33.25" FL: 33.25" Rake: 1.44" Note: I had a shop assemble the front struts with the OME HD springs due to the increased compression required and subsequent sketchiness factor. -
zakzackzachary's 2000 R50 new to PNW from AK
zakzackzachary replied to zakzackzachary's topic in 96-2004 R50 Pathfinders
I've been slacking in the update department! Two weeks ago I successfully installed the front/rear suspension lift, honestly ran into just about no problems. I'm really lucky in that this vehicle has just about no corrosion so everything came apart easy. Thanks to everyone on the forum for providing a ton of info to allow me to prepare ahead of time! Front comparison with KYB struts (P/N 335031/0), KYB mount/bearing/boot replacement (P/N SM5329), and OME HD springs (P/N 2928). Rear comparison with KYB OEM size shock (P/N 343379) and Land Rover Defender springs (P/N NRC9446). Step 1 was build a little mini-workbench with scrap wood from the 'ol Depot. New goodies piled up ready to go on: Old front suspension (no pics of new assembled, just imagine much cleaner :P): While I was in there I threw in new CV axles, SUPER easy on this vehicle. Old OEMs were torn so I may rebuild them as back-ups. Camber bolts, I don't know if they needed them for the alignment, but figured might as well install 'em. New rear shocks. Had to get crafty with jack stands and jack to install the rear springs. Ended up disengaging the sway bar links, differential breather tube, and the trackbar from the knuckle side. This pic specifically is showing the set-up required to get tension off the trackbar bushing so I could get the sucker back on! At some point I took a break and threw some new #74 LEDs into the gauges and #196 into the license plate lights. Took maybe 15 min. Sorry I don't have any level side pics. I might take them later. I did get to test the suspension a bit out getting stuck on some forest roads near Leavenworth, WA though. 4x chains and 4Lo got me pretty far before my lack of recovery gear or back-up vehicles turned me around. So what's next after New Years? -trunk drawers to maximize organization -low pro basket mount -360 degree fog lighting to basket -new tires (currently 29" A/T, maybe 31" A/T?) And a smidge further down the line: -custom rear tire carrier off of trailer hitch Let me know what you think! -
You ended up buying pipe and flattening it yourself?
-
2002 Pathfinder...the long road to recovery (build)
zakzackzachary replied to system_f's topic in 96-2004 R50 Pathfinders
Tire carrier looks great! I'm thinking of eventually doing something similar where you just cut holes in the bumper to gain access to the frame. I first saw it done on a 4Runner somewhere and it looked clean. -
zakzackzachary's 2000 R50 new to PNW from AK
zakzackzachary replied to zakzackzachary's topic in 96-2004 R50 Pathfinders
Alright, that's what I thought! Hopefully this other shop can do it. Maybe the first shop just didn't try? We'll see. -
zakzackzachary's 2000 R50 new to PNW from AK
zakzackzachary replied to zakzackzachary's topic in 96-2004 R50 Pathfinders
@RainGoat @TowndawgR50 I'm having a shop break apart and rebuild my front struts and they're saying the OME 2928 are too long and they couldn't squeeze them into the strut, but I thought they'd work with the strut. Does that sound right for an '00 R50? All my research said they'd be fine... Here are the specific OME coils I got: Amazon -
zakzackzachary's 2000 R50 new to PNW from AK
zakzackzachary replied to zakzackzachary's topic in 96-2004 R50 Pathfinders
@RainGoat @TowndawgR50 Tahuya is on my to-do list to just go goof around on a quiet day since it's about 30 miles from me. I've seen some vids of Foresters doing it so it looks like there's some easier options and bypasses which would be fun -
zakzackzachary's 2000 R50 new to PNW from AK
zakzackzachary replied to zakzackzachary's topic in 96-2004 R50 Pathfinders
The option for LR springs is truly a great example of what these forums can produce, definitely looking forward to the install. Depending on the trail difficulty, I'd be down to join in on a trail run, would be a blast! I have experience snow driving, but my vehicle is currently unmodified so I'd have to take that into account. All though I do have A/Ts in the stock 29" size so that helps. -
zakzackzachary's 2000 R50 new to PNW from AK
zakzackzachary replied to zakzackzachary's topic in 96-2004 R50 Pathfinders
I'm definitely scoutin' for you all out here. I've spent quite a bit of time out in the Cushman area, and so far that's my favorite as far as somewhat more rugged forest roads (therefore no people). I've been using GaiaGPS lately, but I also have a lot of loops/trips planned out in Google Maps from before. I'll definitely check out your notes above and when I get a chance I'll compile some to share as well. That's a bummer, it'd be nice if they allowed volunteers to help clean up the road if the obstruction/damage is smaller. I'm sure some of the old loops could be broken up. @RainGoat, I'm prepping to do the WABDR sometime this spring/summer, have you done it? -
zakzackzachary's 2000 R50 new to PNW from AK
zakzackzachary replied to zakzackzachary's topic in 96-2004 R50 Pathfinders
I'm in Silverdale! I've read a ton of the threads on this forum and saw that you and others have taken a few trips out my way to the Olympics and Tahuya, it'd be cool to join in some time. I've already been exploring some of the gnarlier forest roads out in the Lake Cushman area. Yeah I definitely will. I studied that thread well and figured for my use case I'd go with the 9446s. I'll post up my info when I eventually get them installed and see what happens. They were so incredibly cheap, such a good find. $15/each + $47 shipping, but out of everything they're going to arrive first somehow. -
Hello NPORA, Location: Kitsap, WA Vehicle: 2000 SE Vehicle Notes: 2nd owner as of Oct18, purchased with 237k miles Hi all, I've been trolling the forum for a couple months now and have finally decided to join in. I currently have an '18 WRX, but after moving to the PNW I found myself in need of a good forest road exploration rig so I started the search. Stumbled upon a great condition single older owner R50 that has provided a great base to build upon. The first month was spent doing the usual- oil/coolant/trans/transaxle/front-rear diff/PS fluids, all three accessory belts, fuel filter, battery, and a good headlight polish. After that I moved to replacing some stuff: - turn signal housing (1) - fog light (1) - cat-back exhaust - broken power antenna to fixed 6" stubby Since then I scored a ~5' roof basket which mounts great to the OEM rails and will come in handy for fully loaded camping trips in the future. I'd like to integrate some ditch and camp lighting into the basket and take advantage of the blank switch spots in the dash. Current suspension is okay, but aged: *RR: 31.25" (Factory Spec: 33.31) *RL: 30.50" (33.31) *FR: 32.00" (32.09) *FL: 31.25" (32.09) Therefore as of Nov2018 I have the following on order: - LR Defender springs for rear (P/N: NRC9446) - KYB GR-2/Excel-G for rear (P/N 343379) - OME HD springs for front (P/N: 2928) - KYB struts for front (RockAuto P/N: 335031/0) - KYB strut mount/bearing/boot for front (RockAuto P/N: SM5329) - Camber bolts for front, (RockAuto P/N: K90474) Anyway, I'll photo dump below. There's lots of upgrades in the future like LED gauge cluster lights and a rear drawer system, but I'm taking it slow. I'll trail run it and as I find myself needing things I can add to it. I'm in the Kitsap, WA area near Seattle so if any of you local PNW Pathfinder nerds need a hand or want to meet up I'm down! https://imgur.com/a/PiQG7TO
-
If Hawairish and TownDawgR50 are building a kit in the Seattle area I'd be down to check that out before anything. Always fun to support locally built stuff. Nice to have options too though.