- Sign In Changes: You now need to sign in using the email address associated with your account, combined with your current password. Using your display name and password is no longer supported.
- If you are currently trying to register, are not receiving the validation email, and are using an Outlook, Hotmail or Yahoo domain email address, please change your email address to something other than those (or temporary email providers). These domains are known to have problems delivering emails from the community.

Snowboarder12345
-
Posts
157 -
Joined
-
Last visited
-
Days Won
9
Content Type
Profiles
Forums
Calendar
Everything posted by Snowboarder12345
-
Mine are going to get a healthy dose of bedliner when I coat the fenders.
-
 The crosslink sits under the SFD blocks so any crosslink will fit.
 -
For Members with a SFD - Need Confirmation
Snowboarder12345 replied to fleurys's topic in 96-2004 R50 Pathfinders
Yes, that is the spot. I don't have pictures of mine but I found this thread: http://www.nissanpathfinders.net/forum/topic/33179-r50-24-sfd/ It has a nice pic showing the front and rear block placement. -
Like XPLORx4 said above, all you'd have to do is make a new filter box somewhere down the line where the stock filter housing is. That shouldn't be too hard to do either, just a little bit of sheetmetal work basically.
-
Would that pop charger work with a snorkel setup? You can also buy cams for the 3.3s, and while more intrusive a port and polish job can't do any harm I don't think. Been kinda looking into this myself.
-
Yes, the idea is everything drops down 4".
-
Snowboarder12345's Build
Snowboarder12345 replied to Snowboarder12345's topic in 96-2004 R50 Pathfinders
Oh yeah haha. I just need to finish the bumper I'm making for my brother's 7.3 first. I'm planning on fabbing up a low profile front bumper with winch mount, and a rear bumper with swing out tire carrier. Picked up some heavy duty weld on D rings too.Got some rough sketches and ideas but haven't started yet like I said. -
Woodward steering, Part numbers- UA201113, UA201108, and you'll need a UAD lenght of 5 3/4 for a 4" sfd
-
This might help you, a picture of the kit KRFabs used to put out Far right 2 spacers are the engine mount ones, middle left narrow ones go up front on the subframe, upper and lower left fat ones go on the rear of the subframe. Strut spacers are upper and lower right.
-
Battery drain - 2004 Pathfinder
Snowboarder12345 replied to blk01acr's topic in 96-2004 R50 Pathfinders
You've got a parasitic drain somewhere, probably in the audio system wiring. Could be as simple as a rubbed hot wire shorting/grounding. Only way to find it is to check individual wires with an anmeter to see which one always has current running through it with everything turned off, and then chase the wire to find the short. You're probably in for a headache, have fun. -
4 sf spacers and 2 engine mount spacers
-
Snowboarder12345's Build
Snowboarder12345 replied to Snowboarder12345's topic in 96-2004 R50 Pathfinders
Similar idea, but with crazy carpets cut to fit. I want protection under the fenders too! -
Snowboarder12345's Build
Snowboarder12345 replied to Snowboarder12345's topic in 96-2004 R50 Pathfinders
Yeah mine'll be getting slathered in rust preventer too, and I'll be doing something similar to yours with bedliner. I don't have any pics unfortunately, I didn't really take any. Here's the thread I referred to though, it's good for explaining the front end: http://www.nissanpathfinders.net/forum/topic/31251-sub-frame-drop/ Also this one, but no pics: http://www.nissanpathfinders.net/forum/topic/28342-my-subframe-drop-install-thread/ It's fairly straight forwards though. If you get help from a couple buddies you should be able to get it done in a few days, it took me a week and a half of evenings and 3 or so weekend days. Maybe do it around Christmas if you get a bunch of time off? -
BFG and ProComp - will they fit?
Snowboarder12345 replied to mjotrainbrain's topic in 96-2004 R50 Pathfinders
Once you go past 32" the issue becomes clearing the front strut. Based on my 315/75/R16s I'm thinking that there is no way to stuff a 12.5" wide tire in there without spacers, even with 3.75" backspacing. Spacers are actually pretty cheap, but once you slap spacers on it really changes the arc of the wheel inside the well when you turn the tires, meaning more cutting. I'd go with the 10.5's if I were you. -
Fair enough! I used a 6x6 block of wood and shims to snug it up, just make sure it's stable.
-
Oh, and you need extended brake lines.
-
Yes you have to have the engine spacers, the engine mounts to the subframe. They are like the other spacers, just shorter. Can't take pics now but they'd be super easy to make, just 2 holes in each side of some square tubing like all the other spacers. You also need longer springs/spacers in the back and a panhard arm dropper. Just curious, why do you want to sfd it if it's just 2wd?
-
Snowboarder12345's Build
Snowboarder12345 replied to Snowboarder12345's topic in 96-2004 R50 Pathfinders
I want to keep everything as covered and protected as possible. Like I said above, winter roads here kill vehicles even though we don't salt the roads. I want to be able to use all the original plastics (probably with modifications) as much as I can to cover up the insides of the wheel wells. I'll still be clearing out the fenders a bit to give the tires more room, but I figured I'd try and get the fenders all fixed to roughly stock clearances and work my way back until I find a look that is practical and I like the looks of. Also, my tires stick out so much now that I have to do something to cover them up. And you need good metal to stick flares and mud flaps onto. I've got an idea for some easily removable ones that would cover my ass legally on road that aren't totally ugly, but that I could still pop off and have fun slinging mud with. -
Snowboarder12345's Build
Snowboarder12345 replied to Snowboarder12345's topic in 96-2004 R50 Pathfinders
So this past Saturday I was able to get the guts of the air locker all installed, and reinstalled the diff. As I was leaving for another long camp job Sunday afternoon I didn't make any attempt to run the wiring or plumbing, I dropped everything else to button up the rear end and to try and get all the tires on. And here is how she sits now Stance is an understatement, 12.5" wide tires with 4.25" rim backspacing and 2" aluminum spacers means that the tires stick out around 5" lol. I'd have taken some shots of her outside, except that when I went to put on the front passenger side tire I found out that one of the studs is about 0.25" shorter than all the others. This wasn't ever a problem with just rims, but being that the aluminum spacers are a little thicker than rims where they bolt up I wasn't happy with how many threads the lug nut was able to grab onto. So yeah, I can't say how well she turns the 35's or anything like that because she's parked until I get back at Christmas. But when I do get back, I will be finishing the locker install, doing more body work, and coming up with some sort of fender flares/mud flaps. Because there is seriously no way I could drive this thing around on road right now, the first cop who saw me with tires this exposed would ticket my ass in a heartbeat lol. I'm excited to see how they do in deep snow though, being so wide and these vehicles being fairly light I'm hoping she'll tend to float. Need to actually get some snow first though lol. Bumpers with tire carrier and a winch are also on the list eventually, but probably not until spring or thereabouts... welding when it's really cold sucks and the heated garage has no ventilation Stay tuned though! -
Snowboarder12345's Build
Snowboarder12345 replied to Snowboarder12345's topic in 96-2004 R50 Pathfinders
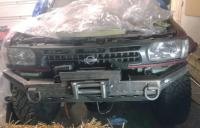
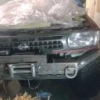
I used 2.5" ID exhaust tubing that I picked up at Canadian Tire, biggest they had or I'd have gone bigger. 3" would have been preferable, but I couldn't find anyone who just had some sitting on a shelf in town. But that's how she goes sometimes when you live up here I built it bit by bit and spent a lot of time prepping all the wedges I had to cut to make the bends. I'm pretty happy with how it turned out though, and it doesn't seem to constrict the engine any. Close up of how I did all the bends Once it was all mocked up I started painting it, and in between coats I started welding in the first patch panel. I made a little plate to cover up the hole for the snorkel, just haven't painted it yet so it's not in the pic. The spacers ended up showing up this week which was great and all, except that I had ripped out the rear diff to install the air locker so I still couldn't see it sitting on it's new rims and tires lol. To be continued tomorrrow! -
So now that things are finally starting to come together on my build I figured I'd post it up. The first pic is the stock configuration of my 98 Chilkoot Edition, taken right before I started the sub-frame drop. This pathfinder was my first vehicle, and I've had her since 2011 or so. I've wanted to do this for a long time now, but seeing as I was in high school when I got her and then went right into post secondary I didn't have the funds. Honestly, if I wasn't so attached to this thing I would never have started this project, as it's been quite a bit of work even with a ton of help from my brother and my Dad. Seeing as what I've done is nothing new, I'll spare you the details of the subframe drop install. Suffice to say, seeing that this vehicle has lived its entire life in northern Canada, the winters have been long and hard on it. There is a significant amount of rust in both the body and pretty much everything underneath it. This did make it a bit of a challenge getting stuff apart. I am quite envious of many other members on here, seeing trucks that are so clean and pristine has kind of ruined me haha. But I still do love my pathy obviously. Anyways, here's how she was sitting after the sfd. I managed to order a krfabs kit back in the summer, which I also paired with slightly cut down 6.5" wj coils and a 2" front AC lift. I had to buy all new struts too as they were completely toast, and had been for a while. Just before she rolled out of the garage for the first time, big difference in altitude Couple in the driveway on stock tires. The rear shocks hadn't shown up yet so that's why they are missing in the pic. She's on stock tires still because we needed the garage space, and I hadn't ordered new rims and tires yet. I wanted to wait and see it with a lift on before I tried to guess how big I'd be able to go. As it happened, the local tire place had a deal going on Duratracs...So I ordered some 315/75/R16s and 8" wide rims After about a week and a half of impatient waiting, they finally showed up. I had switched gears to help my brother with his pathy project, so I hadn't really done anything else at this point. So big!!!! All I could get up here were rims with 4.25" of backspacing, I was pretty sure they wouldn't clear the strut and I was right lol. Even with the camber messed up there was no way they'd fit up front, especially once they get aligned properly. So with 2" spacers on order I decided to start chipping away at body work. I started by pulling off all the plastic fender flares, and watching chunks of the body come off with them. I then roughly cut out most of the rust on all the fenders. Those with stomachs sensitive to vehicle gore (body rust) and grinder chopping should look away now. It's bad The other side of her looks pretty much the same rust wise. Notice all the chinks that were held on purely by paint and the fender flare Marking it out roughly with masking tape and cutting After some cutting I figured I should maybe get to figuring out how to weld body panels before I got too gung ho. I spent a week's worth of evenings trying very unsuccessfully to weld sheet metal with a stick welder. I was so unsuccessful in fact that I went out and bought a mig welder lol. I'm not too bad with a stick welder but there is no way in hell I'd be able to do body work with one anytime in the near future haha. As it turns out, I'd had to cut so much out of the driver's side front fender that I exposed a bunch of wiring and the stock air box. I had made up a sheet metal patch for it and was about to start welding it in, but seeing how I was hacking up that fender anyways, the stock airbox is kind of a big water liability, and I had all the room to work with while the fender was cut open...Screw it, let's switch gears and have a go at a snorkel! Maxed out the picture count, part 2 to follow.
-
mjotrainbrain's Build Thread
Snowboarder12345 replied to mjotrainbrain's topic in 96-2004 R50 Pathfinders
Bumpers and lights perhaps? Or if you are looking more towards off road performance a lokka would probably be a decent purchase seeing as you already have the LSD. -
ARB air locker. And one of these days I want to order a lokka for the front. Or I might just weld it lol. But we'll see.
-
Well, there was a deal on big duratracs at my local fountain tire, so 35s are on order! Should be here in about a week or so, and we'll see how she feels with them on.
-
Anyone crammed 35s in with a 6" lift?
Snowboarder12345 replied to Snowboarder12345's topic in 96-2004 R50 Pathfinders
Thanks, I didn't know there was an R50 fb page, I'll be sure to check it out.
