- Sign In Changes: You now need to sign in using the email address associated with your account, combined with your current password. Using your display name and password is no longer supported.
- If you are currently trying to register, are not receiving the validation email, and are using an Outlook, Hotmail or Yahoo domain email address, please change your email address to something other than those (or temporary email providers). These domains are known to have problems delivering emails from the community.
Leaderboard



Popular Content
Showing content with the highest reputation on 11/15/2019 in all areas
-
I believe the mounting plate is a carry over from the Load sensing Valve that was present on earlier model pathfinders, mine has it too.2 points
-
I looked into the service history and confirmed that the power valve screws have not been tightened in the past, so I think that’s going to be my next shop visit You all have convinced me that it’s not worth rolling the dice on this one, so I’ll see about getting into a Nissan mechanic next week to do the work. What’s a fair price do you think?1 point
-
Oh believe me, I’ve realized! Ive got way too many wants and way too little money my friend. Current to do list: -Manual hubs -New CVs (one boot is torn but both sides are probably in need of replacing anyway) -New front control arms, tie rod ends, lower ball joints, end links, and steering rack boots -New upstream O2 sensors -Getting the power valve screws tightened -Front Lokka -Bilstein shocks to replace the Gabriel ultras and give me more flex -Hi lift jack, Tow ropes, traction boards - Rock lights and reverse mounted LED bar - rock sliders -coastal off-road front bumper with 10,000lb smitty winch - limiting straps - custom swing out rear gas can carrier (mounted to a custom rear bumper) My wallet is crying. It’s telling me to run away from this forum My family lives in vegas so I’ll be there for thanksgiving. Pray for me fellow pathfinder nuts, if I hit even a minor jackpot I can check quite a few things off the list! Lol1 point
-
The back of the diff has a mounting plate for I don’t know what that I’ve thought about sending a rigid arm off of to allow visualization of the rear diff as well or at least to have a good idea of what it would align with. You do realize, this means rock/undercarriage lights are next?1 point
-
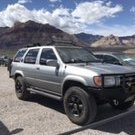
As you can see, the camera is a really basic set up. It could be refined in about a million different ways, but what I have right now works for me so I’ll leave it alone. The wiring goes up along the lower trailing arm to the underside of the running board, and then into the crack of the door (reinforced with plastic tubing and tape so it doesn’t get pinched). I also made sure to leave some slack in the wiring so that they don’t tear under flexing and compression. Ignore the clump of tape haha, I was trying to wrap more of the wiring quickly before going to work but it’s falling off already so I’ll have to find a better solution. I was pressed for time on the install, but I’ll revisit it soon. You can also see in the top picture that there’s actually a bit of rake front to back. I’m noticing it more now that I’m taking more pictures from the sides. For some reason it looks more level in person. Anyway, I don't think I mind it.This way I can still load up the back with people and camping gear without sagging1 point
-
Last night one of the spring cups on my driver side drum came loose causing the drum to get smoking hot and the shoes to seize. Had to fix everything in the Kroger parking lot at 11pm in the freezing cold! Dang it!1 point
-
I just went with a random one from harbor freight. Couldn’t tell you what it is, but it seems to be good enough to me. It’s red and puts out fires. Rain goat, the fire extinguisher I have came with a plastic hard mount for screwing into a wall, and attaches to the extinguisher with a plastic clip by the neck of the bottle plus a strap around the middle, so I’m considering just screwing the mount into the plastic but I would prefer to use nuts and bolts if I could get behind it. Ideally I’d drill holes into the metal behind the plastic but that’s quite an involved job and I have no idea the layout of what’s under there. It’s hard to tell from those pics what a suitable spot would be1 point
-
I have - years ago tried it from a stop to see what would happen. Clicking sound from both front hubs. No damage as far as I can tell but definitely didn’t sound like it would be good if it happened at anything more than a crawl. Warn hubs fwiw. No error light either.1 point
-
Yeah I used them, but I’m having trouble getting them to work properly. I’m just going to tell the guys at the alignment shop about the bolts and let them sort it out while they are aligning the front1 point