
- Sign In Changes: You now need to sign in using the email address associated with your account, combined with your current password. Using your display name and password is no longer supported.
- If you are currently trying to register, are not receiving the validation email, and are using an Outlook, Hotmail or Yahoo domain email address, please change your email address to something other than those (or temporary email providers). These domains are known to have problems delivering emails from the community.
Leaderboard



Popular Content
Showing content with the highest reputation on 11/13/2019 in all areas
-
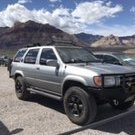
Phew that was a long day! Got up at 8, picked up the keys at 9 and had the truck on the lift by 10. Good start. Taking off the struts was way easier that I thought it would be. The bolts took some decent force to crack, but I had all the clearance for the breaker bars that I could ask for, and the lift made it much more comfortable to work on. The hardest part was reaching one of the bolts on the driver side tower, but still not too bad. Total time for disassembly was 2 hours Then I brought them to pepboys for the reassembly with AC coils. First thing the “manager” told me was that it would be a few hours because they were all booked up. I said fair enough, and went back to do the rear coils. Before I left I gave him all the parts and explained what everything was, and he was convinced that I didn’t need to leave the old struts because “you’ve already got the tops right here” (pointing at the strut mounts). Oh lord..... After explaining to him that without the old ones he wouldn’t have upper spring perches, he relented and took everything into the shop. When I got back around 4 to pick them up, I wasn’t surprised when I found they had completely messed up the orientation of the notches and mounts. I had them redo it while I waited, and sure enough the second time was still wrong. I had to rotate the mounts on the counter in front of them, but at least they were done so I was happy. Reinstalling them was pretty much just as easy as taking them out, just a bit of a pain holding them up over my head. The rear coils were extremely simple to put in because of the lift. I just had to disconnect the end links, shocks, and panhard, then lower the axle using the tall jack stand the shop had and the OEM springs popped right out. I only needed to compress the Land Rover springs an inch to be able to seat them, and that was only so that it would be easier to maneuver them between the other components. Even fully uncompressed they had a couple inches of clearance between the tops and the upper perches until I reconnected everything and brought the axle back to normal height, so theoretically I didn’t even need to compress them. Where are the pics of the truck?? I’m just going to tease you guys with these mid-build pics until I can get the tires mounted tomorrow and the alignment done. Im way too embarrassed to post photos of the truck with its 29.5 inch tires lol Before getting the new tires, Im wondering if I should just guesstimate the rubbing areas and pre cut them? If they rub badly I don’t want to be damaging the tires on the way home2 points
-
I’ll try to take measurements after the tires go on, and get pictures of the camera mounting point. Its surprisingly decent quality for the price, and the wireless makes it convenient. I just had to run wires to the socket under the center console to power the camera and the monitor came with an adapter to plug into the 12 socket in the dash so the install was ridiculously easy. I gave up on trying to tap into the 4Wd light, and besides it’s nice to be able to switch it on whenever I want to. This particular model had the option to overlay lines on the screen but has a feature to turn them off as well, which I personally chose to do. I wish I could have gotten the front facing camera now that I know they exist. Ha, I guess I just jumped on the first one I thought I could make work.1 point
-
So to be clear, the lower u-joint is damaged. Nothing may be snapped, but it sure looks borked to me in more ways than one. If I'm seeing it correctly, there were at least two problems: The shaft piece was not properly secured correctly by the set screws, or otherwise installed incorrectly. The shaft piece either slid into the joint space, or too much shaft was left exposed when installed, and during turns, the journals made contact with the exposed shaft, causing them to bend. That explains why the bearing cap is protruded from the fork (this is normally flush, and I see damage to the cap by the retaining screw), and why I can't see the fork in the background...it's bent out of position. The mark on the end of the shaft I was starting to mistake as a set screw indentation, is actually from the fork making contact with the shaft. The rack was probably not rotated enough. I can see binding marks on the fork that I don't think would have been caused after the journal had started to bend. If the rack was rotated enough, some shaft exposure might have still been ok, as the joint wouldn't have oscillated as much and potentially avoiding contact. Still, the lower joint sees a more extreme angle than the upper joint, so any exposed length is not desirable. Notably, rotating the rack too much can also lead to exposing the shaft (more rotation means less shaft length needed), but again, the binding marks suggest it wasn't rotated enough. Having purchased and installed several of these links and joints, I know the Woodward joints are high quality. The failure here is from either installation or maintenance, not the part itself. Are set screws missing? Those should have had threadlocker applied after confirming the steering was aligned correctly. For the upper part that slipped out, is there a set screw groove on the shaft? Are there set screw marks in that groove? Your best bet at this point is probably to buy a new lower u-joint from Woodward and wait it out. You may also need a new shaft piece, since the damage at the end will make it difficult to remove from the u-joint, and will require some filing to repair in order to re-use, if you can even remove it from the joint (might be easiest to remove the journal first then push the shaft through). My homework on the Honda joint suggested it wasn't even the right spline count and only conveniently fit because it was slightly oversized and, as a clamp-style, non-cast joint with an opening, could be tightened enough to take up that missing spline. I don't think it was ever clear what model/year it came from, either; some early 90's Accord perhaps. It was also for the upper joint, and your failure appears to be on the lower joint, so it's not going to help you much. Plus, all the DIY steering links I've seen have looked like dangerous garbage, so unless you've got the fabrication skills, I'd stick with what works and ensure that the next installation is done correctly.1 point
-
If you are using a Nissan Top Hat then the spacer is already a part of it. If aftermarket make sure the spacer gets put in. Here is the compressor everybody is talking about. We used it with my ARB OME HD front springs & rear LR9228 springs. No problem - very stable & safe feeling. Strut Alignment The notches on the bottom spring seat and the top spring seat must be aligned as shown. Note that the side of the strut shown in the photo is the inboard (engine-facing) side. When reinstalling the struts, orient the "L" or "R" on the strut insulator (aka "top hat") so that the "L" lines up with the notches for the left strut, and the "R" lines up with the notches for the right strut -can’t get the photo to stick1 point
-
Nice, would love to see the engine put together1 point