- Sign In Changes: You now need to sign in using the email address associated with your account, combined with your current password. Using your display name and password is no longer supported.
- If you are currently trying to register, are not receiving the validation email, and are using an Outlook, Hotmail or Yahoo domain email address, please change your email address to something other than those (or temporary email providers). These domains are known to have problems delivering emails from the community.
Leaderboard




Popular Content
Showing content with the highest reputation on 06/17/2019 in Posts
-
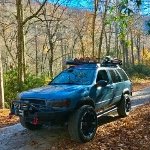
We did a 72 mile off-road overnight trip. Sent from my iPhone using Tapatalk4 points
-
When it comes to attention detail, anyone on here who knows me knows im a clean freak. Always coming up with ways to make my ride stand out. Not on the 4wd side of it, but on the bone stock fixer upper staying bone stock side of it cleanliness. LOL!! I appreciate them allowing me to continue on NPORA even though i dont go offroading. Kudos to you guys. Ive owned 3 R50's so by my 3rd one i know all the ways of painting or upgrading parts from newer Pathys and Q's. Apperence of plastic parts on the outside and the bumpers the grills I've tried everything and anything and as far as I know what I'm about to show you is probably the best but I've come up with so far. Get 3M scratch pad two cans of Rust-Oleum self etching primer and 3 Rust-Oleum mate paint. I went ahead and scuffed the entire trim on the truck including the metal bumper that's part of the front fascia. You might want get you some rubber gloves because your hands will be black after scuffing everything. After you do that you need to wash it with Dawn dishwashing detergent or something that will remove the grease, oil and whatever else you sended it off. Dry It Off then apply two coats Rust-Oleum self etching primer. Sand in between coats lightly. After the two coats dry and sanded lightly apply the Rust-Oleum matte finish and just follow the directions on the can. Wallah! Sent from my SM-S737TL using Tapatalk2 points
-
AC coils in the front, Land Rover NRC9449 Coils, 32x11.5 tires, 15x8 rims with 3.75 backspacing. Front trimming required, tire fully tucks in the rear.2 points
-
Wow, that's bad. Good thing you checked out the noise before it collapsed! Funny how Firestone didn't notice the gaping hole. This thread's got a lot of good info and pictures. Nissan's "repair" procedure is probably the most half-assed thing I've seen written up. The reinforcement panel splints over some of the damage and the fiberglass hides the holes, but at best it's a band-aid, and yours is well beyond band-aid territory. This guy had a body shop fix it properly (new panel welded in) for $300. The body shop can probably recommend a good undercoating if you're concerned about a repeat performance.1 point
-
They both look really good. Even with the ‘03’s hood open it took a careful eye to see anything was amiss.1 point
-
Stripped her down, cleaned up some of the trim pieces with a new coat of flat black and dropped the troutfinder off for her new paint job. Going to be prepping the flares for flat black too! Sent from my SM-J327P using Tapatalk1 point