- Sign In Changes: You now need to sign in using the email address associated with your account, combined with your current password. Using your display name and password is no longer supported.
- If you are currently trying to register, are not receiving the validation email, and are using an Outlook, Hotmail or Yahoo domain email address, please change your email address to something other than those (or temporary email providers). These domains are known to have problems delivering emails from the community.
Leaderboard




Popular Content
Showing content with the highest reputation on 11/14/2018 in Posts
-
Dropped the transmission to replace my rear main seal and gaskets on the coolant crossover pipe. Crappy job for sure. Big thanks to @ferrariowner123 for the help!3 points
-
The lockers go inside, or replace, the differential, if that’s what you’re asking. If you’re wondering “where”, on the other hand, any 4x4 or differential shop can do it. Depending on the type of locker, you’ll need other special tools, particularly if you need to “set up” the gears again. Set up is normally required if you replace the carrier, or if you put a locker in an H233B. For R180/R200 (front) and C200, you can get away with putting everything back in the way it come out (i.e., don’t mix up the bearing races and any shims). If doing a mechanical locker up front, it’s pretty easy. Just disassemble the axle and carrier, pop the ring gear off, replace the carrier internals with the locker pieces, then put it all back together. Only thing you might need to check, as I’m not familiar with WD21 drivetrain options, is whether you’ve got the R180 or R200 up front...I don’t know what options exist for the R180.2 points
-
Slowly chipping away at that swingate retrofit project.2 points
-
I put a video together when I did my manual hub swap ages ago. Not the best but here it is --should give you an idea of what you're up against if nothing else. +1 on the snap ring pliers. I've had my hubs off several times since and it's much quicker and easier with the right tools. You can also service/adjust your front wheel bearings while you're in there if they need it. My truck's got the factory rear LSD in it. It's much better than an open diff but it's certainly not a locker. Could be a good option depending on your budget.2 points
-
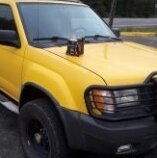
Hello all it’s me again. So I have some free time right now where I thought I would do a quick write up. So I’ll be going over how I installed my light bar into the bumper for a clean look and also without the use of a brush guard or other mounting bar.Then I’ll go over on how I installed amber lights into the grill to mimic what every 4runner does lol. Might as well kill 2 birds with one stone. So with the light bar I used a 30 inch china bar that is spot middle and floods on either side and unfortunately I do not know what brand it is as I got it on Ebay like 2 years ago. But the important part of the bar is how it mounts. Preferably you would need a light bar with a slim adjustable bracket that goes on the body of the light bar compared to the end mounting brackets. Next you need to remove the plastic front bumper cover to trim the “teeth” in the plastic bumper and cut a notch at the end of the plastic bumper as well as expose the steel crash bar. After cutting the “teeth” off and cutting a notch you’ll need to line up the light bar as centered as possible and perfectly perpendicular to the crash bar. I used a sharpie to mark the holes as well as used a straight edge and measuring tape to get it as close as possible. Drilling in the crash bar is not easy and takes some effort but is doable. After mounting the light bar go ahead and turn it on as this is the easiest to adjust the angle of the bar before putting the plastic cover on. After you do that you’re done! It took me several times to put the bumper back on and off to trim the plastic just a little bit at a time and as well as measuring. With this setup you get no hood glare (obviously) and also more of a “stealth” look without the addition of other mounting brackets. The only downside to this is that is removes your front plate bracket which could be a bad thing in your area depending on your front plate laws. I went ahead and just put my plate in windshield and I may relocate it up to the rack potentially. For the amber lights I used Grand General 77650 amber lights off amazon. I also went ahead and bought a 99 to 01 SE grill as I was tired of the LE grill of the pathy. When it arrived it was a silver color so I had to paint it black and I got it close enough with the original black on the truck. Then thanks to@TowndawgR50 and@RainGoat for light placement I then carefully dremeled out the back to cut a notch in so the lights could be more secure as the mesh wasn’t flat. After getting the right depth and width I went ahead and super glued the lights in and as well as zip tied it to the grill as an extra precaution. I then routed the wiring between the mesh so you can’t see it and I just tapped the wiring into the cigarette lighter fuse spot. So when I turn the key the lights come on and serve as my driving lights and as well as giving it more of a unique look. I tried plugging the tap into an empty slot but it didn’t work for some reason but when I put my CB radio tap in the same slot it worked so I don’t know if it needs a switch but I’m just gonna use the cigarette lighter for now. Since I was doing “light” mods I also went ahead and installed some clear corners as well. Also currently waiting for the emblem as Nissan changed it from a stick on to a bolt on but I think USPS lost it but that's another topic. Sent from my SM-G960U using Tapatalk1 point
-
Thanks for the invite RG and the offer, unfortunately I will be working. Please do keep me in the loop, hopefully I will be able in the future.1 point
-
Instructions for the Lokka are on the web. I think I watched through some good Australian ones on PCoA.@TowndawgR50 loves his Lokka & says it’s pretty easy to install.1 point
-
I suspect that the brass bushing in the arm is toast! I think you might be able to just throw on a stock new one from one of our fine vendors and be good to go. If you off-road a lot I would get the AC brace, but mine has taken a beating and is still good without the brace (at least... as far as I can tell!!) I would tell you to get the Beck/ Arnely because it seems that it is the only one with a grease port. None of the others seem to have one! https://www.rockauto.com/en/moreinfo.php?pk=493175&cc=1211926&jsn=5251 point
-
Is darwinpasta you? Wow, you’ve got a lot of videos!1 point
-
That's what I did. Mr Cox 96R50-97JR501 point
-
While the primary reason may be to correct suspension geometry I'd argue that another massive benefit of the SFD is access to the 3.5 VQ and its accessories. I dropped my transmission and in the process had to work all around the motor, including removing the starter. I have no idea how somone would achieve simple repair work, like replacing the starter, without tearing apart the whole subframe or removing the front differential. With my 4" SFD the starter was a fairly straight forward job with just a hair of extra of room to wiggle around in1 point
-
LOL yep, not much traffic out here, except on holiday weekends in the summer when the tourists descend. The rest of the time you're more likely to hit a deer than a traffic jam. I drove to the coast a couple years ago and got to experience I5 during rush hour. I'm still convinced that the interchange in Olympia was lifted from an MC Escher sketchbook.1 point
-
@SpecialWarr Yes, an LSD is a good traction device, but I omitted it from the list because it’s not a locker. Having run a front mechanical locker with a rear re-packed LSD, though, I can attest to its capabilities. Costs-wise, changing from open-to-LSD or re-packing an existing LSD might not be cheaper than mechanical locker either.1 point
-
There are a few locker types out there: Mechanical lockers aka lunchbox lockers aka unlockers: these have spring-loaded side gears that keep the diff locked most of the time, but will disengage (unlock) when making turns to allow one tire to rotate faster than the other. They'll make a click-click-click or tap-tap-tap noise during the turn. This allows them to be streetable to some degree, but loose terrain (including wet road) may prevent them from disengaging, which could prove hazardous; simple solution: slow down, brake earlier. Because they are already locked, there's nothing extra the driver needs to do to engage them. Most lockers of this type fit inside the OE differential carrier; some (like a Detroit Locker) replace the carrier. If you have rear LSD, you'll need an open carrier to put non-Detroit mechanical lockers in. These are rather economical options, running around $200-$300 for most brands, and can be installed with basic tools. Air lockers (ARB) or Pro Locker (TJM): these require an air compressor and some electrical wiring to engage. The air pressure is what locks the locker, and the locker unit replaces the entire OEM differential carrier. The wiring portion puts electric solenoid on the air line, which opens to fill the air hose between it and the locker. This is engaged by a switch that the user toggles. One air compressor can power both front and rear locker, so it usually makes sense to run dual air lockers, budget permitting. When not engaged, the locker acts like an open diff. These lockers run around $1K and require more advance mechanical skills for installation, as gear setup is required. Factor in another $200-$400 for the air compressor and fittings. E-lockers: while not readily available in the US, an Australian brand, Harrop, makes the Eaton equivalent of their E-lockers for Nissans. Like the air lockers, these replace the entire carrier and are open diffs when off. They don't require air, of course, but do require some light electrical wiring. A 12V source and a driver-operated switch engages the locker. Harrop and other importers sell them for around $1200-$1300 USD depending on the exchange rate. Although they are more expensive, they also don't need an air compressor. Cable lockers: Although I don't think there's a Nissan option, cable-actuated lockers (like OX) do exist. Same concept as the air and e-lockers, except they are engaged by lever and cable. However, there are kits that can convert them to air-driven. Spools: these replace the carrier internals, or the entire carrier. Not sure if aftermarket options exists for Nissan, but these "lock" the diff 100% because they completely eliminate the "differential" function of the diff. The idea is that all the moving pieces are held stationary to each other, which means that you can weld all the internals together to turn the diff into a spool. Cost in that scenario is just labor and welding wire. Since you will be installing manual hubs, these tend to pair well with mechanical lockers as a budget-friendly option. Since you have a WD21, you also have rear mechanical diff options if budget is an issue. Either route, lockers are worth every penny.1 point
-
So many have asked me how I mounted lights on my a pillars next to the windshield. I had roof lights and they shook too much and we're too noises the lights in this position give lots of light not much hood glare and they have zero shake at all which is awesome. How's how they look First thing I had to address while mourning these was making sure I could still open and close the hood easily which meant fender mounting theme was out of the question. As you can see the lights sit to the side of the hood allowing full movement of the hood. You will need to Dremel out your fenders a bit to allow this but it will work fine just tAke off a bit at a time. Open your door and take off the door trim that is rubber behind it the window trim will be screwed in using 4 Phillips head screws. Unscrew those and the metal trim will come off. The 4 screws are what make this a solid mount. Next take your light and find the correct size drill bit for the stud on the light. Drill a hole for the stud. Use a washer on the back side to prevents crushing the trim too much. Use washers on the upper side to make up for space. Now the most involved process. Take a screw driver and hammer and punch down the metal below the stud for the light to allow clearance for the stud and to allow the light to sit down in the body some. Place the trim up on the body and see how much you need to trim out of the fender to allow for correct aiming and placement for hood clearance. http://img.tapatalk.com/d/14/07/19/7u2epyda.jpg Just play with that Dremel and hammer for correct fit. After that just run your wires to power ground and switch. That just basic wiring which I'm sure y'all can figure out! Enjoy your new lights http://img.tapatalk.com/d/14/07/19/aba3a7e5.jpg Any questions just ask! Hope this helps a bit Sent from my iPad using Tapatalk1 point