- Sign In Changes: You now need to sign in using the email address associated with your account, combined with your current password. Using your display name and password is no longer supported.
- If you are currently trying to register, are not receiving the validation email, and are using an Outlook, Hotmail or Yahoo domain email address, please change your email address to something other than those (or temporary email providers). These domains are known to have problems delivering emails from the community.
Leaderboard




Popular Content
Showing content with the highest reputation on 10/28/2018 in all areas
-
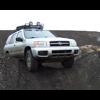
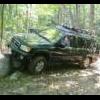
Garage day w @RainGoat &@ferrariowner1234 points
-
Hello all it’s me again. So I have some free time right now where I thought I would do a quick write up. So I’ll be going over how I installed my light bar into the bumper for a clean look and also without the use of a brush guard or other mounting bar.Then I’ll go over on how I installed amber lights into the grill to mimic what every 4runner does lol. Might as well kill 2 birds with one stone. So with the light bar I used a 30 inch china bar that is spot middle and floods on either side and unfortunately I do not know what brand it is as I got it on Ebay like 2 years ago. But the important part of the bar is how it mounts. Preferably you would need a light bar with a slim adjustable bracket that goes on the body of the light bar compared to the end mounting brackets. Next you need to remove the plastic front bumper cover to trim the “teeth” in the plastic bumper and cut a notch at the end of the plastic bumper as well as expose the steel crash bar. After cutting the “teeth” off and cutting a notch you’ll need to line up the light bar as centered as possible and perfectly perpendicular to the crash bar. I used a sharpie to mark the holes as well as used a straight edge and measuring tape to get it as close as possible. Drilling in the crash bar is not easy and takes some effort but is doable. After mounting the light bar go ahead and turn it on as this is the easiest to adjust the angle of the bar before putting the plastic cover on. After you do that you’re done! It took me several times to put the bumper back on and off to trim the plastic just a little bit at a time and as well as measuring. With this setup you get no hood glare (obviously) and also more of a “stealth” look without the addition of other mounting brackets. The only downside to this is that is removes your front plate bracket which could be a bad thing in your area depending on your front plate laws. I went ahead and just put my plate in windshield and I may relocate it up to the rack potentially. For the amber lights I used Grand General 77650 amber lights off amazon. I also went ahead and bought a 99 to 01 SE grill as I was tired of the LE grill of the pathy. When it arrived it was a silver color so I had to paint it black and I got it close enough with the original black on the truck. Then thanks to@TowndawgR50 and@RainGoat for light placement I then carefully dremeled out the back to cut a notch in so the lights could be more secure as the mesh wasn’t flat. After getting the right depth and width I went ahead and super glued the lights in and as well as zip tied it to the grill as an extra precaution. I then routed the wiring between the mesh so you can’t see it and I just tapped the wiring into the cigarette lighter fuse spot. So when I turn the key the lights come on and serve as my driving lights and as well as giving it more of a unique look. I tried plugging the tap into an empty slot but it didn’t work for some reason but when I put my CB radio tap in the same slot it worked so I don’t know if it needs a switch but I’m just gonna use the cigarette lighter for now. Since I was doing “light” mods I also went ahead and installed some clear corners as well. Also currently waiting for the emblem as Nissan changed it from a stick on to a bolt on but I think USPS lost it but that's another topic. Sent from my SM-G960U using Tapatalk1 point
-
Nissan Geniune MAF sensors for a Maxima are a direct replacement and costs less than the rock auto daily driver category parts. This topic is covered in detail in the pinned topics thread "Cheap 01+ MAF sensor problem fix!" Make sure to to get the correct unit for your year as they change https://www.nissanpartsdeal.com/parts/nissan-volume-air-flow~22680-2y001.html1 point
-
Are you asking if that is the correct one? In general RockAuto has great prices, and Hitachi is generally the OEM for many electronic parts on Nissans so it is a safe "generic" to use. Sent from my SM-N950U using Tapatalk1 point
-
Alright, so today I jacked up the front and poked around. Fortunately the the cv axles didn't bind at full droop with both wheels in the air. However the right wheel has a couple spots of resistance when I spin it. In addition to that, spinning the wheels/axles revealed the diff mounts to be worse than I thought. Lots of side to side movement seen in the bushings on both sides when rotating the right wheel. For some reason the diff sits still when rotating the left tire and keeping the right still. My coworker spun the wheel while I filmed. Video right side Video left side The tapping/scraping noise every 2-3 seconds is a portion of the cv boot band clamp contacting the lower ball joint stud. Not an issue when laden. So here's my thinking: I only get bad vibes with hubs locked/4Hi b/c the wheels are connected to the diff AND the diff is receiving input from the motor. With hubs locked I get only mild vibes b/c the wheels are still connected to the shaking diff, but not amplified by torque. When in 4hi/hubs unlocked I don't get vibes at all because the shaking diff is isolated from the wheels/suspension. Quasar I know this didn't fully fix your issue when you had it, but I think new bushings is the best course of action for now since it's at least apparent that it needs to be done. What method did you use to remove the bushings from the mounts? I'm tempted to just by new OEM mounts to avoid hassle, based on my experience with the rear control arm bushings. My one concern with buying rubber stuff regardless if it's the whole mount or just the bushings is the age of the "new" part. What do you guys think about rubber parts sitting on a shelf for 10+ years? If it's in a sealed package should it be a concern? That being said, I wonder if Towndawg made any progress on his diff poly bushings...1 point
-
Nice job. Clean install Sent from my iPhone using Tapatalk1 point
-
I definitely do not like the neutral white either (and it’s really not neutral but falls slightly on the cool side- maybe 4700k). The only reason I got it was because they didn’t have warm white in that high quality brand. Superbrightled’s map lights looked like they wouldn’t have been bright enough with so few emitters, however they had every color available so I grabbed red from them (I wanted the red to be on the dim side anyway). So then I wanted the brightest possible passenger map light LED to make up for not really having one in my driver side since 99.99999% of the time I won’t be needing the red. I’m sure there is probably another good brand that has high quality bright warm white BA9S LEDs and I just didn’t do enough research..1 point
-
Just finished this up about 10 minutes ago. I really appreciated your how to, although I deviated slightly and did not remove the throttle body. For anyone about to do this, have some extra vacuum line on hand as a couple of mine broke upon trying to remove. I'm sure the act it is 24 degrees out didn't help, though. For what it's worth all of mine were tight and most likely would never have come out on their own, but a decent amount of red lock tite on each screw will now make sure of that. Got it all done in about 3 hours, including spark plug change while I was at it. This was doing the work behind my townhouse on the side of the street in freezing temps too, so I don't want to hear anyone's excuses!1 point
-
Could someone sticky this plz1 point
-
Hey Bowtied, Just wanted to offer my thanks on an excellent guide. I wouldn't have attempted this fix without your guide. Couple of comments (I have an '03 SE Auto 4x4 with 75k miles): 1) My power valve screws were in tight and also had some gunk on them that we cleaned out prior to adding locktite. Not sure if they had been threadlocked or not at the factory, but they were not backed out of the valves at all. 2) My throttle body looks different than the one in your pics. On the backside of the throttle body (firewall side), there is what appears to be an electronic control module and there is no linkage on the frontside. Any idea what changes occurred between the '02 and '03? 3) I replaced my PCV valve while I had the manifolds off. The PCV valve in my engine (probably OEM) is threaded into the valve cover. If you search on rockauto.com (or another parts website), two types of PCV valves come up. One, the Fram version, just seems to plug in and is not threaded. This part did not look like the one that came out of my engine. The second type is threaded and costs 3-4x as much. However, there seem to be different versions of threaded PCV valve. The ACDelco variety does not fit. Any idea why different valves are showing up for the same engine? Again, thanks for a great post.1 point
-
Although I do not own a VQ, I must must say that posts like this one are the exact reason I join forums. BowTied, thank you so much for the time you took in order to post this. I'm sure that you're helping more people than you'll ever know. Mebers like yourself make this forum so awesome. BIG THANKS AGAIN!!!1 point
-
You did a great job, and I think many more people have or will use your post than you'll hear from. Any given forum will have many times more lurkers than regular posters. However, I do believe it's good practice to at least send a private message to the author if I found a HowTo useful. A pat on the back will also make the author more inclined to share in the future. Even a simple "Thanks, Dude! You da man!" private message can make a big difference for the entire forum ecology!1 point
-
I guess I should give credit where credit is due! Great write-up I just wish I read it more thoroughly1 point
-
I found this guidance very helpful. Thank you, BowTied The entire job really isn't that bad, one just has to be methodical about a system for remembering how all those hoses and clamps get re-installed. I really liked that idea of pushing the bolts through cardboard to keep them in order. I ended up taking off the resonator box under the intake hose. It really did make life a lot easier. Rotating the clamp on the box's connection to the intake helped me actually see the screw head. I used an offset ratcheting screwdriver in the tight space, though one would incur just a little more fuss with a regular screwdriver. I had a bit of trouble with the weatherproof electrical connectors. The FSM has info on how to unlock them, but I couldn't get the knack of it. Sometimes it took me almost 10 minutes of fiddling before they finally came apart. My advice is to NOT force the connectors apart: when they are finally unlocked, they come apart with almost no force. Before delving into this procedure, VQ35DE owners with manual transmissions should read this post and check if they have any power valves at all. Although you might not have power valves, there are still the swirl valves which you definitely have. So I'd still keep an eye on this topic in case it's determined they have the same problem.1 point
-
I know you're not done yet, but this thread should really be pinned, or at least made a topic in the How To section. GREAT walk-through here...thanks for all the info.!1 point