- Sign In Changes: You now need to sign in using the email address associated with your account, combined with your current password. Using your display name and password is no longer supported.
- If you are currently trying to register, are not receiving the validation email, and are using an Outlook, Hotmail or Yahoo domain email address, please change your email address to something other than those (or temporary email providers). These domains are known to have problems delivering emails from the community.
Leaderboard




Popular Content
Showing content with the highest reputation on 10/04/2018 in Posts
-
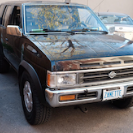
Встретил машину знакомого по drive2.ru2 points
-
Sign me up! Looks great! (Funny story, when I first moved to Arizona I wondered why so many people had Free Tibet flags)2 points
-
So I bought this fridge on Amazon the other week for $390. It's the same item as the $700 Smittybilt Arctic Fridge, but surprisingly with much better reviews. I put it through some extended runs and a few food trips, and it's been really good so far. Gets down to temps quickly, seems well built, but we'll see how it's maiden real trip goes this weekend. I started making some modifications to the cargo rack to accommodate it... ...but I was sorely disappointed when I discovered that the liftgate won't clear the fridge. Contact point is the lift strut bracket. Sucks because I already had the rack out of the truck and presumed it would clear given that the top of the fridge didn't exceed the top of the rack. Perhaps it would fit if I didn't use the rail I had just made for it and slid it over the inch or so, or maybe if I remove the strut and bracket and just not use the glass, but it's pretty close to the glass and I don't feel like chancing it. Time was really short this weekend and couldn't troubleshoot further, so I abandoned this project and moved on. I'll still be able to take the fridge on my trip, but it'll have to sit on one of the seats folded down. I'm already considering a v2 of this project that would lower that shelf to the same as the lower shelf (might have to raise it a little to clear the passenger wheel well hump), which would allow it to clear. Since I still needed a constant 12V socket, I got this part of the electrical done:2 points
-
These engines are actually fantastic. It looks like you just got a couple of really poorly maintained ones. glad it is running well though. I'm about to dig into my VG33ER out of my Xterra that was eating a quart of oil every 150 miles!1 point
-
Well, first off, remember it was a Jeep('05 Jeep Grand Cherokee Overlander). While a VERY capable off-road vehicle & a comfortable tourer, it was nearly impossible to service & broke all the time-until it dropped it's #4 valve seat, ruined the engine & turned a $13,000 value vehicle into a big piece of metal that we ultimately had to pay to have towed off to a junkyard (it was in Kansas City & there's just no market for off-roaders or we would have given it away to someone interested in replacing the engine). From the get go, the lights would flicker when on & stay persistently lit. No similar problem in the Path or my wife's MDX with the same lights. I did the replacement on one of my Mom's visits to Seattle hoping to make it brighter for her to see inside. As she left, she got just on the other side of the Cascades before, at night, almost all of her dash & center console went out, including intermittent radio - though HVAC still worked. A guy in a campground in Eastern WA helped her check all fuses (no simple feat as just replacing a fuse on that truck was one of the most difficult maintenance operations I've done-requiring breaking your back, not being able to see, cutting your wrists, cracking the fuses & often not getting them out even with all that). Ultimately, the cause was never identified (despite my trying to track it down in my brief KC visits) & she drove it like that for another 1-1.5yrs. I never could figure out what it did but then that Jeep never made sense & it was obvious the lights weren't working quite right from the beginning. I pulled them from my other vehicles as I did't want to chance it - though I think it was an American car thing as the Japanese vehicles seemed to manage it fine. Needless to say, I was VERY unenthusiastic about repairing the Jeep when the engine blew, especially as my Mom is in her 70s & goes remote & solo in the West almost 2 months a year. I convinced them to let me go in with them on getting a 4Runner which I expect will replace my Path in 8-12 years.1 point
-
Went shopping for 3/8 steel and struck out. Gotta call around tomorrow. Was raining cats and dogs all day so no work done but was able to go mudding. Give it a few days when I'm under the truck making the damn skid plate and I'll regret ever doing that lol1 point
-
As others have posted, cut out the rubber bushing. You can use a drill and then wire saw to cut out the bushing, then a sawmill to cut a slit all the way through the outer sleeve, but not through the whole outer metal tube. If you have an air compressor and an air chisel, it's faster than using a hammer and punch.1 point
-
Thanks guys. Looks like LED is good, but I need to order some good ones.1 point
-
I’ve LED’d 6 cars over the past 3-4 years. In the end, the cheap ones are unreliable & burn out in 1-2yrs. They can also cause odd electrical issues-persistent light, flickering & did some irreparable damage to my Mom’s JGC. Diode Dynamics are fantastic but cost the most (they are warrantied 3yrs but mine have lasted longer than that). They make a little light that fits the glove box & ash tray.(Diode Dynamics 194 HP5 (92 lumens)) Also have vanity light replacements (28mm SMF2 (too bright) & SMF1) DDM Tuning-good & reliable. Really like my map light & considering their Sabre Headlight LEDs for my high beam once my JDM headlight units are in. BTW, I’ve gone with red as well but military friends tell me the military now uses alot of green instead of red at night because you can still read maps (DDM Tuning BA9S-5 X 5050 SMD, Red LEDs 1w(60lm)2 Year Warranty. Beam Angle: 360 Degrees, Polarity Sensitive iJDM Toy & JDM Astar have also held up well I’ve heard good things about Xtreme LED as well & I’ve used a couple Sylvannia & Phillips LEDs which I’m sure are fine but probably cost more than they’re worth. For the dome lights you can use adapters & SMD Panels. I tried a set that are RGB changed with a remote but the “white” is really too blue for me.1 point
-
Well I took it off for today and honestly...Its alright. Its not any louder and gas mileage didn't really change that much. Only complaint, the smell of exhaust without a CAT. Not fun1 point
-
If you’re replacing OE bushings with OE-style replacements, just buy new links. Only go through the process of cutting them out if you’re replacing them with poly bushings, and go for the 2-piece bushings for a little more simplicity.1 point
-
My air compressor was installed in the cubby at some point and I had a server fan run when the compressor was on, and a thermal switch to keep it running after the compressor was off. There’s no fan there at the moment, though.1 point
-
Sucks when it's time to fit it all up and something's that little bit off. Should be nice once you've got the bugs out, though. What's the fan by your distribution block for?1 point
-
Well, it's as done as it's gonna get before my CANVAZ trip this weekend. I will eventually put some plate up top and some additional brackets under the quarter panel for support. I've been pretty pleased with the cuts. My AZ flag apparently had some hidden lines that got cut, but I went with it. Cheapo MicTuning lights off Amazon are wired to the reverse lights...and make the OE bulbs look like garbage. I also made a new missing link and mid skid... Super pleased with the results. It slides on/off just like the front skid, and now all the hardware is matched for a single socket. ... I know this thread started off for front bumper brackets, but I've come a lot farther than expected. I'm still planning to go through with the front brackets for those interested, but still need another week or so to finalize a few things and put some numbers to things. I'm absolutely exploring options to make skids and missing link available, too. Stay tuned!1 point
-
Went wheeling and stumbled on a nice hard track, steep and big rocks off camber. Running on my 31s I wasn't sure if I was going to be able to make it but the old girl crawled right up it with minor wheel spin and not much complaint. Heard a very odd noise come out from the truck which I want able to track down getting out if the truck. No leaks aside from a bit of water that seemingly came out of the overflow tube. Whine stopped suddenly and never came back through the rest of the trail and driving through town. My best thought is power steering since my custom line is quite finicky (modified a few parts to fit against the frame with a vg33 swap). Planning to look under the truck tomorrow and double check everything but no leaks, oils fine and water is fine with no over heats. Two projects coming up this week, number 1 is to make a skid plate for the oil pan so I can stop stressing while crawling over larger rocks. Number 2 is to make a fold down table on the tire carrier so I can grill while on a trip this next coming Thursday. One week to do both.1 point
-
OK, so the LED's I used for my map lights and dome lights are by Yorkim and are extremely bright in my 4Runner, my QX4, my dad's Tacoma, and my mom's Escape. Highly recommend them. Can't say for sure about superbrightleds, however I have been very happy with their bulbs in other applications. Unlike many cheaper bulbs, I haven't had any bad ones from either of these companies. This pic is taken with all interior LED lights on from the backseat, as you can see, you can see! Very well in fact! It's almost annoyingly bright, haha. Stock I could hardly read a map, now I could just about do surgery (if you're crazy enough to let my meathooks on ya!).1 point
-
Even with a press, it’s a hassle because you need a very specific die size and the tube doesn’t have much meat to it either. Just getting the things in a vise can be a pain. I drill a bunch of holes in the rubber, enough to weaken the connection to the inner sleeve. Then wood dowel or other drift and sledge to pop the inner sleeve out. Then reciprocating saw to surgically cut a slit in outer sleeve. Finally, hammer and punch on the edge of the sleeve to push it through. It’s a crappy job no matter how you dice it, but after you do the first, the rest are cake.1 point
-
На парковке1 point