stioc Posted April 13, 2013 Share Posted April 13, 2013 (edited) A while back I posted the $5 DIY missing link before so here's the $50 skid-plate (the middle one, and the most important one). Cut and paste from my build thread on ExPo. I started building my skid plate today. Since ground clearance is always an issue and not wanting to go any higher I decided to tackle what I've been putting off for a while. I could've bought a pre-made skid but the two available skid plates both had draw backs for me. The first one being the weight- at almost 70lbs using the 3/16" plate from 4x4parts is a bit overkill for me. Two the aluminum version available didn't provide the coverage I was looking for. So the bottom line was I wanted the coverage for the engine sump and and the trans oil pan and I wanted it to weigh less than 40lbs. After doing some designs in my head, I pulled the trigger and picked up a 11ga (basically 1/8") sheet. I then made a rough template out of cardboard Then cut it to size Next, because of the longish span and to prevent the plate from bowing over time I welded some plates. And the skid plate was ready for drilling holes After drilling all the holes I weighed it. The moment of truth...31lbs! Finally I installed it and took the truck out for a 20mile spin There are a couple of tweaks I'd like to do when I have some time:1. add a flat top on the plates/ribs so if they make contact with the oil pan they don't puncture it.2. Buy better bolts and washers3. Cut out a hole for the drain plug4. Paint it 5. For added support attach it to my DIY missing-link using u-bolts Overall I'm really happy with the results. It won't support the weight of the truck but similar to the factory gas tank skid-plates I wanted at least some level of protection for the oil pans without adding too much weight to the already heavy truck. Edited April 13, 2013 by stioc 2 Link to comment Share on other sites More sharing options...
Iceman2989 Posted April 13, 2013 Share Posted April 13, 2013 Great job Stioc!! I just joined over at Expo, been following your ride for a while now. Very impressed. I'm curious to know how much the 11ga cost you, if you don't mind sharing. Link to comment Share on other sites More sharing options...
stioc Posted April 13, 2013 Author Share Posted April 13, 2013 I picked it (2ft x 4ft) up locally and got a good deal on it - with taxes $52 and change. Link to comment Share on other sites More sharing options...
Iceman2989 Posted April 13, 2013 Share Posted April 13, 2013 A while back I posted the $5 DIY missing link before so here's the $50 skid-plate (the middle one, and the most important one). I guess it would help if I even read the very first sentence... ha Link to comment Share on other sites More sharing options...
Nefarious Posted April 13, 2013 Share Posted April 13, 2013 very cool, love it. thats wicked you r50 guys can make a skid plate out of a totally flat skid plate...man that makes it easy. Link to comment Share on other sites More sharing options...
stioc Posted April 13, 2013 Author Share Posted April 13, 2013 Thanks. It is pretty straight forward to make and inexpensive. Even if I used 3/16 it would've been another $35 or so. The mid-skid from 4x4parts comes to $265 to my door with shipping so I saved myself not only the weight but also just over $200 for other goodies. I want to build the front skid too but it's not a big priority for me since it's mostly just to keep the mud and small pebbles etc away from the radiator and other low hanging parts of the engine. If I build one I'll probably use 14ga or so which would be stronger than the plastic splash pan - which so far is still hanging in there just fine. Link to comment Share on other sites More sharing options...
90seven Posted April 14, 2013 Share Posted April 14, 2013 Finally I installed it and took the truck out for a 20mile spin. That's pretty far for a spin. Haha Nice work, btw. You made it look so easy. Link to comment Share on other sites More sharing options...
Precise1 Posted April 14, 2013 Share Posted April 14, 2013 Nice work, but it is basically cheating since you can use a flat plate and didn't even have to form it... If weight was a main concern, why didn't you use (UHMW) polyethylene? B Link to comment Share on other sites More sharing options...
stioc Posted April 14, 2013 Author Share Posted April 14, 2013 Thanks guys, it's really not that hard to do. Precise1, yeah I would love to have bead rollers and metal brakes but probably won't happen in this life. So I did what I could with what I had. I briefly considered UHMW but I'd have to use a pretty thick sheet (3/8") and it also requires a lot more bolts and nuts and then I wasn't saving as much money either so good-ole hot rolled sheet it was. So far about 90 miles on (granted on paved roads) including speed bumps etc and the plate is as flat as a ruler still Link to comment Share on other sites More sharing options...
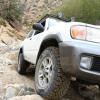
XPLORx4 Posted April 14, 2013 Share Posted April 14, 2013 Nice way to think out of the box on the cheap. It's hard to tell from the photo above, but it looks like there's exposed threaded stud (bolt?) sticking out below those nuts, making them very vulnerable to damage/shearing/bending if they hit a rock. Were you unable to use existing welded nuts in the subframe? 1 Link to comment Share on other sites More sharing options...
theexbrit Posted April 14, 2013 Share Posted April 14, 2013 My next project! Great write up S. One question, where'd you get the metal from, you said a local metal shop right? Link to comment Share on other sites More sharing options...
stioc Posted April 15, 2013 Author Share Posted April 15, 2013 Nice way to think out of the box on the cheap. It's hard to tell from the photo above, but it looks like there's exposed threaded stud (bolt?) sticking out below those nuts, making them very vulnerable to damage/shearing/bending if they hit a rock. Were you unable to use existing welded nuts in the subframe? Thanks. I know, I need to get different bolts, it's just what I had on hand at the time. Oh I didn't use the existing threaded nuts because they were too small. I used the large holes that are cut out in the cross member with a large washer and 3/8" bolt/stud combo, just that the bolts are long. In the back I reversed the bolts (it was easier to do this in the back) so the only thing exposed are the bolt heads. My next project! Great write up S. One question, where'd you get the metal from, you said a local metal shop right? Got it from Industrial Metal Supply (IMS), they have a couple of locations I got the quote online and then picked it up in Irvine (405 and Jamboree- Alton exit). 1 Link to comment Share on other sites More sharing options...
Bluewulf73 Posted April 16, 2013 Share Posted April 16, 2013 Nice work stioc! The more I watch you and other guys here fabricating your own stuff, the more I want to take a welding course! 1 Link to comment Share on other sites More sharing options...
shoesandsocks Posted April 17, 2013 Share Posted April 17, 2013 Got it from Industrial Metal Supply (IMS), they have a couple of locations I got the quote online and then picked it up in Irvine (405 and Jamboree- Alton exit). they just built one of these down the street from my house i am very excited now 1 Link to comment Share on other sites More sharing options...
Precise1 Posted April 17, 2013 Share Posted April 17, 2013 Precise1, yeah I would love to have bead rollers and metal brakes but probably won't happen in this life. So I did what I could with what I had. I briefly considered UHMW but I'd have to use a pretty thick sheet (3/8") and it also requires a lot more bolts and nuts and then I wasn't saving as much money either so good-ole hot rolled sheet it was. It certainly can if you prioritize! No, I wasn't criticizing, just commenting on how convenient it is that a flat sheet can be used, almost like it was designed that way... As for the UHMW, yes 3/8 is probably what I would use but do you really think it would need that much more hardware? The plastic isn't really cheaper than steel, it was just the weight factor I was talking about. Certainly nothing wrong with how you did it... B Link to comment Share on other sites More sharing options...
stioc Posted April 17, 2013 Author Share Posted April 17, 2013 It certainly can if you prioritize! No, I wasn't criticizing, just commenting on how convenient it is that a flat sheet can be used, almost like it was designed that way... As for the UHMW, yes 3/8 is probably what I would use but do you really think it would need that much more hardware? The plastic isn't really cheaper than steel, it was just the weight factor I was talking about. Certainly nothing wrong with how you did it... B I didn't take that as criticism at all! I read one guy who built his using UHMW for his Baja truck and found that it needed a lot more support than steel. He posted some pics and it looked like a rivets galore! But it was unknown territory to me and I needed something I could whip up in an afternoon. I'm working on building a box around my cone filter, now for that I'm debating between 20ga steel or ABS plastic... Next will be a rear bumper... It's always challenging to find time to lock myself into the garage for a day or two without feeling guilty about not spending time with the family, the dog etc. lol Nice work stioc! The more I watch you and other guys here fabricating your own stuff, the more I want to take a welding course! Thanks. I'm not that good at welding but I'm self taught like with most things I pretend to know lol. Also the welding itself is the fun/easy part, it's the cutting, grinding, bending, measuring etc that's tedious work and you usually can't tell from the pics- but I enjoy it. You could say I even find it therapeutic. Link to comment Share on other sites More sharing options...
Bluewulf73 Posted April 17, 2013 Share Posted April 17, 2013 ... it's the cutting, grinding, bending, measuring etc that's tedious work and you usually can't tell from the pics- but I enjoy it. You could say I even find it therapeutic. Amen to that, brother Link to comment Share on other sites More sharing options...
Precise1 Posted April 17, 2013 Share Posted April 17, 2013 I didn't take that as criticism at all! I read one guy who built his using UHMW for his Baja truck and found that it needed a lot more support than steel. He posted some pics and it looked like a rivets galore! But it was unknown territory to me and I needed something I could whip up in an afternoon. I'm working on building a box around my cone filter, now for that I'm debating between 20ga steel or ABS plastic... Next will be a rear bumper... It's always challenging to find time to lock myself into the garage for a day or two without feeling guilty about not spending time with the family, the dog etc. lol Thanks. I'm not that good at welding but I'm self taught like with most things I pretend to know lol. Also the welding itself is the fun/easy part, it's the cutting, grinding, bending, measuring etc that's tedious work and you usually can't tell from the pics- but I enjoy it. You could say I even find it therapeutic. Ok, just making sure. I have made 1 skid plate and gave it away and will make a few more for my current truck as I have some material in the garage. Here is a picture of the one I made out of 1/2" UHMW PE antistatic (Black) for JJ Big shoe. http://www.nissanpathfinders.net/forum/topic/17159-jj-big-shoe/?p=278787 Simple bends and held on in the stock mounting holes (but I used a damaged truck as a template, so the angle was wrong and the bolt hole pattern backwards. JJ rebent it and redrilled it to fit. Long story...) To form it I heated it with a propane torch while it was C clamped to the edge of a deck that was shielded by sheet metal, bent it to the desired angle, then cooled it off with water from a garden hose so it held it's shape. FYI, if you reheat it with a torch, it returns to flat! The reliefs were made using a mortal and pestle morter and a bottle jack and heated/cooled the same. Pretty high tech, eh? Worked damn well too. You have officially planted the idea to make some now that I have an R50 for fitment. This is basically how I would mount them to protect the cap screw head and dispurse the load; pardon my crude CAD. I hear you though, my truck isn't on the road because I can't seem to get to working on it for all the other things I'm doing around the house, but I don't feel bad when I do. Hell, I deserve some therapudic man-cave time and so do you. It keeps you healthy... B Link to comment Share on other sites More sharing options...
Recommended Posts
Create an account or sign in to comment
You need to be a member in order to leave a comment
Create an account
Sign up for a new account in our community. It's easy!
Register a new accountSign in
Already have an account? Sign in here.
Sign In Now